Displaying the Data Code
The camcorder maintains a data code containing the recording date and time. You can select the data code combination and display it during playback.
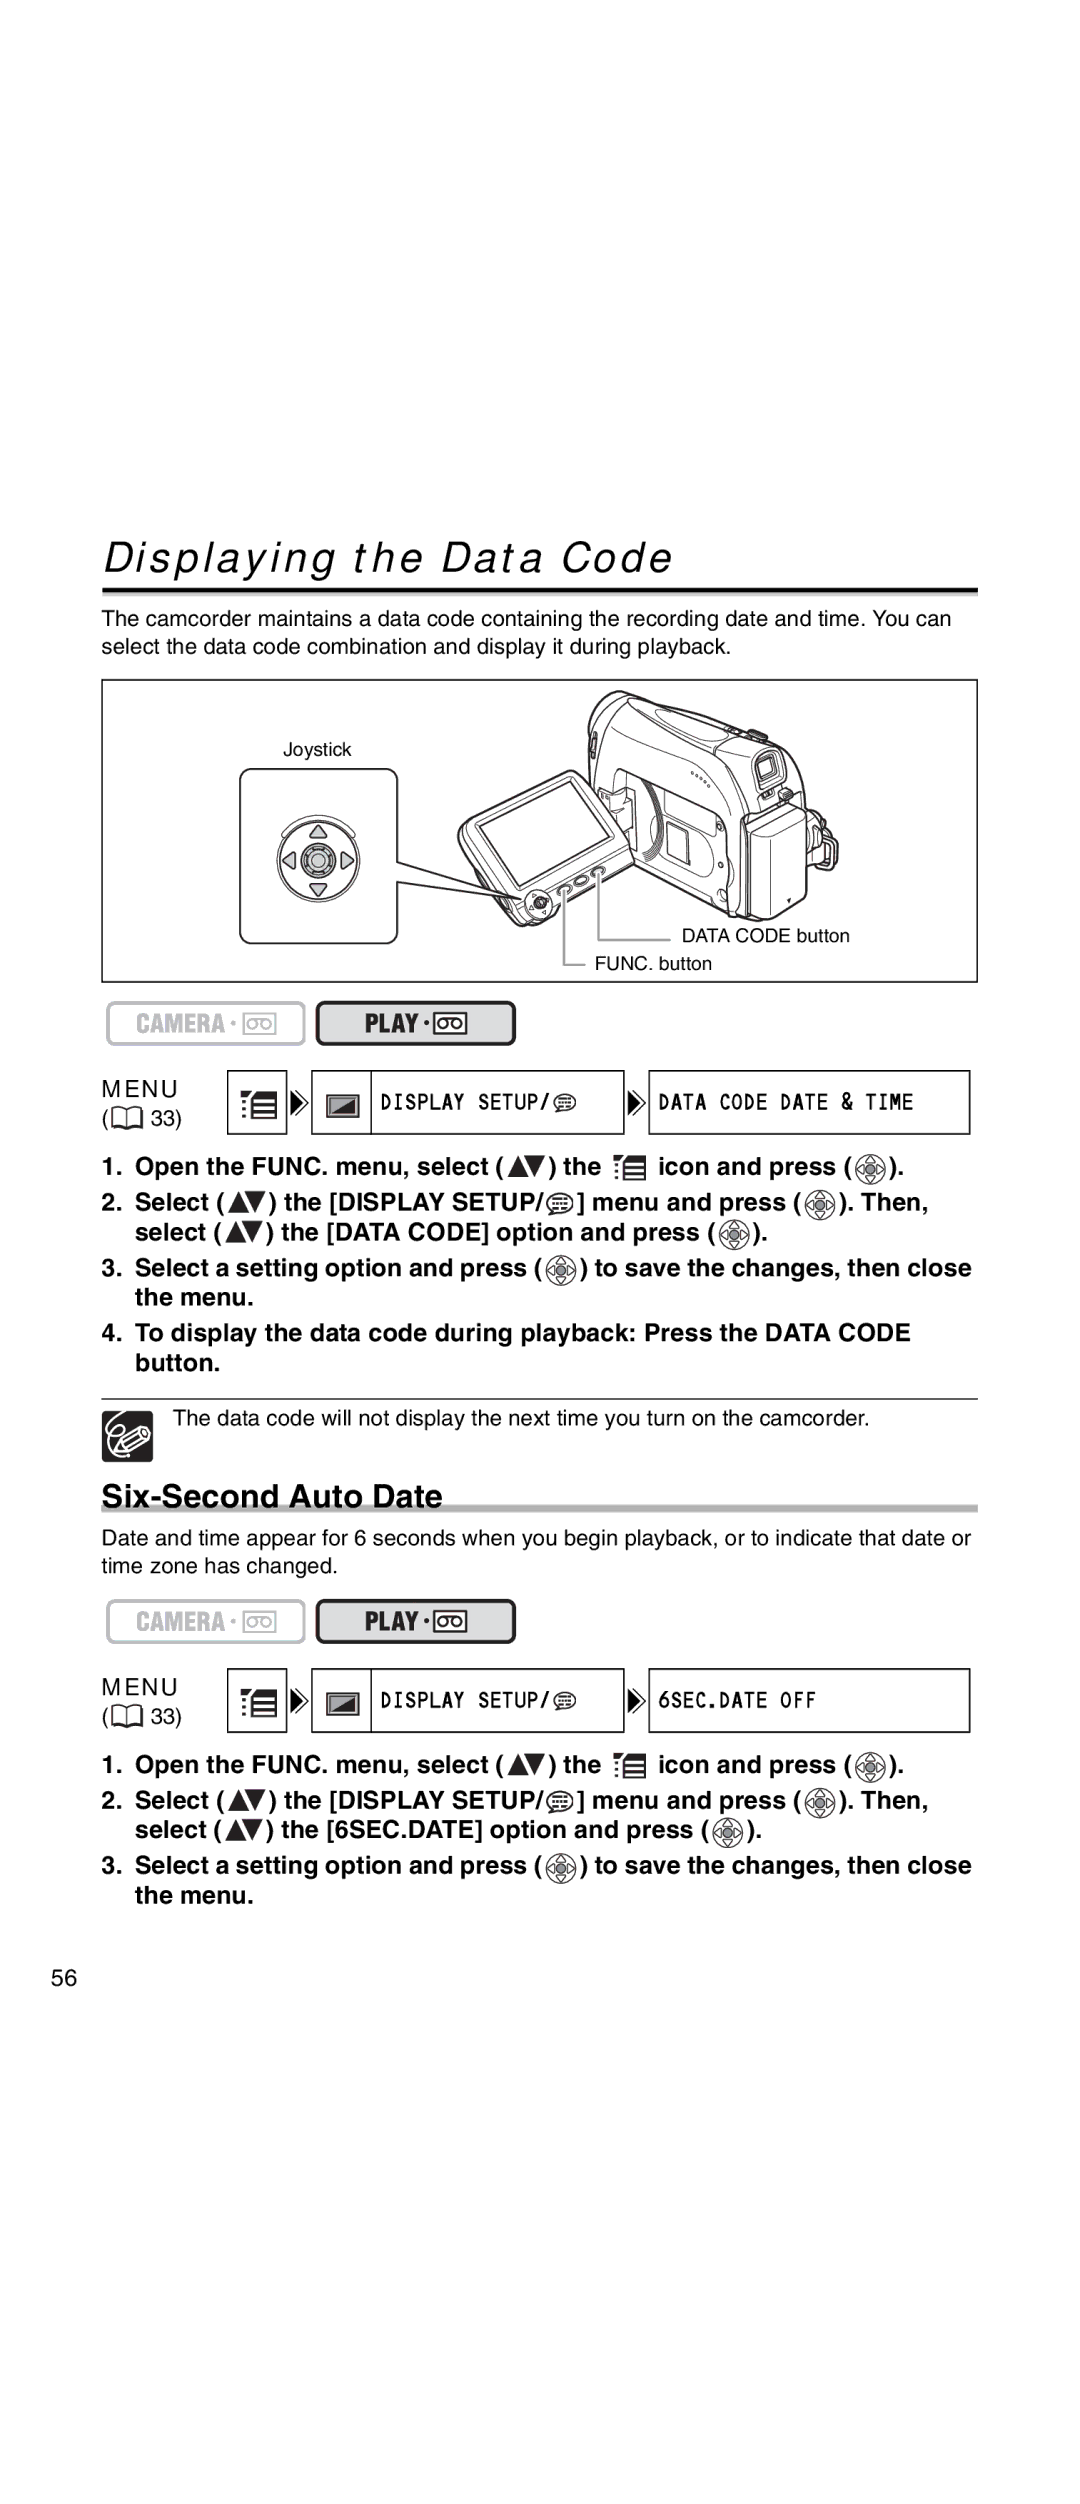
Joystick
DATA CODE button
![]() FUNC. button
FUNC. button
MENU
(![]() 33)
33)
DISPLAY SETUP/

 DATA CODE DATE & TIME
1.Open the FUNC. menu, select (![]() ) the
) the ![]() icon and press (
icon and press ( ![]() ).
).
2.Select (![]() ) the [DISPLAY SETUP/
) the [DISPLAY SETUP/![]() ] menu and press (
] menu and press ( ![]() ). Then, select (
). Then, select (![]() ) the [DATA CODE] option and press (
) the [DATA CODE] option and press ( ![]() ).
).
3.Select a setting option and press ( ![]() ) to save the changes, then close the menu.
) to save the changes, then close the menu.
4.To display the data code during playback: Press the DATA CODE button.
The data code will not display the next time you turn on the camcorder.
Six-Second Auto Date
Date and time appear for 6 seconds when you begin playback, or to indicate that date or time zone has changed.
MENU
(![]() 33)
33)
DISPLAY SETUP/

 6SEC.DATE OFF
1.Open the FUNC. menu, select (![]() ) the
) the ![]() icon and press (
icon and press ( ![]() ).
).
2.Select (![]() ) the [DISPLAY SETUP/
) the [DISPLAY SETUP/![]() ] menu and press (
] menu and press ( ![]() ). Then, select (
). Then, select (![]() ) the [6SEC.DATE] option and press (
) the [6SEC.DATE] option and press ( ![]() ).
).
3.Select a setting option and press ( ![]() ) to save the changes, then close the menu.
) to save the changes, then close the menu.
56