
50HCQA specifications
The Carrier 50HCQA is a cutting-edge rooftop air conditioning unit designed for commercial applications, combining efficiency, reliability, and advanced technology to ensure optimal indoor climate control. This model stands out in Carrier's extensive range of HVAC solutions, showcasing a blend of innovative features suitable for diverse building types.One of the key features of the Carrier 50HCQA is its high-efficiency compressor. With variable-speed capabilities, the compressor adjusts its output to meet the precise cooling or heating demands of the space, promoting energy savings and consistent temperature management. This flexibility results in reduced energy consumption, making the 50HCQA an environmentally friendly choice for businesses looking to lower their carbon footprint.
The 50HCQA integrates advanced microprocessor controls, streamlining operation and enhancing user interaction. This technology allows for sophisticated diagnostics, monitoring, and scheduling, giving facility managers the tools they need to optimize system performance. The user-friendly interface ensures that settings can be easily adjusted, and real-time performance metrics can be accessed to ensure efficient operation.
In terms of construction, the Carrier 50HCQA is built with durability in mind. The unit features a robust cabinet design with a galvanized steel construction that is resistant to corrosion. This feature enhances the longevity of the unit, making it suitable for a variety of weather conditions. Additionally, the insulated casing reduces sound levels, providing a quieter operation that is particularly beneficial in noise-sensitive environments.
Another significant characteristic of the 50HCQA is its environmentally responsible refrigerant options. It utilizes R-410A refrigerant, which has a lower Global Warming Potential (GWP) compared to traditional refrigerants. This aspect not only meets regulatory standards but also supports users in making eco-friendly choices in their HVAC systems.
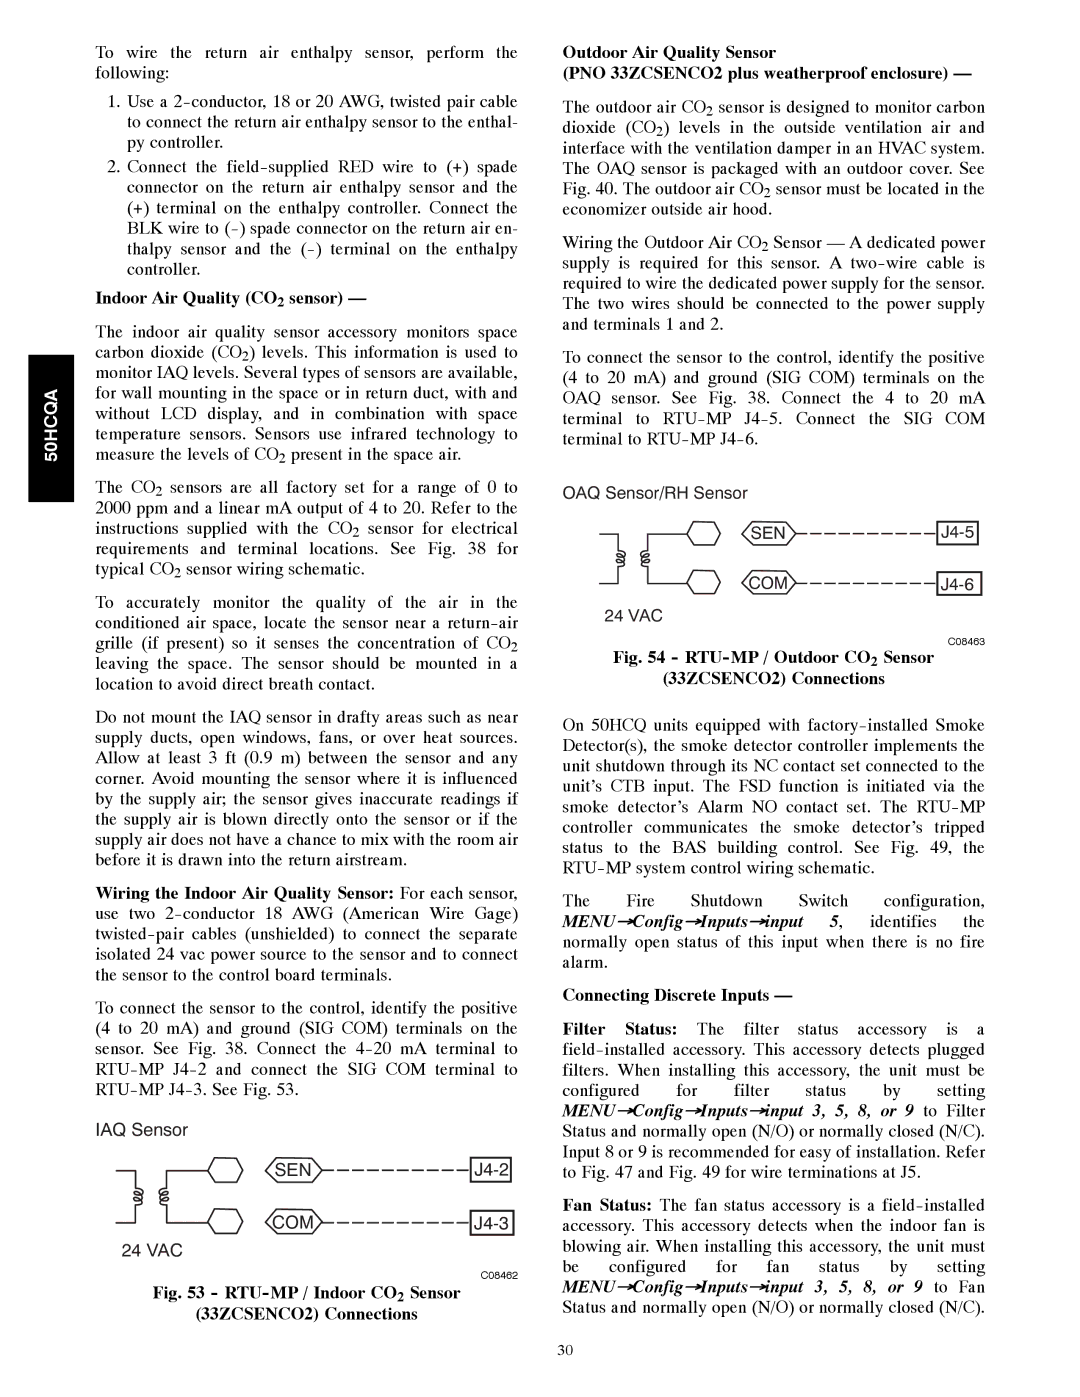
The 50HCQA also supports a range of optional accessories, including economizers for enhanced energy efficiency and improved air quality. This allows for increased outdoor air intake during suitable conditions, which can significantly contribute to enhancing indoor air quality—an essential factor for occupant comfort and health.
In conclusion, the Carrier 50HCQA is an exemplary model in the commercial HVAC sector, delivering powerful performance, advanced control technologies, and robust construction. Its energy-efficient design, user-friendly controls, and eco-conscious refrigerant options make it a top choice for businesses aiming to invest in sustainable and reliable climate control solutions.