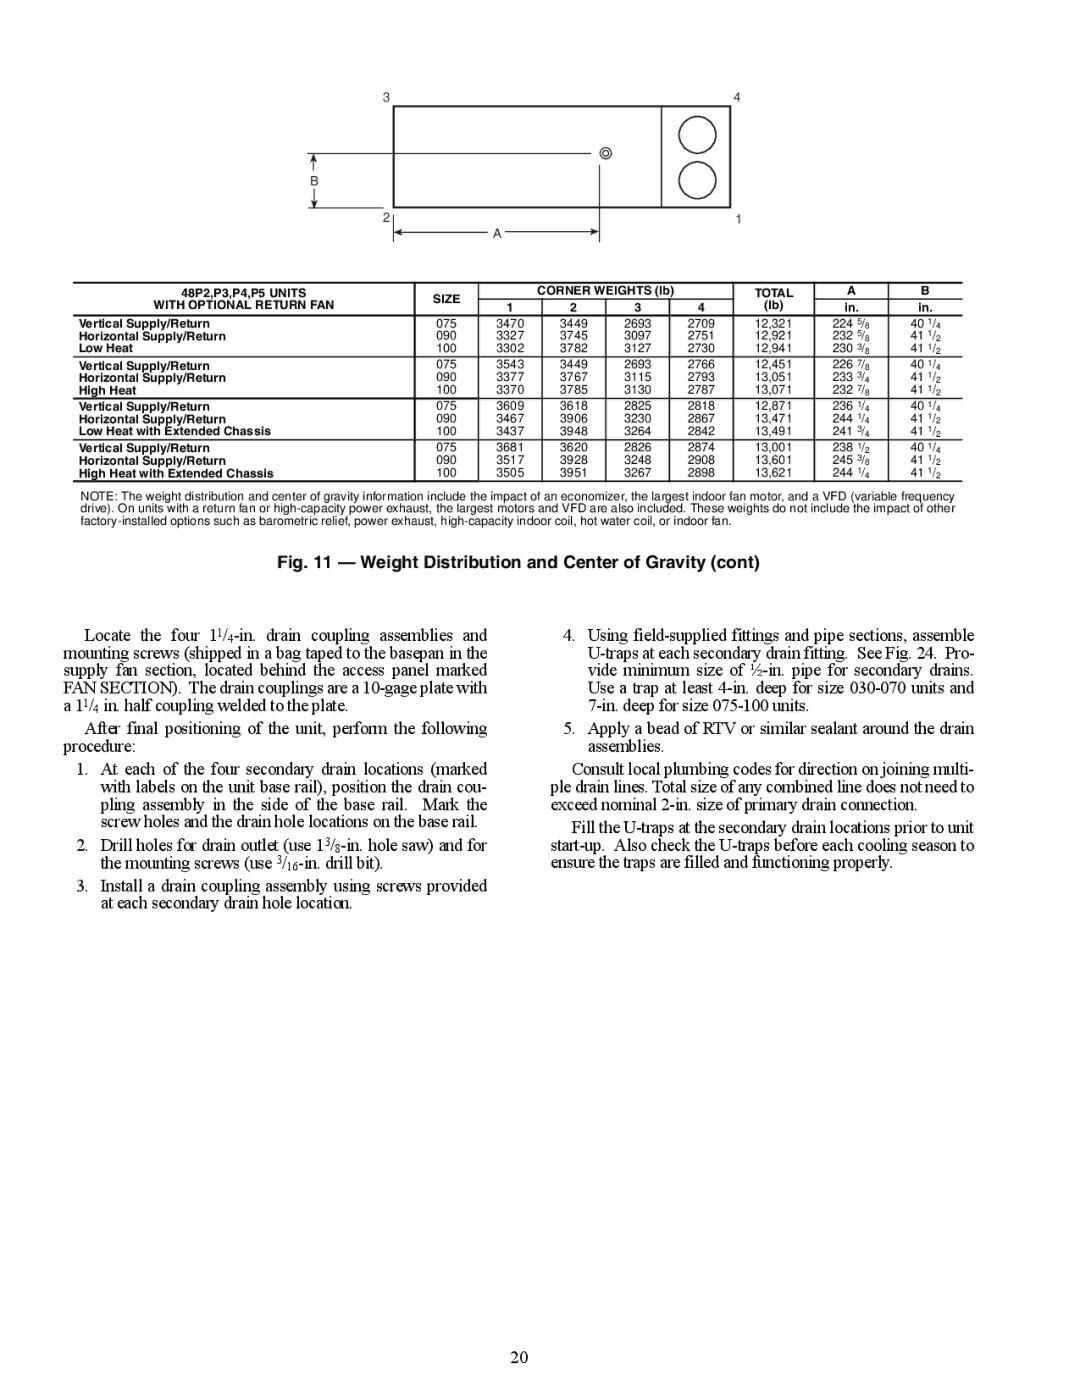
P4, 48P2, P3, P5030-100 specifications
Carrier, a leader in the HVAC industry, offers a range of advanced air conditioning systems designed to provide optimal indoor climate control. Among their innovative products are the Carrier P4, P5030-100, P3, and 48P2 models, each delivering unique features tailored to diverse applications.The Carrier P4 series is engineered for versatility and efficiency. This compact unit integrates advanced inverter technology, allowing for precise temperature control and reduced energy consumption. The P4 employs a variable speed compressor, which adjusts according to cooling needs, ensuring both comfort and energy savings. Additionally, it features a user-friendly interface with smart connectivity options, enabling remote access and management via smartphones.
Next in line, the Carrier P5030-100 model is designed with commercial applications in mind. It is equipped with a robust scroll compressor and advanced heat exchange technology that enhances its performance and efficiency. The P5030-100 operates quietly, making it ideal for office environments where noise reduction is a priority. Furthermore, its eco-friendly refrigerant aligns with today’s environmental standards, further making it a sustainable choice for businesses.
The Carrier P3 model excels in energy efficiency, boasting top SEER ratings while maintaining powerful cooling and heating capabilities. This model incorporates advanced refrigerant management, which minimizes environmental impact while ensuring optimal performance. Its compact design makes it an excellent choice for residential installations, providing homeowners with an unobtrusive yet effective climate control solution.
Finally, the Carrier 48P2 unit stands out with its robust design tailored for large-scale applications. It features a high-capacity scroll compressor and enhanced airflow capabilities, ensuring consistent and reliable performance across various conditions. The 48P2 comes equipped with a comprehensive control system that allows for integration with building management systems, facilitating easy monitoring and control of multiple units. This model is ideal for commercial buildings that demand high performance and energy efficiency.
Overall, Carrier's P4, P5030-100, P3, and 48P2 models represent the forefront of HVAC technology, combining efficiency, reliability, and advanced features to meet the varying demands of both residential and commercial environments. With a commitment to innovation and sustainability, Carrier continues to provide solutions that enhance indoor comfort while reducing environmental impact.

