Chapter 2 Installation
Installing the Switch
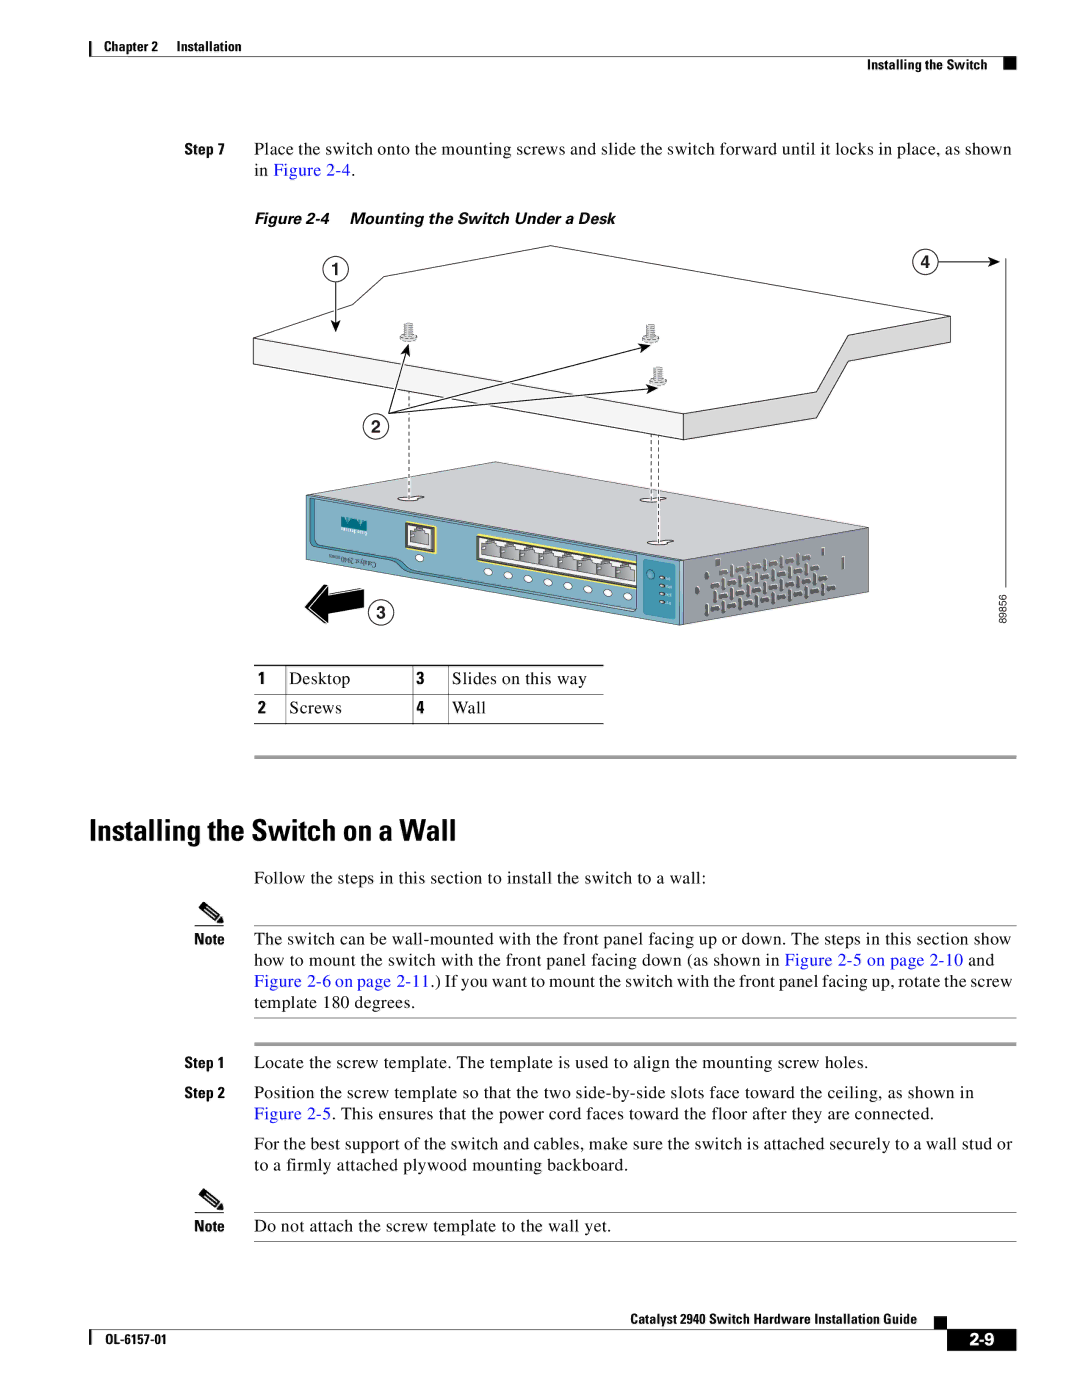
Step 7 Place the switch onto the mounting screws and slide the switch forward until it locks in place, as shown in Figure
Figure |
|
1 | 4 |
|
2
| SERIES |
|
|
| 2940 | atalystC |
|
|
|
| DPS |
|
|
| LXPD |
|
|
| TA TS |
|
| 3 | ST YS |
|
|
| |
1 | Desktop | 3 | Slides on this way |
2 | Screws | 4 | Wall |
89856
Installing the Switch on a Wall
Follow the steps in this section to install the switch to a wall:
Note The switch can be
Step 1 Locate the screw template. The template is used to align the mounting screw holes.
Step 2 Position the screw template so that the two
For the best support of the switch and cables, make sure the switch is attached securely to a wall stud or to a firmly attached plywood mounting backboard.
Note Do not attach the screw template to the wall yet.
Catalyst 2940 Switch Hardware Installation Guide
|
| ||
|
|