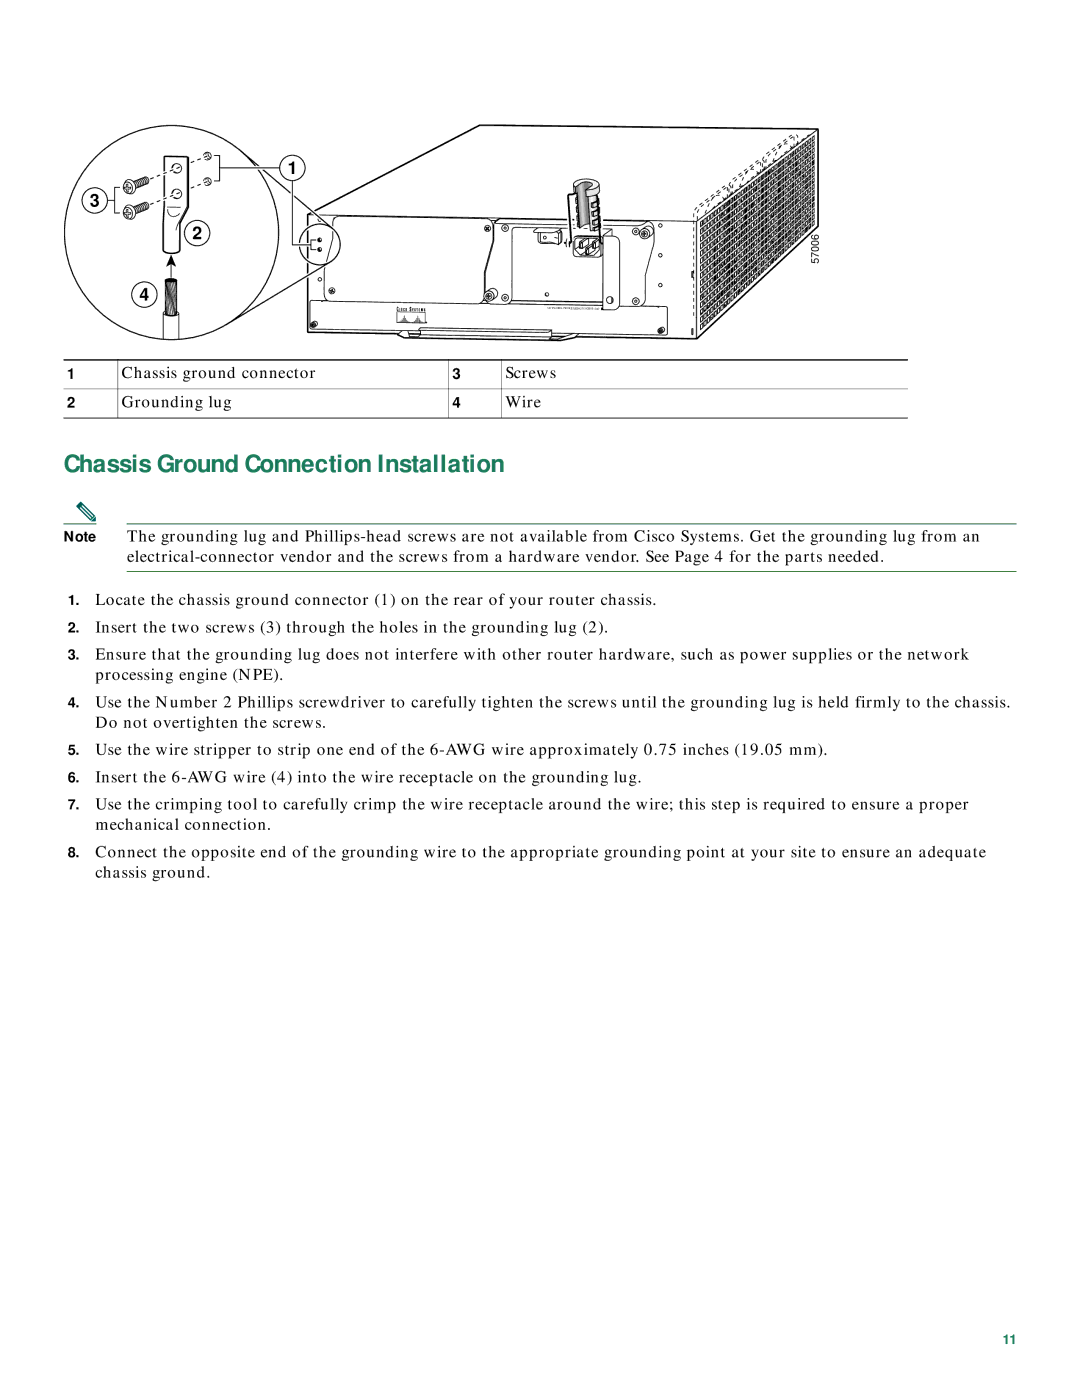
CISCO7206 specifications
The Cisco 7206 is a versatile and powerful router designed to meet the demands of enterprise networking environments. A member of Cisco's 7200 series, this router is ideal for a range of applications including enterprise edge routing, service provider aggregation, and large branch office connectivity. As network infrastructures continue to grow in complexity, the Cisco 7206 stands out with its robust features, advanced technologies, and reliable performance.One of the key characteristics of the Cisco 7206 is its modular architecture. This allows for various interface cards to be installed, enabling customization to meet specific networking requirements. The router supports multiple WAN technologies, including T1, E1, and various DSL connections, facilitating versatility and accommodating different connectivity needs. The modularity also extends to its processors and memory, allowing businesses to scale their networking capabilities as they grow.
The Cisco 7206 employs Cisco's proprietary IOS software, providing a wealth of networking features including advanced routing protocols, such as BGP, OSPF, and EIGRP. This ensures robust and reliable data transmission across diverse environments. Quality of Service (QoS) features are also integrated into the router, allowing for traffic prioritization and management of bandwidth, which is especially critical for applications requiring low latency, such as VoIP or video conferencing.
Additionally, security features integrated into the Cisco 7206, including IPsec for VPNs, access control lists (ACLs), and advanced encryption methods, assure that data is transmitted securely across the network. The router also supports Network Address Translation (NAT) and firewall capabilities, offering an extra layer of protection against unauthorized access.
In terms of performance, the Cisco 7206 is equipped with high-speed interfaces and a powerful CPU, enabling it to handle substantial amounts of data traffic efficiently. With support for both IPv4 and IPv6, it indeed meets the needs of modern networks while future-proofing enterprise infrastructures as they transition to newer protocols.
Overall, the Cisco 7206 router combines flexibility, high performance, and advanced features, making it a powerful solution for organizations needing reliable and adaptable networking solutions. With its modular design and extensive compatibility, it provides an effective way for businesses to manage their communications and data traffic.