Replacing the Chassis
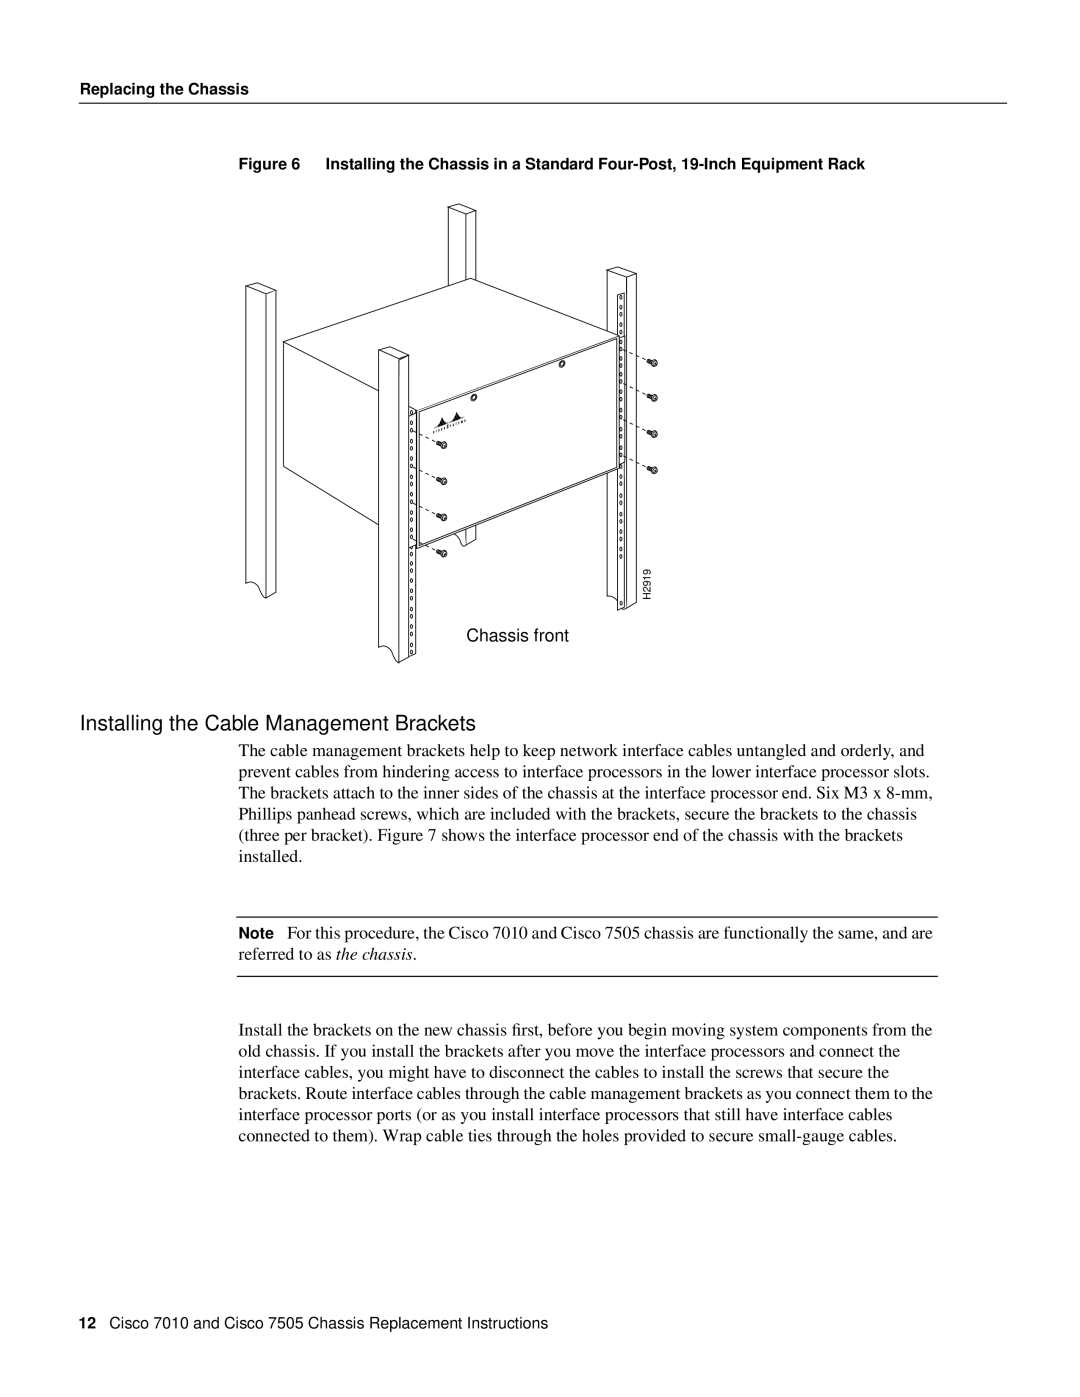
Figure 6 Installing the Chassis in a Standard Four-Post, 19-Inch Equipment Rack
H2919
Chassis front
Installing the Cable Management Brackets
The cable management brackets help to keep network interface cables untangled and orderly, and prevent cables from hindering access to interface processors in the lower interface processor slots. The brackets attach to the inner sides of the chassis at the interface processor end. Six M3 x
Note For this procedure, the Cisco 7010 and Cisco 7505 chassis are functionally the same, and are referred to as the chassis.
Install the brackets on the new chassis first, before you begin moving system components from the old chassis. If you install the brackets after you move the interface processors and connect the interface cables, you might have to disconnect the cables to install the screws that secure the brackets. Route interface cables through the cable management brackets as you connect them to the interface processor ports (or as you install interface processors that still have interface cables connected to them). Wrap cable ties through the holes provided to secure
12Cisco 7010 and Cisco 7505 Chassis Replacement Instructions