Gateway 10 specifications
Cisco Systems Gateway 10 is a robust and versatile networking solution designed to address the needs of modern enterprises. As organizations continue to evolve and adapt to rapidly changing technological landscapes, the necessity for efficient, scalable, and secure network infrastructure has become paramount. The Gateway 10 serves as a central hub for managing various network services while providing a seamless integration of voice, video, and data traffic.One of the standout features of the Cisco Systems Gateway 10 is its advanced security protocols. In an age where cyber threats are increasingly sophisticated, the Gateway 10 incorporates end-to-end encryption, intrusion prevention systems, and firewall capabilities. This ensures that sensitive information is safeguarded from unauthorized access, making it an ideal choice for businesses that place a premium on security.
Another key characteristic of the Gateway 10 is its support for a wide range of connectivity options. It accommodates various communication protocols, including VoIP, making it easier for organizations to integrate legacy systems with newer technologies. This flexibility in connectivity not only facilitates smoother transitions during upgrades but also supports hybrid environments, allowing businesses to utilize both on-premises and cloud solutions.
Moreover, the Cisco Gateway 10 features an intuitive management interface that simplifies network management. Through centralized control, IT administrators can monitor performance metrics, configure settings, and troubleshoot issues in real-time. This enhances operational efficiency and reduces the time and effort needed for maintenance.
In terms of performance, the Gateway 10 is engineered to handle high volumes of traffic without degrading service quality. With its powerful processing capabilities and high throughput, it can cater to the demands of large enterprises that rely on consistent network performance for day-to-day operations.
Additionally, the Gateway 10 incorporates advanced analytics and reporting features. By leveraging real-time data insights, organizations can make informed decisions regarding network optimization. This proactive approach not only enhances performance but also ensures that resources are utilized efficiently.
Overall, Cisco Systems Gateway 10 is a state-of-the-art networking solution that combines security, flexibility, management ease, and performance. It is engineered to support the evolving needs of modern enterprises, making it an essential component of an organization's network ecosystem. As businesses continue to prioritize digital transformation, solutions like the Gateway 10 represent vital investments toward achieving greater agility and competitiveness in the marketplace.

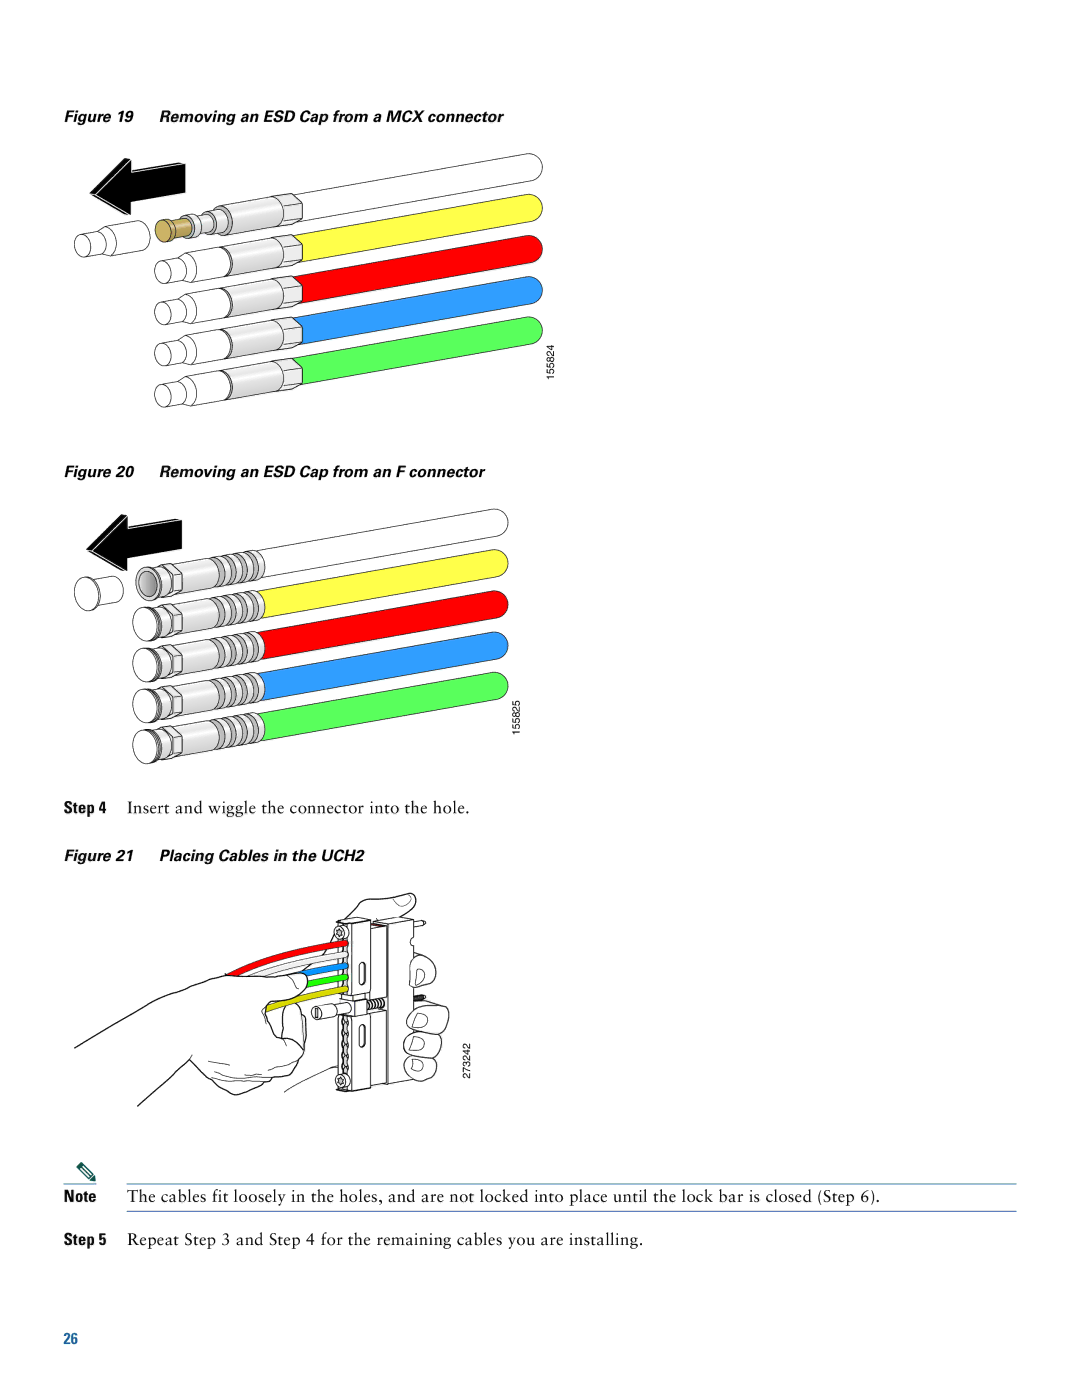
 155824
 155825