■Fixed Mount (TOYOTA, NISSAN and other ISO/DIN equipped vehicles)
English Installation and Wire connection manual
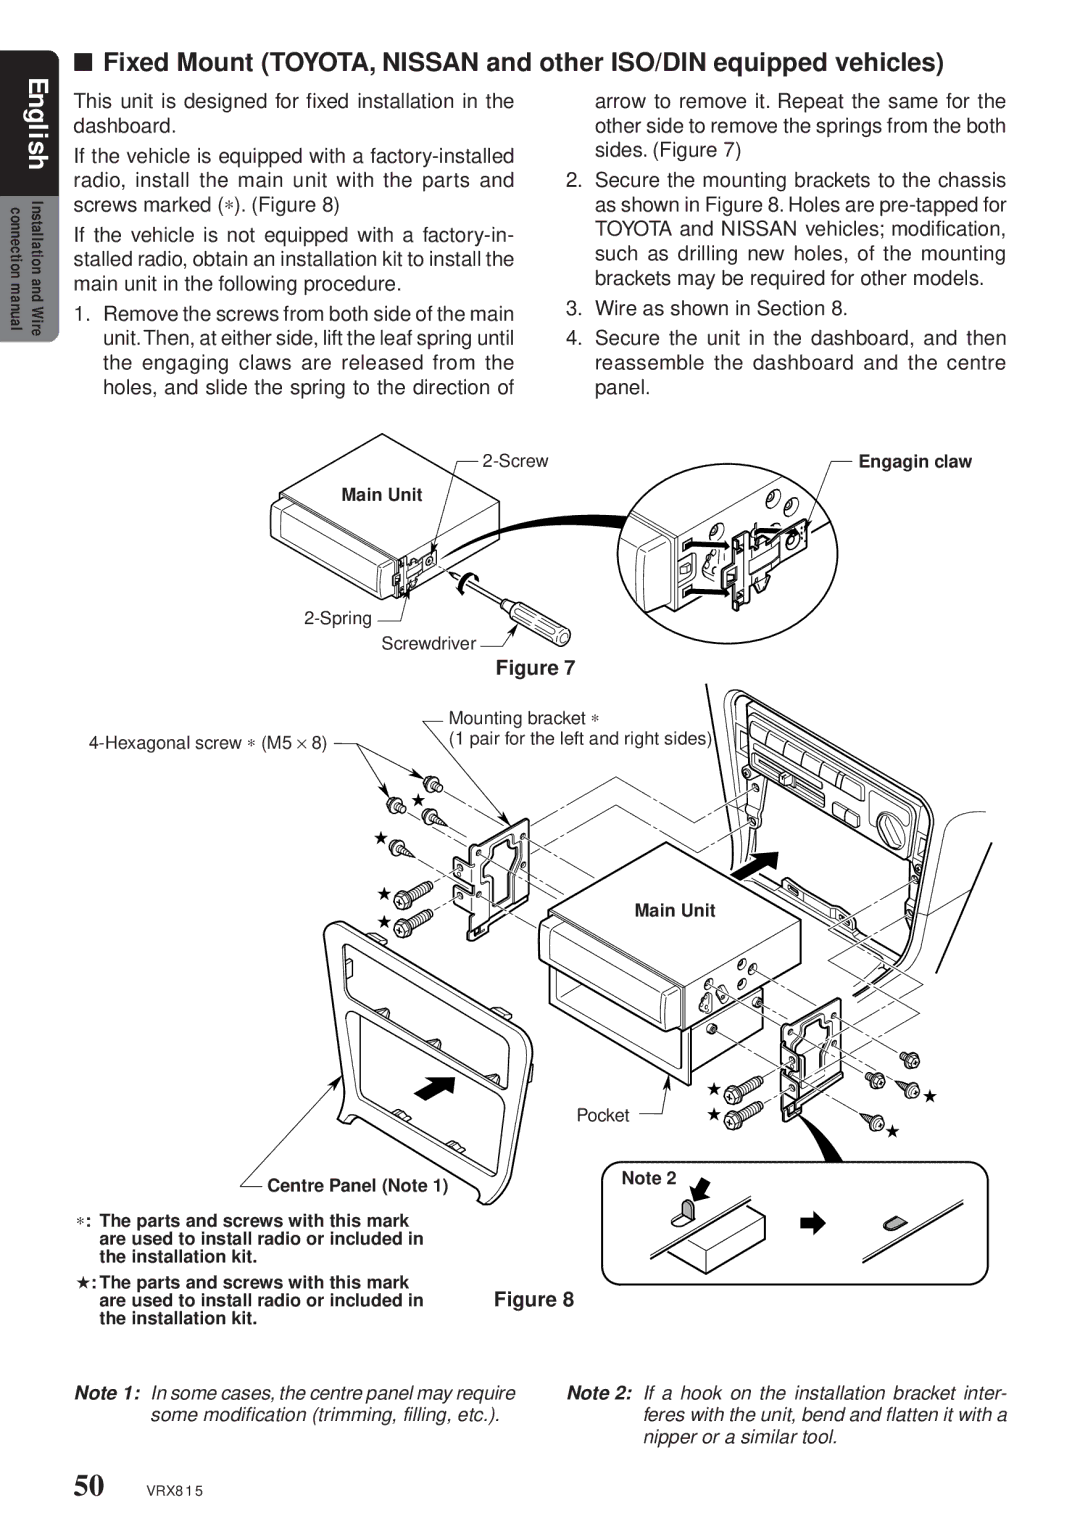
This unit is designed for fixed installation in the dashboard.
If the vehicle is equipped with a
If the vehicle is not equipped with a
1.Remove the screws from both side of the main unit.Then, at either side, lift the leaf spring until the engaging claws are released from the holes, and slide the spring to the direction of
arrow to remove it. Repeat the same for the other side to remove the springs from the both sides. (Figure 7)
2.Secure the mounting brackets to the chassis as shown in Figure 8. Holes are
3.Wire as shown in Section 8.
4.Secure the unit in the dashboard, and then reassemble the dashboard and the centre panel.
| Engagin claw |
Main Unit
![]()
| Screwdriver |
| Figure 7 |
| Mounting bracket ∗ |
(1 pair for the left and right sides) |
Main Unit
Centre Panel (Note 1)
∗: The parts and screws with this mark are used to install radio or included in the installation kit.
★: The parts and screws with this mark
are used to install radio or included in Figure 8 the installation kit.
Note 2
Note 1: In some cases, the centre panel may require some modification (trimming, filling, etc.).
Note 2: If a hook on the installation bracket inter- feres with the unit, bend and flatten it with a nipper or a similar tool.
50 VRX815