NEED PARTS? VISIT HTTP://WWW.MANUALBUDDY.COM/PARTS
OPERATION
8.To stop auger, release auger drive clutch lever (right hand - Figure 16).
9.To move the snow blower backwards, move speed select lever into first or second reverse and engage traction
drive clutch lever (left hand). To stop, release traction drive clutch lever.
,i_ WARNING: Never run engine indoors or in an enclosed, poor ventilated area. Engine exhaust
contains CARBON MONOXIDE, an OR- DERLESS and DEADLY GAS.
Keep hands, feet, hair and loose clothing away from any moving parts on engine and snow blower. Temperature of muffler and nearby areas can exceed 150 ° F (66 ° C). Avoid these areas.
DO NOT allow children or young teenagers to operate or be near snow blower while it is operating.
WHEEL LOCK OUT PIN
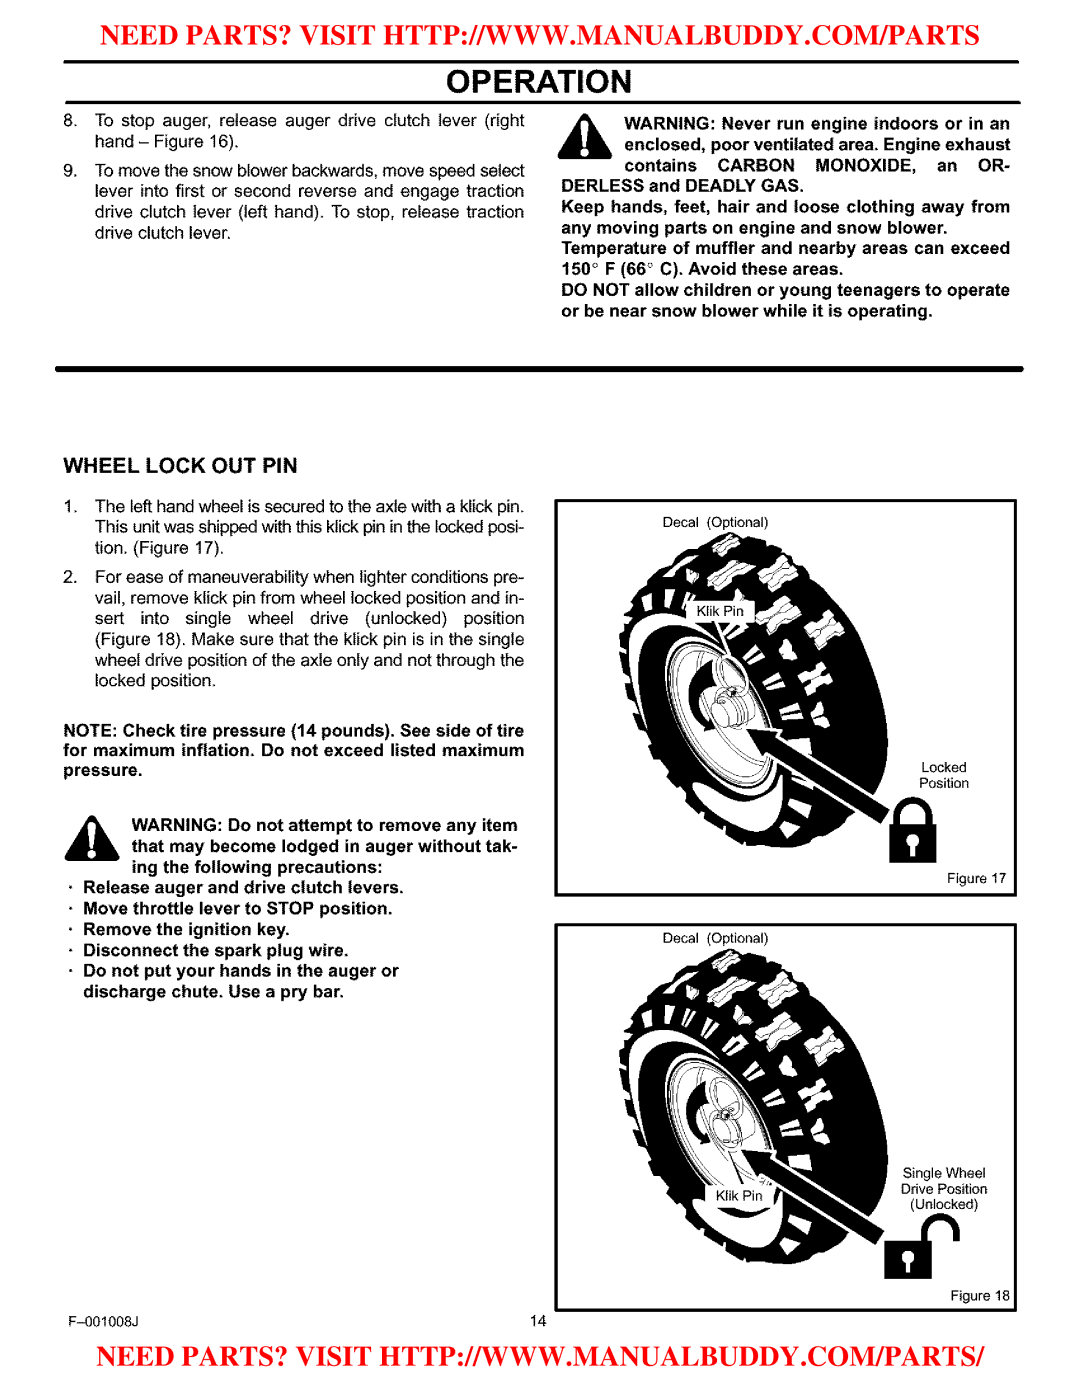
1.The left hand wheel is secured to the axle with a klick pin. This unit was shipped with this klick pin in the locked posi- tion. (Figure 17).
2.For ease of maneuverability when lighter conditions pre- vail, remove klick pin from wheel locked position and in- sert into single wheel drive (unlocked) position (Figure 18). Make sure that the klick pin is in the single wheel drive position of the axle only and not through the locked position.
NOTE: Check tire pressure (14 pounds). See side of tire for maximum inflation. Do not exceed listed maximum
pressure.
,_ WARNING: Do not attempt to remove any item that may become lodged in auger without tak-
ing the following precautions:
•Release auger and drive clutch levers.
•Move throttle lever to STOP position.
•Remove the ignition key.
•Disconnect the spark plug wire.
•Do not put your hands in the auger or discharge chute. Use a pry bar.
14 |
Decal (Optional)
Locked
Position
Figure 17
Decal (Optional)
Single Wheel
Drive Position
(Unlocked)
Figure 18
NEED PARTS? VISIT HTTP://WWW.MANUALBUDDY.COM/PARTS/
