INITIAL APPLIANCE BURN SETUP
IT IS CRITICAL FOR THE CORRECT OPERATION OF YOUR STOVE THAT THE BURN
GRATE, AIR INLET DAMPER, COMBUSTION FAN SPEED, AND
1 & 4 FUEL RATE BE SET CORRECTLY!
A HIGH QUALITY FIRE should burn with a brisk, yellow flame. A flame exhibiting a lazy, orange or sooty characteristic is a poor quality and inefficient flame. A poor flame produces less heat, increases sooting and may cause a smoky exhaust. If a poor flame exists for any period of time, clean your stove and exhaust system.
Note: if log option is purchased, do not install until initial setup is complete
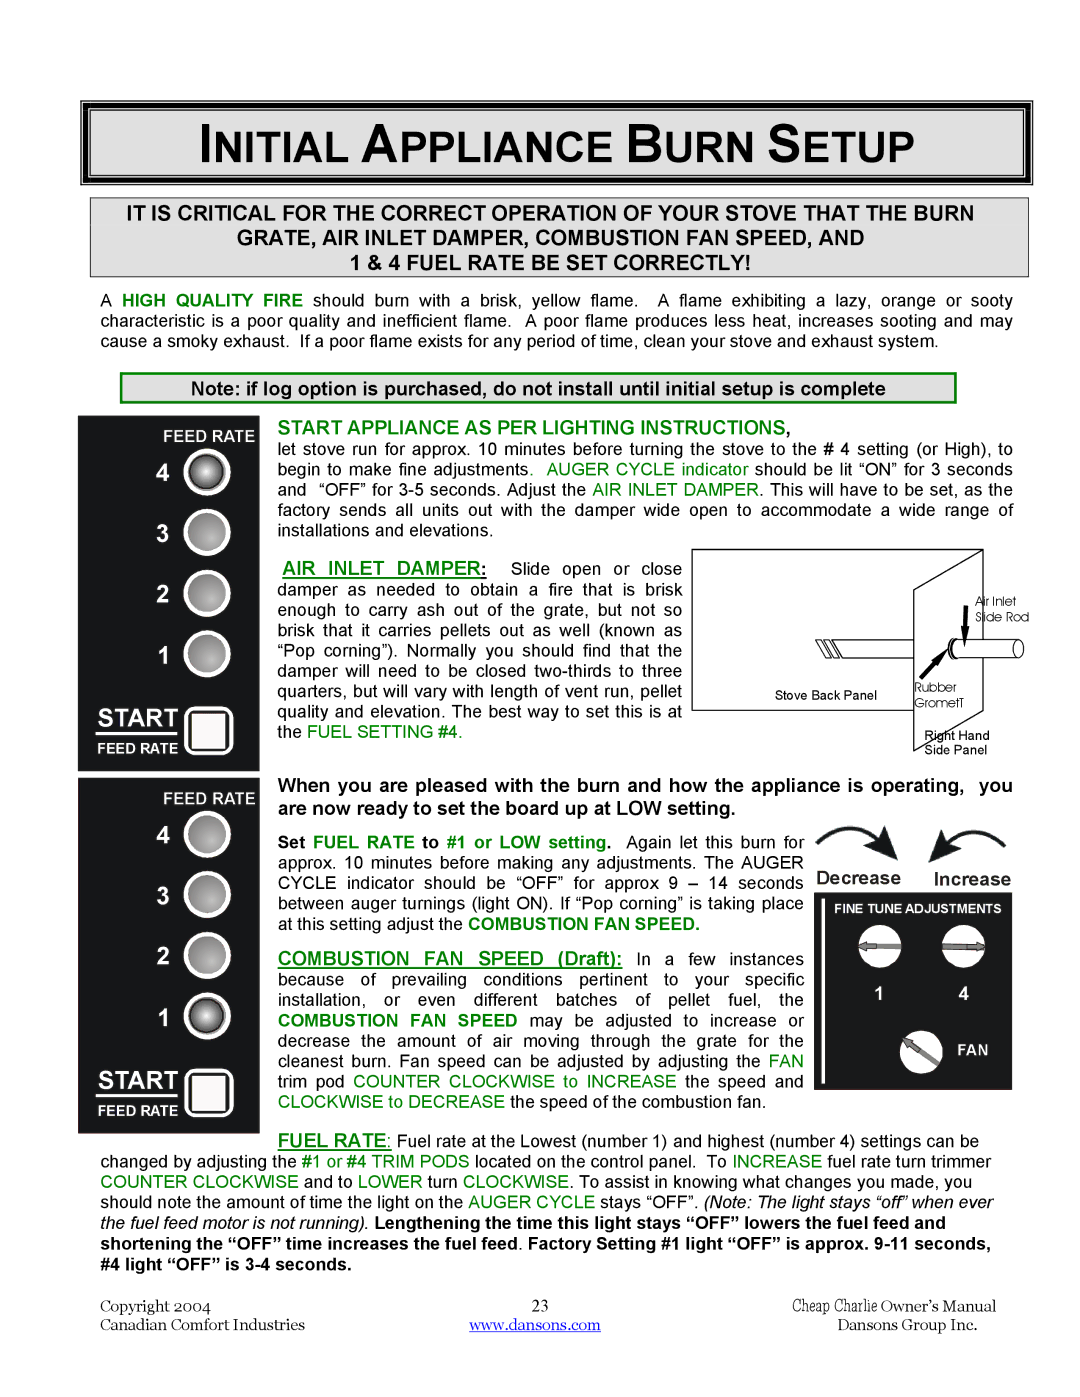
FEED RATE
4![]()
3![]()
2![]()
1 ![]()
START
FEED RATE
START APPLIANCE AS PER LIGHTING INSTRUCTIONS,
let stove run for approx. 10 minutes before turning the stove to the # 4 setting (or High), to begin to make fine adjustments. AUGER CYCLE indicator should be lit “ON” for 3 seconds and “OFF” for
AIR INLET DAMPER: Slide open or close |
|
|
|
| |
damper as needed to obtain a fire that is brisk |
|
| Air Inlet | ||
enough to carry ash out of the grate, but not so |
|
| |||
|
| Slide Rod | |||
brisk that it carries pellets out as well (known as |
|
|
|
| |
“Pop corning”). Normally you should find that the |
|
|
|
| |
damper will need to be closed |
| Rubber | |||
quarters, but will vary with length of vent run, pellet | Stove Back Panel | ||||
GrometT | |||||
quality and elevation. The best way to set this is at |
| ||||
|
|
|
| ||
the FUEL SETTING #4. |
| Right Hand | |||
|
| Side Panel | |||
FEED RATE | When you are pleased with the burn and how the appliance is operating, you | ||
are now ready to set the board up at LOW setting. |
|
| |
4 |
|
| |
Set FUEL RATE to #1 or LOW setting. Again let this burn for |
|
| |
| approx. 10 minutes before making any adjustments. The AUGER | Decrease | Increase |
3 | CYCLE indicator should be “OFF” for approx 9 – 14 seconds | ||
between auger turnings (light ON). If “Pop corning” is taking place | FINE TUNE ADJUSTMENTS | ||
| at this setting adjust the COMBUSTION FAN SPEED. |
|
|
2 | COMBUSTION FAN SPEED (Draft): In a few instances |
|
|
| because of prevailing conditions pertinent to your specific | 1 | 4 |
1 | installation, or even different batches of pellet fuel, the | ||
COMBUSTION FAN SPEED may be adjusted to increase or |
|
| |
| decrease the amount of air moving through the grate for the |
| FAN |
| cleanest burn. Fan speed can be adjusted by adjusting the FAN |
| |
START |
|
| |
trim pod COUNTER CLOCKWISE to INCREASE the speed and |
|
| |
FEED RATE | CLOCKWISE to DECREASE the speed of the combustion fan. |
|
|
|
|
| |
FUEL RATE: Fuel rate at the Lowest (number 1) and highest (number 4) settings can be changed by adjusting the #1 or #4 TRIM PODS located on the control panel. To INCREASE fuel rate turn trimmer COUNTER CLOCKWISE and to LOWER turn CLOCKWISE. To assist in knowing what changes you made, you should note the amount of time the light on the AUGER CYCLE stays “OFF”. (Note: The light stays “off” when ever the fuel feed motor is not running). Lengthening the time this light stays “OFF” lowers the fuel feed and shortening the “OFF” time increases the fuel feed. Factory Setting #1 light “OFF” is approx.
Copyright 2004 | 23 | Cheap Charlie Owner’s Manual |
Canadian Comfort Industries | www.dansons.com | Dansons Group Inc. |