Back to Contents Page
Button Board
Dell™ XPS™ M1530 Service Manual
Removing the Button Board
Replacing the Button Board
CAUTION: Before you begin any of the procedures in this section, follow the safety instructions in the Product Information Guide.
NOTICE: To avoid electrostatic discharge, ground yourself by using a wrist grounding strap or by periodically touching an unpainted metal surface (such as a connector on the back of the computer).
NOTICE: To help prevent damage to the system board, you must remove the battery from the battery bay before you begin working inside the computer.
Removing the Button Board
1.Follow the procedures in Before You Begin.
2.Remove the Center Control Cover and Hinge Covers (see Removing the Hinge Covers and Center Control Cover).
3.Remove the keyboard (see Removing the Keyboard).
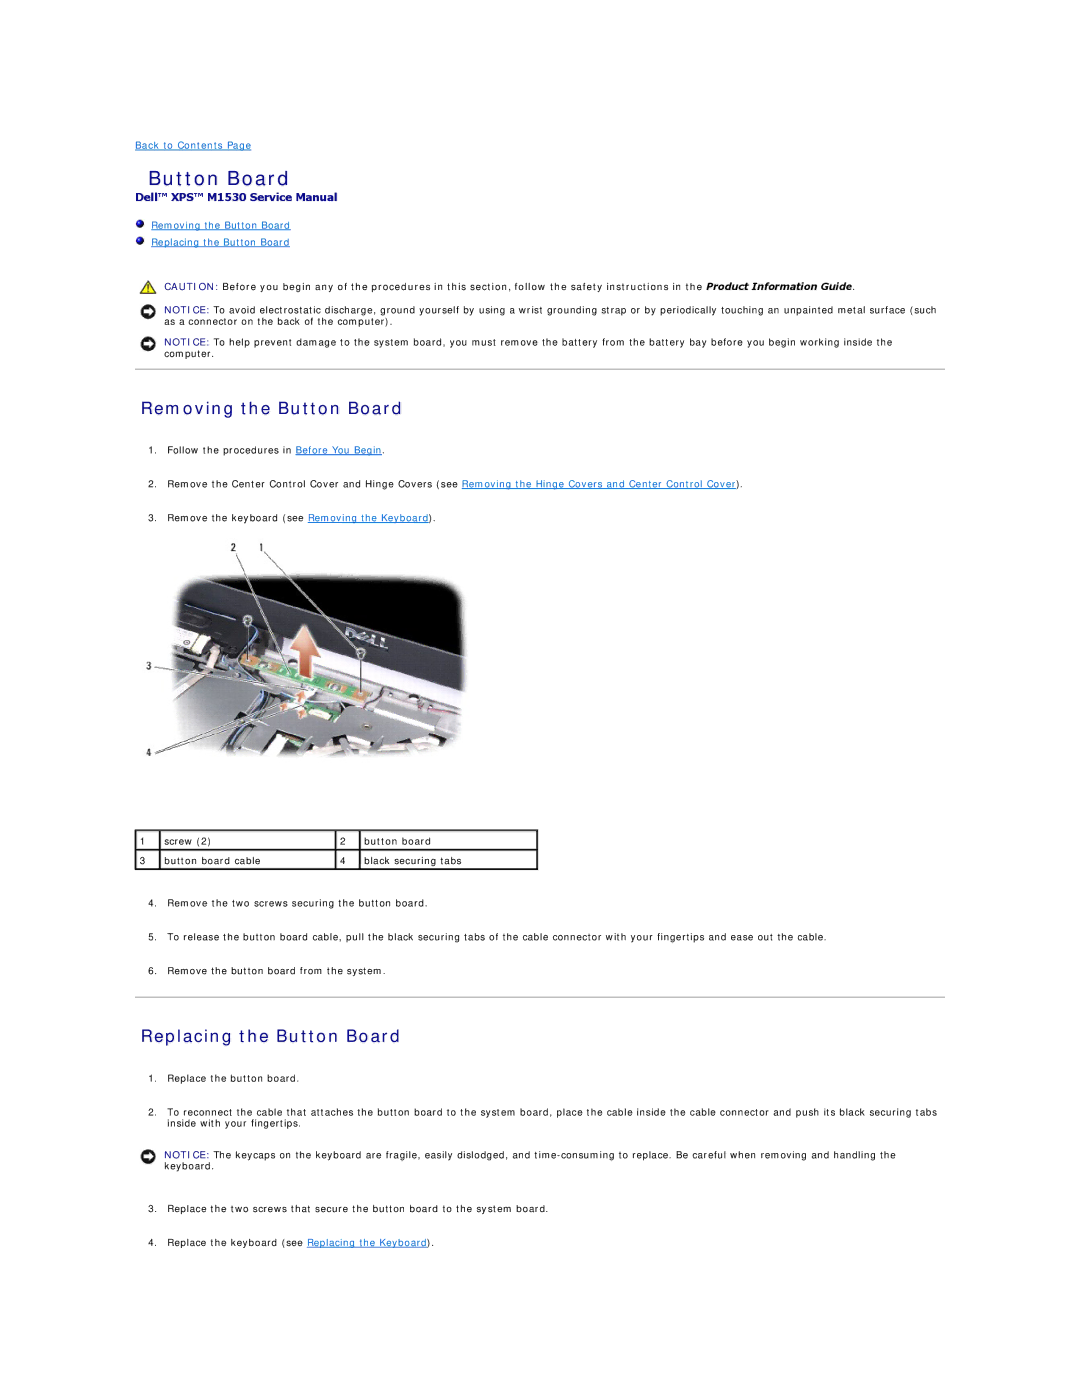
1 | screw (2) | 2 | button board |
|
|
|
|
3 | button board cable | 4 | black securing tabs |
|
|
|
|
4.Remove the two screws securing the button board.
5.To release the button board cable, pull the black securing tabs of the cable connector with your fingertips and ease out the cable.
6.Remove the button board from the system.
Replacing the Button Board
1.Replace the button board.
2.To reconnect the cable that attaches the button board to the system board, place the cable inside the cable connector and push its black securing tabs inside with your fingertips.
NOTICE: The keycaps on the keyboard are fragile, easily dislodged, and
3.Replace the two screws that secure the button board to the system board.
4.Replace the keyboard (see Replacing the Keyboard).