DUST CHUTE
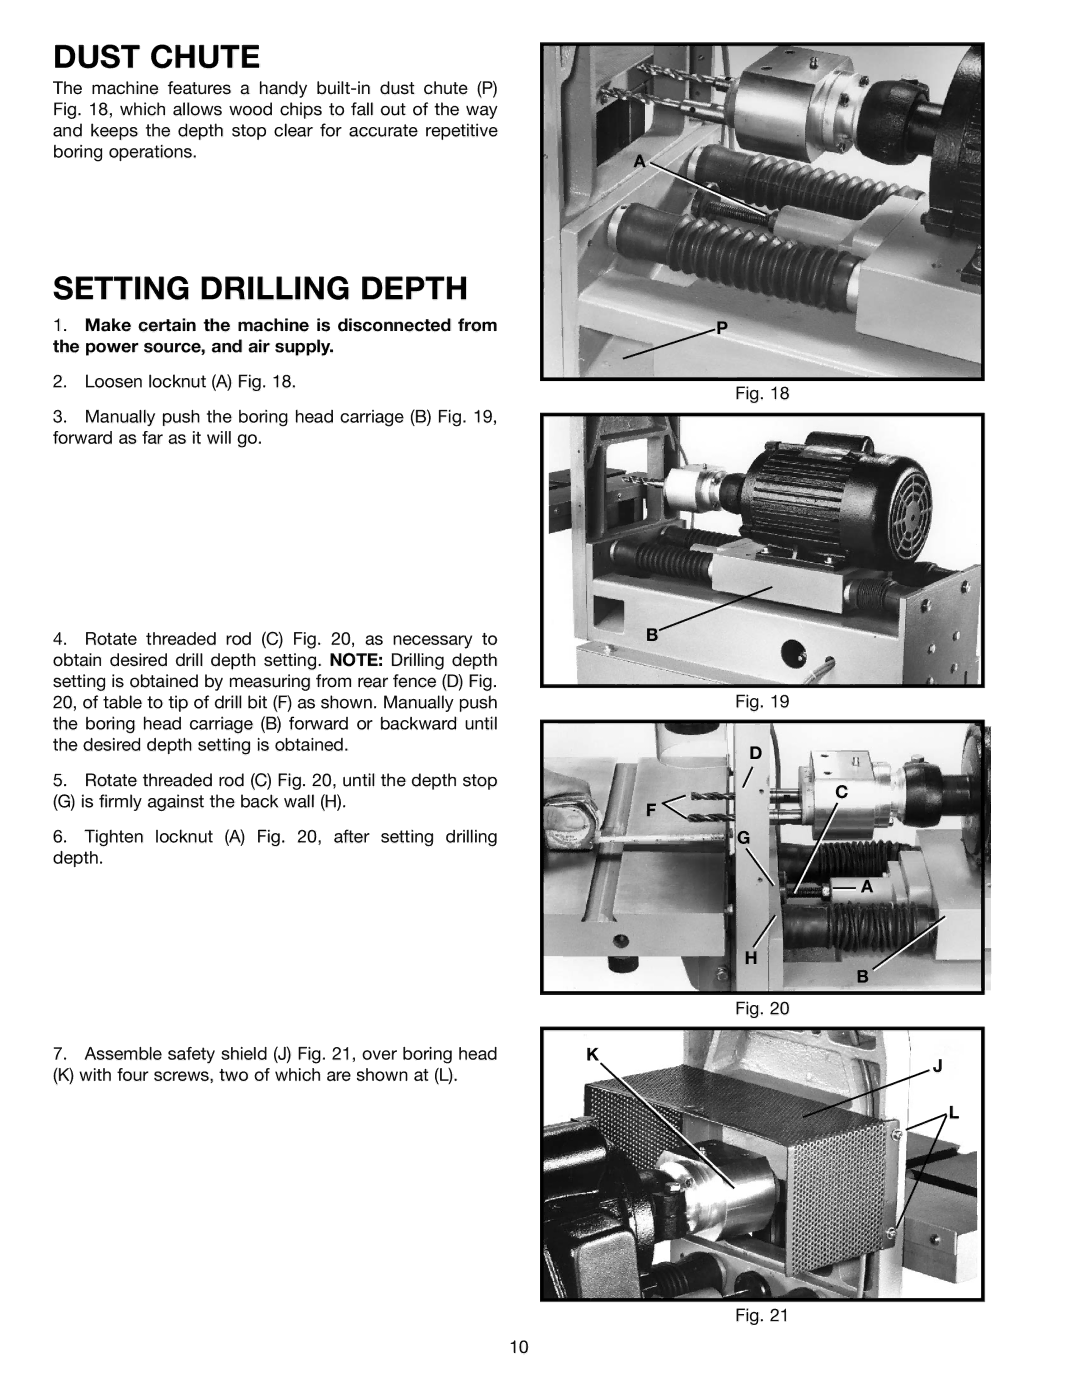
The machine features a handy
SETTING DRILLING DEPTH
1.Make certain the machine is disconnected from the power source, and air supply.
2.Loosen locknut (A) Fig. 18.
3.Manually push the boring head carriage (B) Fig. 19, forward as far as it will go.
4.Rotate threaded rod (C) Fig. 20, as necessary to obtain desired drill depth setting. NOTE: Drilling depth setting is obtained by measuring from rear fence (D) Fig. 20, of table to tip of drill bit (F) as shown. Manually push the boring head carriage (B) forward or backward until the desired depth setting is obtained.
5.Rotate threaded rod (C) Fig. 20, until the depth stop
(G) is firmly against the back wall (H).
6.Tighten locknut (A) Fig. 20, after setting drilling depth.
7.Assemble safety shield (J) Fig. 21, over boring head
(K) with four screws, two of which are shown at (L).
A
P
Fig. 18
B
Fig. 19
D
C
F
G
![]() A
A
H
B
Fig. 20
K
J
L
Fig. 21
10
