REPLACING SAW
ON STAND
(FOR MODEL 36-250 ONLY)
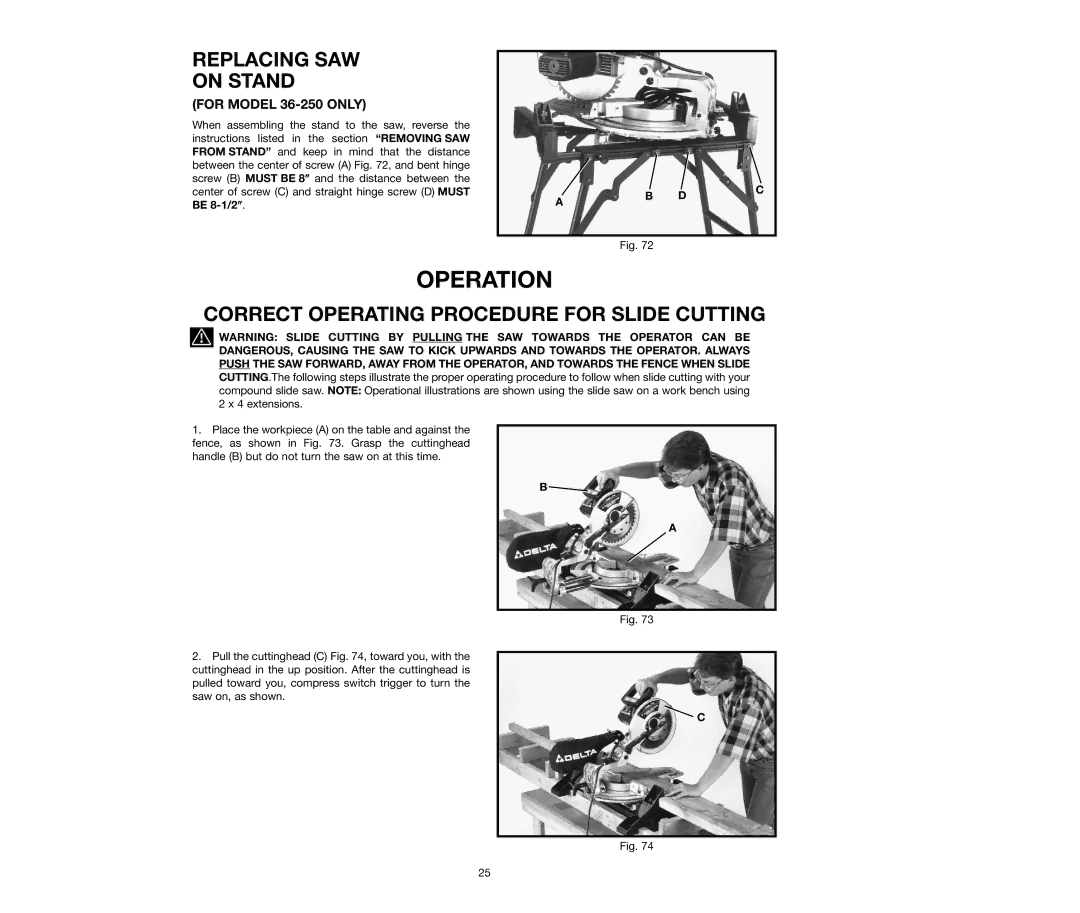
When assembling the stand to the saw, reverse the instructions listed in the section “REMOVING SAW FROM STAND” and keep in mind that the distance between the center of screw (A) Fig. 72, and bent hinge screw (B) MUST BE 8″ and the distance between the center of screw (C) and straight hinge screw (D) MUST BE
![]() B DC A
B DC A
Fig. 72
OPERATION
CORRECT OPERATING PROCEDURE FOR SLIDE CUTTING
WARNING: SLIDE CUTTING BY PULLING THE SAW TOWARDS THE OPERATOR CAN BE DANGEROUS, CAUSING THE SAW TO KICK UPWARDS AND TOWARDS THE OPERATOR. ALWAYS PUSH THE SAW FORWARD, AWAY FROM THE OPERATOR, AND TOWARDS THE FENCE WHEN SLIDE CUTTING.The following steps illustrate the proper operating procedure to follow when slide cutting with your compound slide saw. NOTE: Operational illustrations are shown using the slide saw on a work bench using 2 x 4 extensions.
1.Place the workpiece (A) on the table and against the fence, as shown in Fig. 73. Grasp the cuttinghead handle (B) but do not turn the saw on at this time.
2.Pull the cuttinghead (C) Fig. 74, toward you, with the cuttinghead in the up position. After the cuttinghead is pulled toward you, compress switch trigger to turn the saw on, as shown.
B ![]()
A
Fig. 73
![]() C
C
Fig. 74
25
