A
B
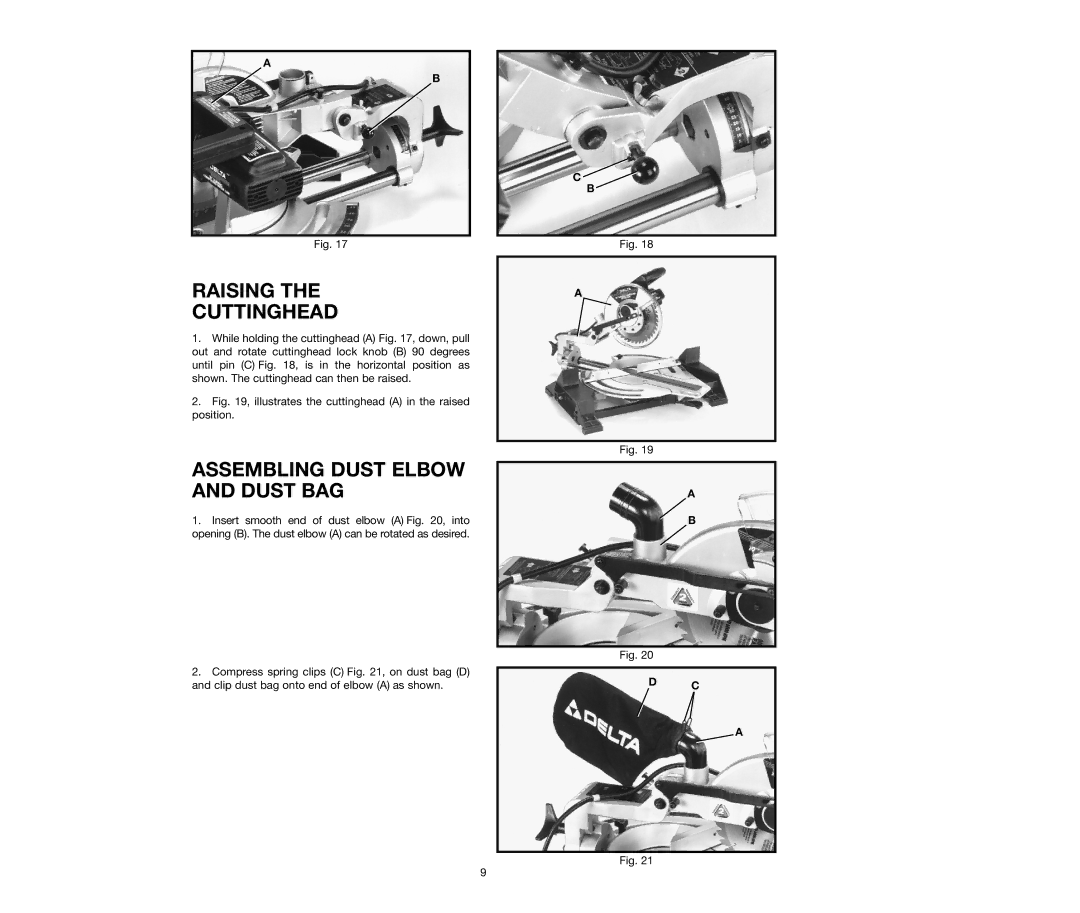
Fig. 17
RAISING THE
CUTTINGHEAD
1.While holding the cuttinghead (A) Fig. 17, down, pull out and rotate cuttinghead lock knob (B) 90 degrees until pin (C) Fig. 18, is in the horizontal position as shown. The cuttinghead can then be raised.
2.Fig. 19, illustrates the cuttinghead (A) in the raised position.
ASSEMBLING DUST ELBOW AND DUST BAG
1.Insert smooth end of dust elbow (A) Fig. 20, into opening (B). The dust elbow (A) can be rotated as desired.
2.Compress spring clips (C) Fig. 21, on dust bag (D) and clip dust bag onto end of elbow (A) as shown.
C ![]()
B
Fig. 18
A
Fig. 19
A
B
Fig. 20
D C
A
Fig. 21
9