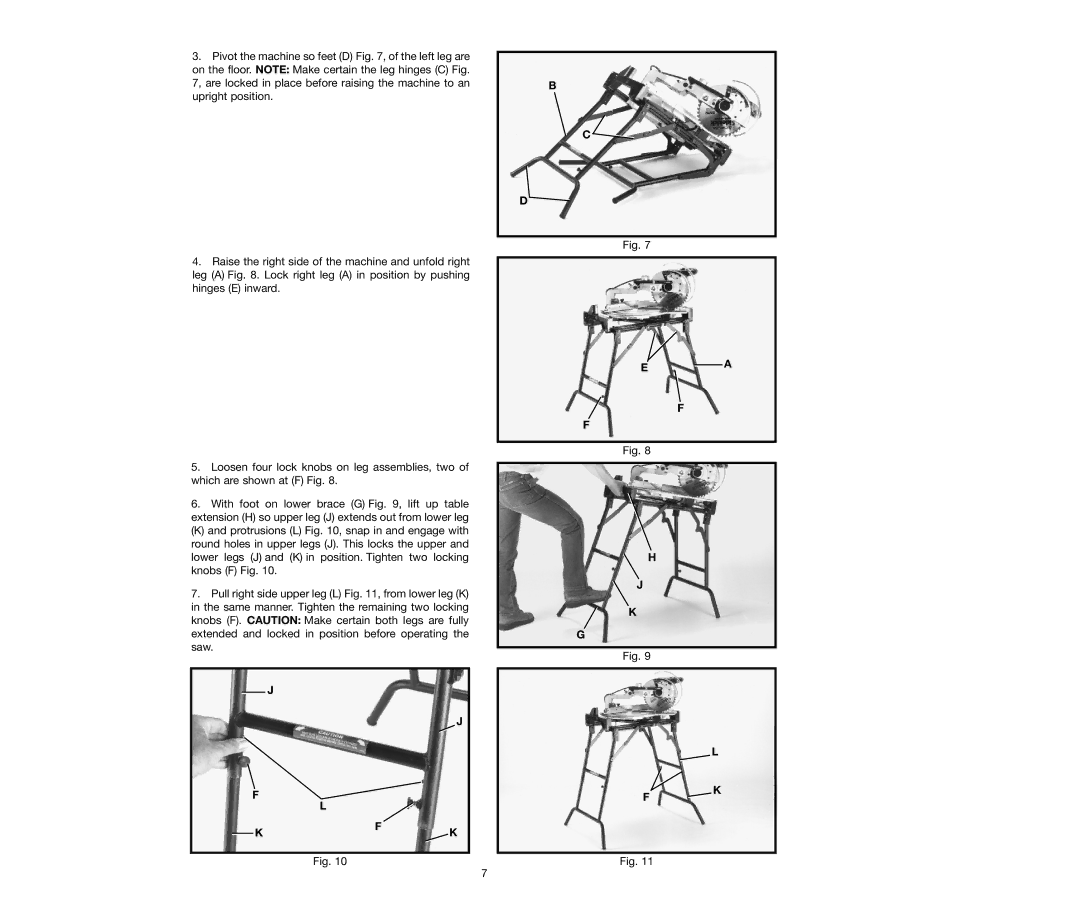
3.Pivot the machine so feet (D) Fig. 7, of the left leg are on the floor. NOTE: Make certain the leg hinges (C) Fig. 7, are locked in place before raising the machine to an upright position.
4.Raise the right side of the machine and unfold right leg (A) Fig. 8. Lock right leg (A) in position by pushing hinges (E) inward.
5.Loosen four lock knobs on leg assemblies, two of which are shown at (F) Fig. 8.
6.With foot on lower brace (G) Fig. 9, lift up table extension (H) so upper leg (J) extends out from lower leg
(K) and protrusions (L) Fig. 10, snap in and engage with round holes in upper legs (J). This locks the upper and lower legs (J) and (K) in position. Tighten two locking knobs (F) Fig. 10.
7.Pull right side upper leg (L) Fig. 11, from lower leg (K) in the same manner. Tighten the remaining two locking knobs (F). CAUTION: Make certain both legs are fully extended and locked in position before operating the saw.
J |
J |
B
C![]()
D
Fig. 7
EA
F
F
Fig. 8
H
J
K
G
Fig. 9
L
F | L |
|
|
| |
K | F | K |
|
F
K
Fig. 10
Fig. 11
7
