INSTALLATION
Log Placement for M42/VM42 Models
15
INSTALLATION
Continued
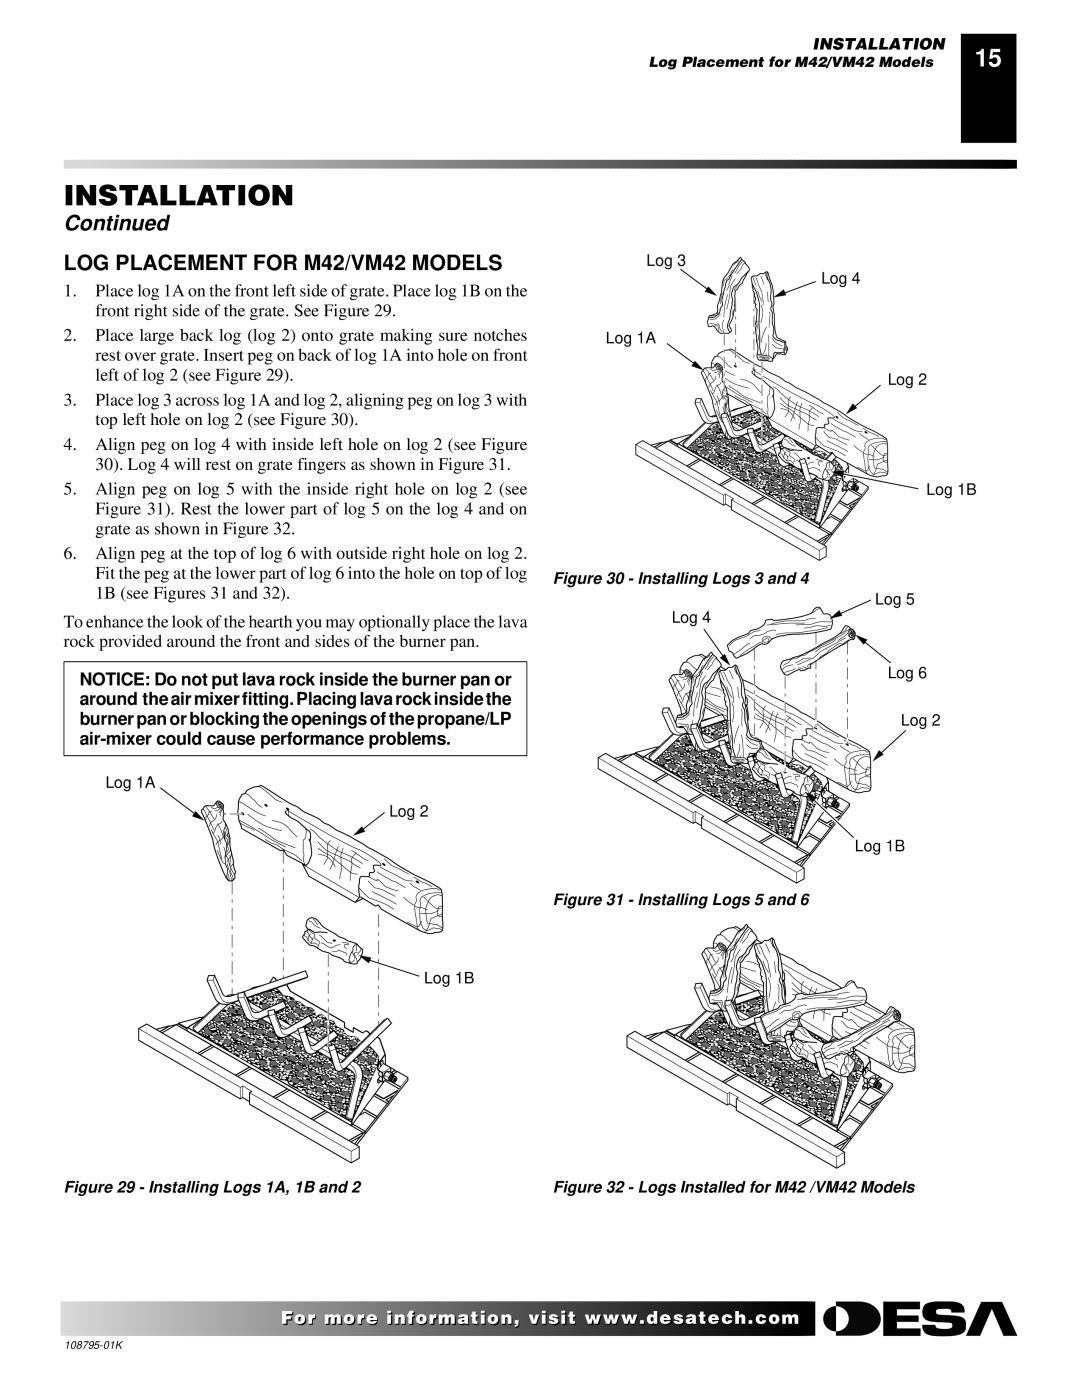
LOG PLACEMENT FOR M42/VM42 MODELS
1. | Place log 1A on the front left side of grate. Place log 1B on the |
| front right side of the grate. See Figure 29. |
2. | Place large back log (log 2) onto grate making sure notches |
| rest over grate. Insert peg on back of log 1A into hole on front |
| left of log 2 (see Figure 29). |
3. | Place log 3 across log 1A and log 2, aligning peg on log 3 with |
| top left hole on log 2 (see Figure 30). |
4. | Align peg on log 4 with inside left hole on log 2 (see Figure |
| 30). Log 4 will rest on grate fingers as shown in Figure 31. |
5. | Align peg on log 5 with the inside right hole on log 2 (see |
| Figure 31). Rest the lower part of log 5 on the log 4 and on |
| grate as shown in Figure 32. |
6. | Align peg at the top of log 6 with outside right hole on log 2. |
Log 3
Log 1A
Log 4
Log 2
Log 1B
Fit the peg at the lower part of log 6 into the hole on top of log |
1B (see Figures 31 and 32). |
To enhance the look of the hearth you may optionally place the lava rock provided around the front and sides of the burner pan.
NOTICE: Do not put lava rock inside the burner pan or around the air mixer fitting. Placing lava rock inside the burner pan or blocking the openings of the propane/LP
Log 1A
Log 2
Figure 30 - Installing Logs 3 and 4
Log 5
Log 4
Log 6
Log 2
Log 1B
Figure 31 - Installing Logs 5 and 6
Log 1B
Figure 29 - Installing Logs 1A, 1B and 2 | Figure 32 - Logs Installed for M42 /VM42 Models |
![]()
![]()
![]()
![]() For more information, visit www.desatech.com
For more information, visit www.desatech.com