INSTALLATION
Continued
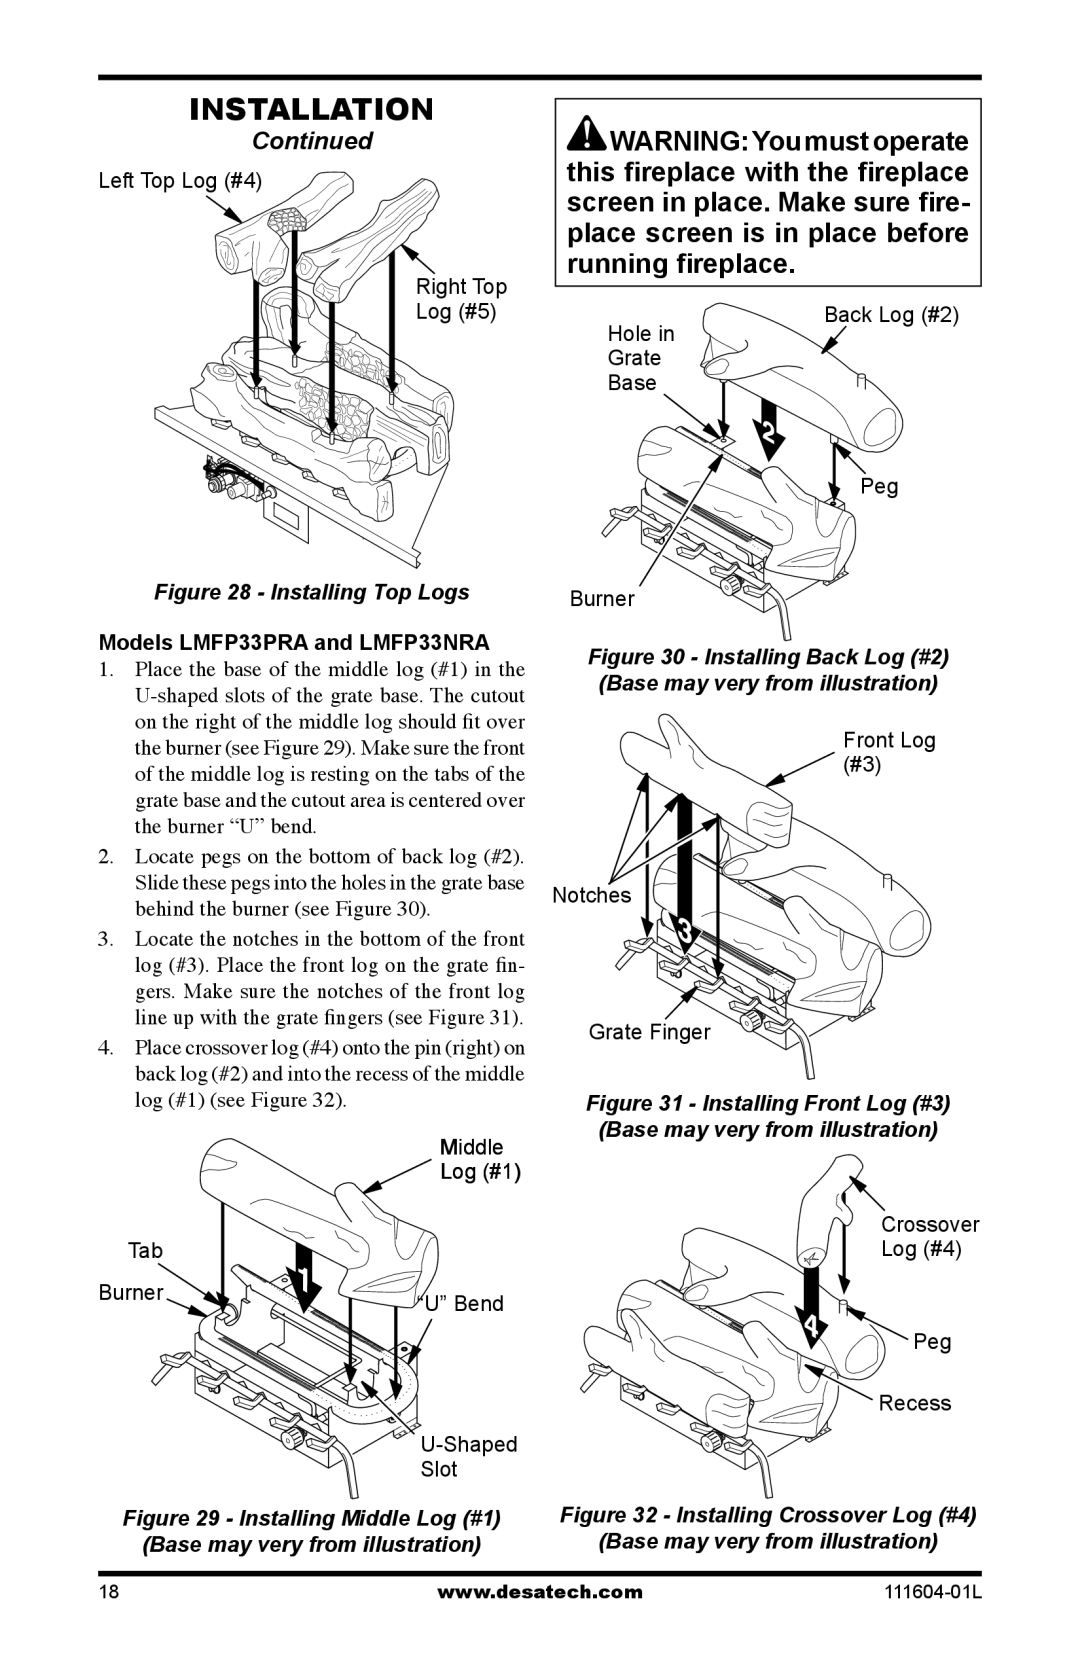
Left Top Log (#4)
Right Top
Log (#5)
Figure 28 - Installing Top Logs
Models LMFP33PRA and LMFP33NRA
1.Place the base of the middle log (#1) in the
2.Locate pegs on the bottom of back log (#2). Slide these pegs into the holes in the grate base behind the burner (see Figure 30).
3.Locate the notches in the bottom of the front log (#3). Place the front log on the grate fin- gers. Make sure the notches of the front log line up with the grate fingers (see Figure 31).
4.Place crossover log (#4) onto the pin (right) on back log (#2) and into the recess of the middle log (#1) (see Figure 32).
| Middle |
| Log (#1) |
Tab |
|
Burner | “U” Bend |
| |
| |
| Slot |
Figure 29 - Installing Middle Log (#1) | |
(Base may very from illustration) | |
![]() WARNING:You must operate this fireplace with the fireplace screen in place. Make sure fire- place screen is in place before running fireplace.
WARNING:You must operate this fireplace with the fireplace screen in place. Make sure fire- place screen is in place before running fireplace.
Back Log (#2)
Hole in
Grate
Base
Peg
Burner
Figure 30 - Installing Back Log (#2) (Base may very from illustration)
Front Log
![]() (#3)
(#3)
Notches
Grate Finger
Figure 31 - Installing Front Log (#3) (Base may very from illustration)
Crossover
Log (#4)
![]()
![]()
![]() Peg
Peg ![]()
![]()
![]()
![]()
![]()
![]()
![]() Recess
Recess
Figure 32 - Installing Crossover Log (#4) (Base may very from illustration)
18 | www.desatech.com |