INSTALLATION | If securing to a concrete floor, drill a 1 3/8" deep hole using a 1/4" diameter con- |
| |
Continued | crete drill bit. Completely insert anchors into each hole. |
3. Mount heater to hearth base following steps under Mounting Heater to Optional | |
| Hearth Base, page 17. After mounting heater, position heater and hearth base |
| over drilled holes. With slotted screwdriver, secure hearth base to floor with |
| four wood screws. |
Mounting Heater to Optional Hearth Base
1.Lay heater on its back on a table with the bottom of heater overhanging the edge of the table.
2.Remove 2 shipping screws in bottom of heater. Discard shipping screws.
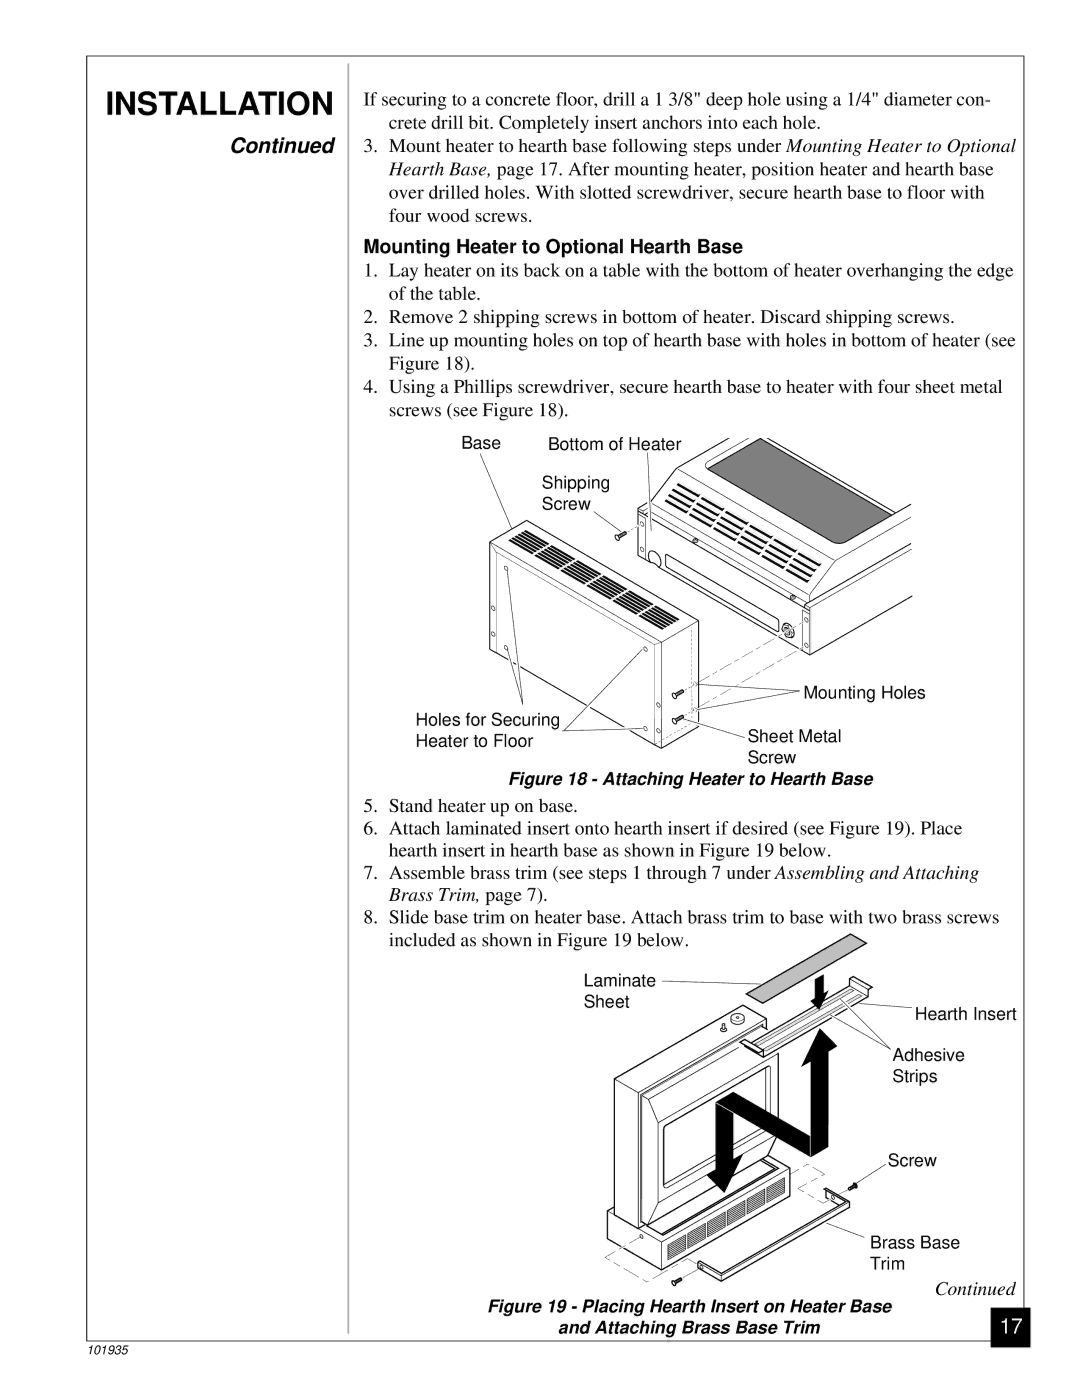
3.Line up mounting holes on top of hearth base with holes in bottom of heater (see Figure 18).
4.Using a Phillips screwdriver, secure hearth base to heater with four sheet metal screws (see Figure 18).
Base | Bottom of Heater |
Shipping
Screw
| Mounting Holes |
Holes for Securing | Sheet Metal |
Heater to Floor | |
| Screw |
Figure 18 - Attaching Heater to Hearth Base
5.Stand heater up on base.
6.Attach laminated insert onto hearth insert if desired (see Figure 19). Place hearth insert in hearth base as shown in Figure 19 below.
7.Assemble brass trim (see steps 1 through 7 under Assembling and Attaching Brass Trim, page 7).
8.Slide base trim on heater base. Attach brass trim to base with two brass screws included as shown in Figure 19 below.
Laminate
Sheet
Hearth Insert
Adhesive
Strips
| Screw |
| Brass Base |
| Trim |
| Continued |
Figure 19 - Placing Hearth Insert on Heater Base | |
and Attaching Brass Base Trim | 17 |
101935
