ASSEMBLY | Assembling and Attaching Brass Trim |
| |||
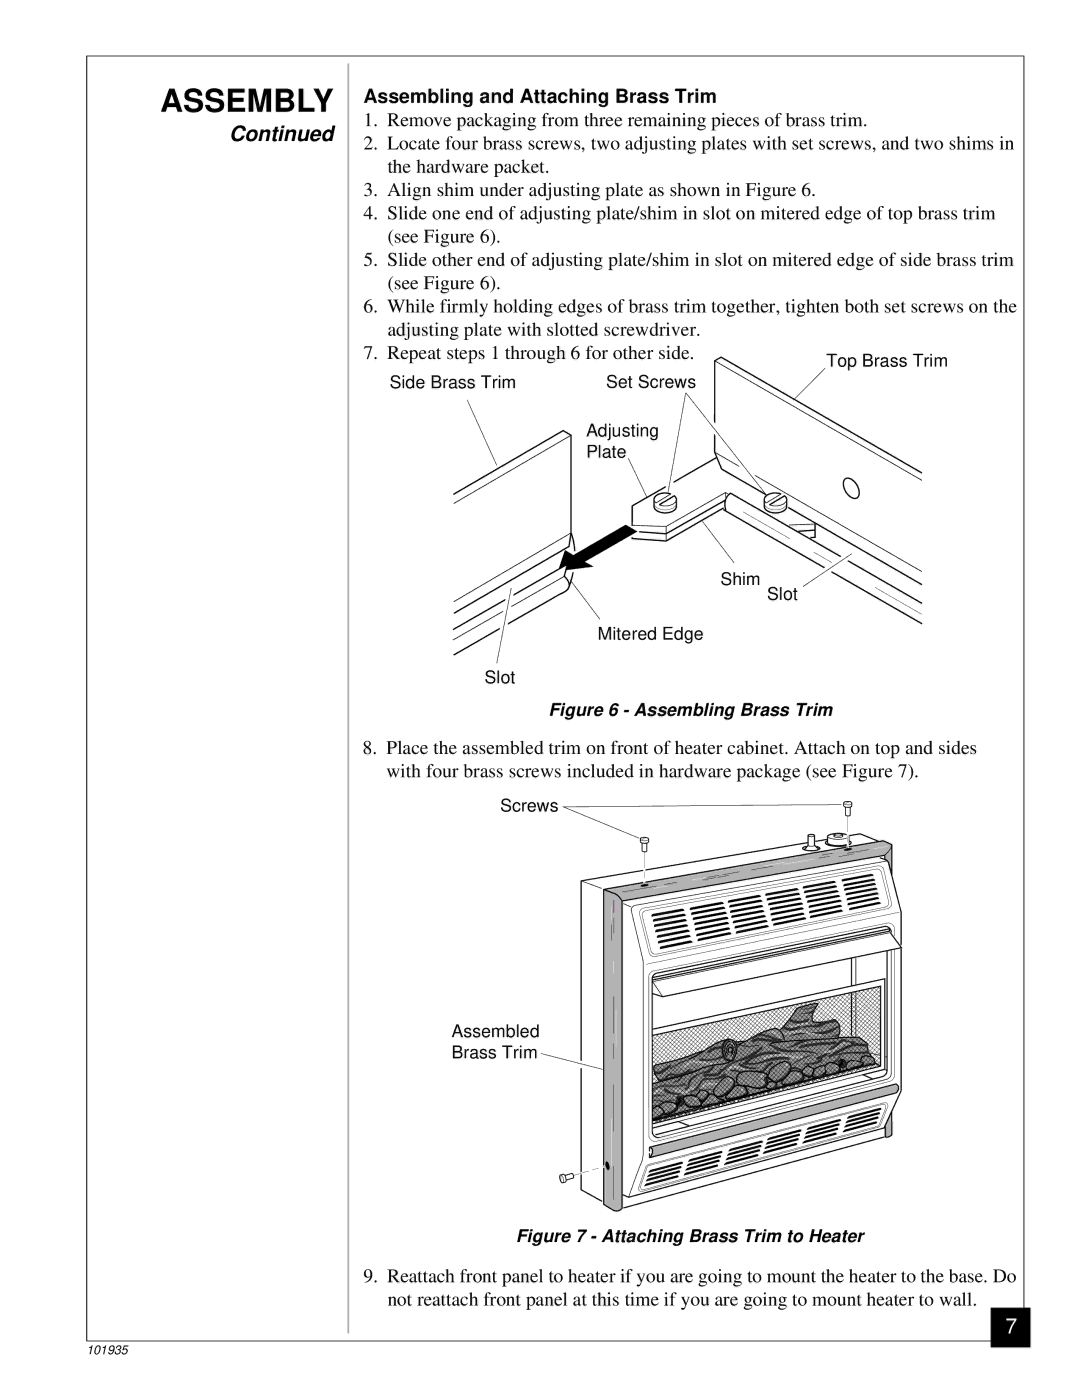
1. | Remove packaging from three remaining pieces of brass trim. | ||||
Continued | |||||
2. | Locate four brass screws, two adjusting plates with set screws, and two shims in | ||||
| |||||
|
| the hardware packet. |
|
| |
| 3. | Align shim under adjusting plate as shown in Figure 6. |
| ||
| 4. | Slide one end of adjusting plate/shim in slot on mitered edge of top brass trim | |||
|
| (see Figure 6). |
|
| |
| 5. | Slide other end of adjusting plate/shim in slot on mitered edge of side brass trim | |||
|
| (see Figure 6). |
|
| |
| 6. | While firmly holding edges of brass trim together, tighten both set screws on the | |||
|
| adjusting plate with slotted screwdriver. |
| ||
| 7. | Repeat steps 1 through 6 for other side. | Top Brass Trim | ||
|
|
|
| ||
|
| Side Brass Trim | Set Screws |
| |
|
|
| Adjusting |
| |
|
|
| Plate |
| |
Shim
Slot
Mitered Edge
Slot
Figure 6 - Assembling Brass Trim
8.Place the assembled trim on front of heater cabinet. Attach on top and sides with four brass screws included in hardware package (see Figure 7).
Screws
Assembled
Brass Trim![]()
Figure 7 - Attaching Brass Trim to Heater
9.Reattach front panel to heater if you are going to mount the heater to the base. Do not reattach front panel at this time if you are going to mount heater to wall.
7
101935