12
VENTING INSTALLATION
Installation Planning (Cont.) Installation For Horizontal Termination
VENTING INSTALLATION
Continued
Installing Vent System in a Chase
A chase is a vertical boxlike structure built to enclose venting that runs along the outside of a building. A chase is not required for such venting.
NOTICE: Treatment of firestops and construction of the chase may vary from building type to building type. These instructions are not substitutes for the requirements of local building codes. You must fol- low all local building codes.
Note: When installing in a chase, you should insulate the chase as you would the outside walls of your home. This is especially important in cold climates. Minimum clearance between vent pipes and combustible materials such as insulation is 1".
INSTALLATION FOR HORIZONTAL TERMINATION
1.Determine the route your horizontal venting will take. Note: The location of the horizontal vent termination on the exterior wall must meet all local and national building codes and must not be easily blocked or obstructed.
![]() WARNING: Do not recess vent terminal into a wall or siding.
WARNING: Do not recess vent terminal into a wall or siding.
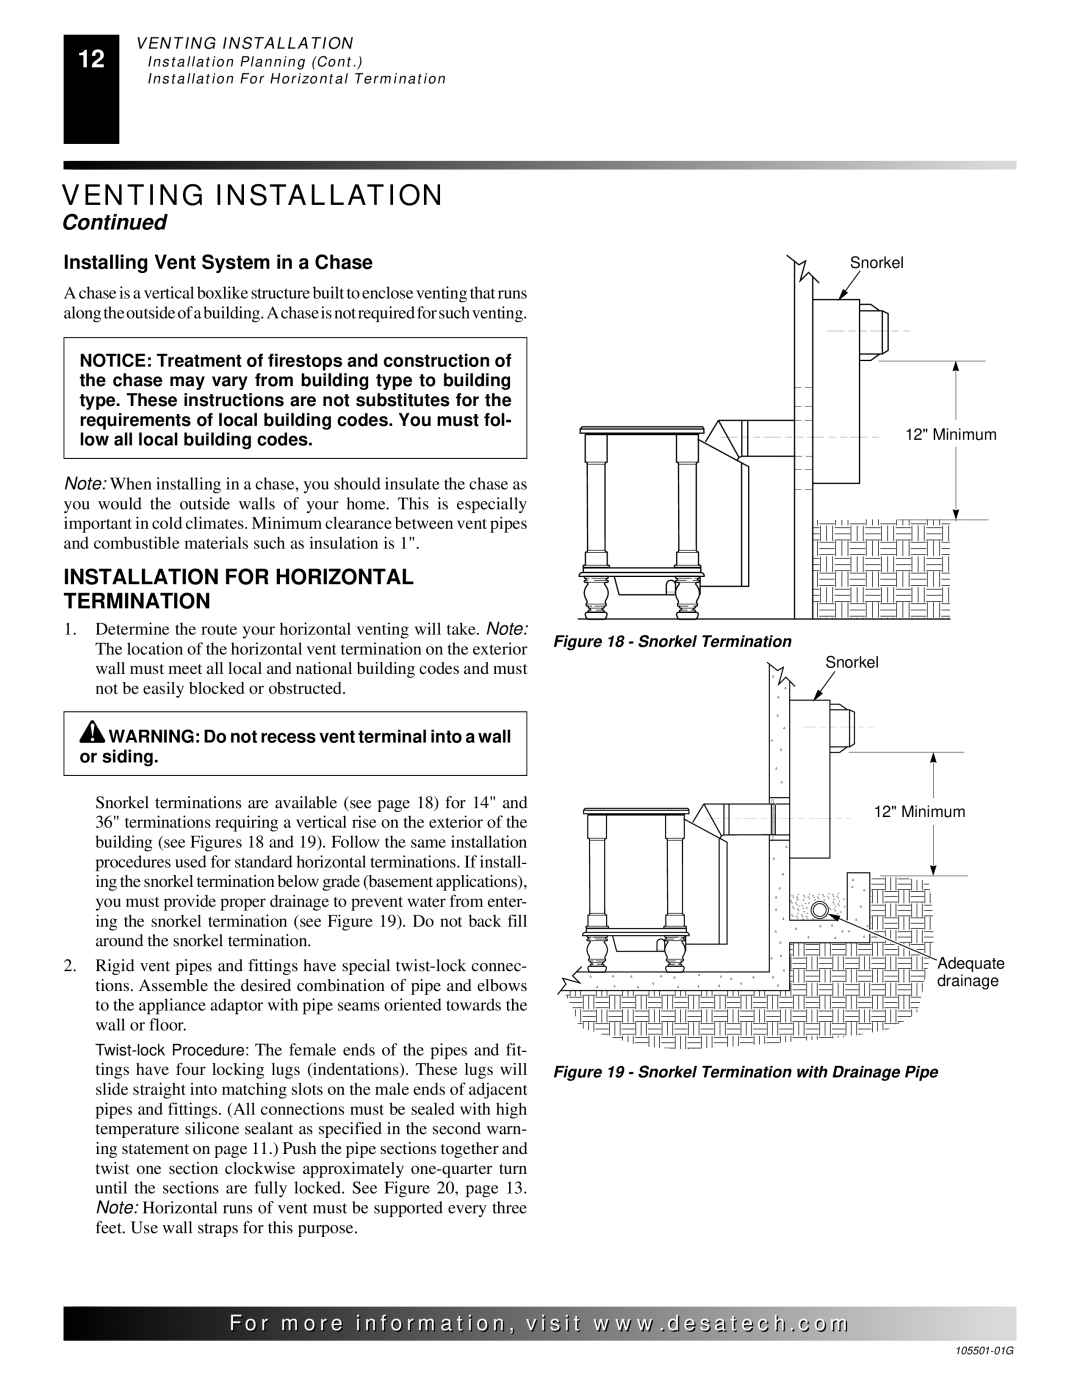
Snorkel terminations are available (see page 18) for 14" and 36" terminations requiring a vertical rise on the exterior of the building (see Figures 18 and 19). Follow the same installation procedures used for standard horizontal terminations. If install- ing the snorkel termination below grade (basement applications), you must provide proper drainage to prevent water from enter- ing the snorkel termination (see Figure 19). Do not back fill around the snorkel termination.
2.Rigid vent pipes and fittings have special
Snorkel |
12" Minimum |
Figure 18 - Snorkel Termination
Snorkel
12" Minimum
![]()
![]()
![]()
![]()
![]()
![]()
![]()
![]()
![]()
![]()
![]()
![]()
![]()
![]()
![]()
![]()
![]()
![]()
![]()
![]()
![]()
![]() Adequate
Adequate
![]()
![]()
![]()
![]()
![]()
![]()
![]() drainage
drainage
Figure 19 - Snorkel Termination with Drainage Pipe
![]()
![]()
![]()
![]()
![]() For
For![]()
![]()
![]()
![]()
![]()
![]()
![]()
![]()
![]()
![]()
![]()
![]()
![]() .
.![]()
![]()
![]()
![]() .com
.com![]()
![]()
![]()
![]()
![]()