USING THE CLIENT SOFTWARE
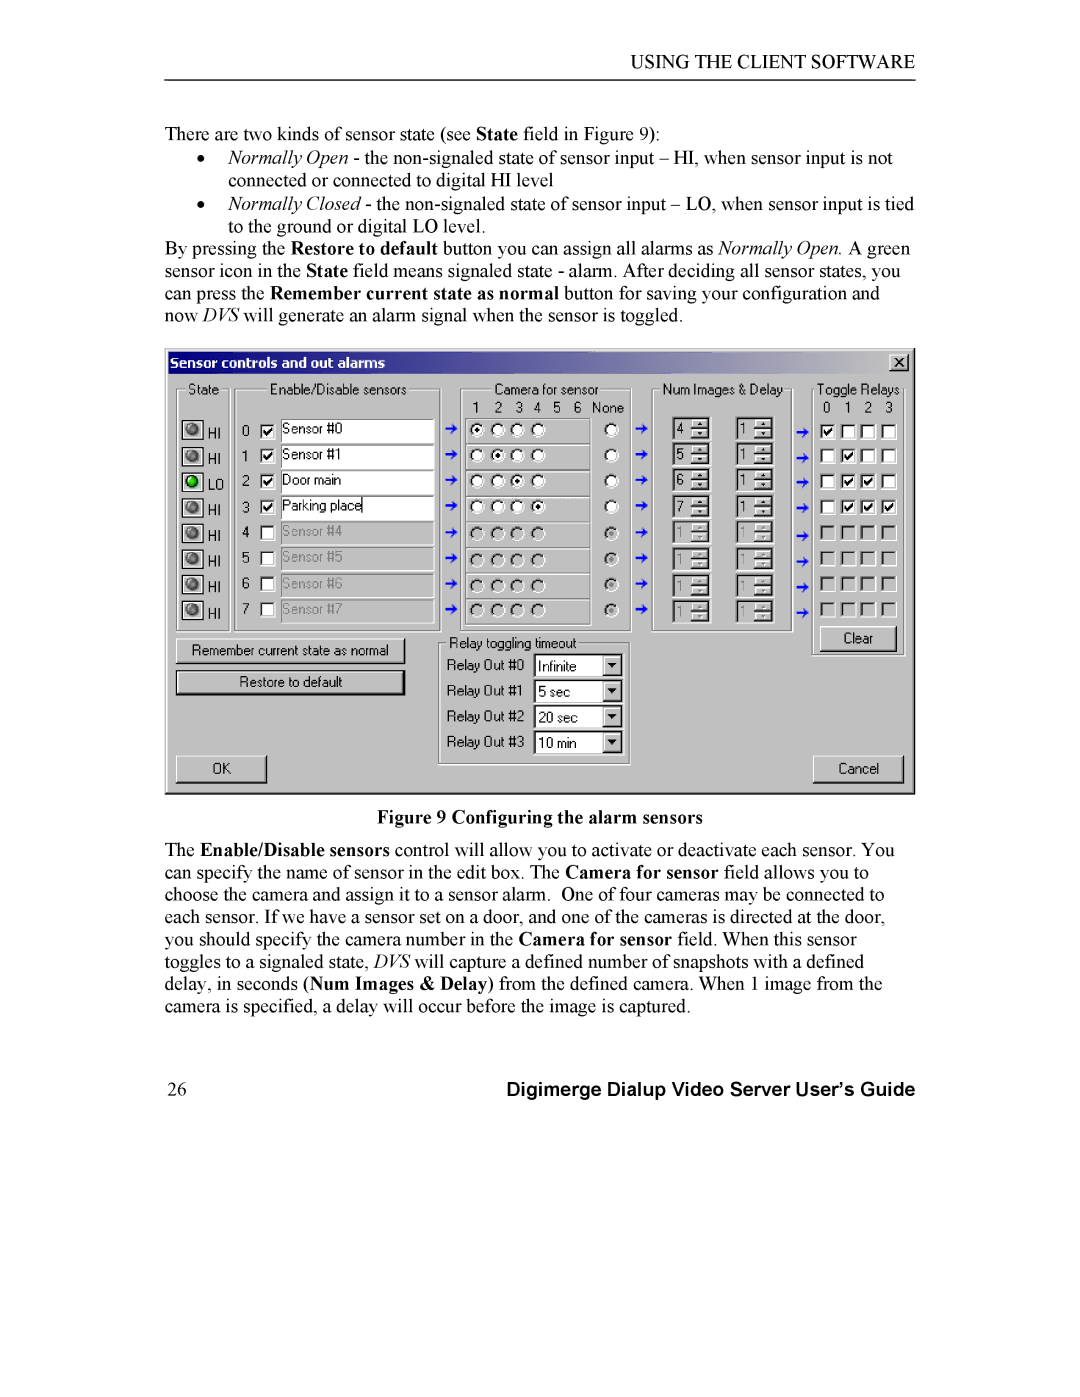
There are two kinds of sensor state (see State field in Figure 9):
•Normally Open - the
•Normally Closed - the
to the ground or digital LO level.
By pressing the Restore to default button you can assign all alarms as Normally Open. A green sensor icon in the State field means signaled state - alarm. After deciding all sensor states, you can press the Remember current state as normal button for saving your configuration and now DVS will generate an alarm signal when the sensor is toggled.
Figure 9 Configuring the alarm sensors
The Enable/Disable sensors control will allow you to activate or deactivate each sensor. You can specify the name of sensor in the edit box. The Camera for sensor field allows you to choose the camera and assign it to a sensor alarm. One of four cameras may be connected to each sensor. If we have a sensor set on a door, and one of the cameras is directed at the door, you should specify the camera number in the Camera for sensor field. When this sensor toggles to a signaled state, DVS will capture a defined number of snapshots with a defined delay, in seconds (Num Images & Delay) from the defined camera. When 1 image from the camera is specified, a delay will occur before the image is captured.
26 | Digimerge Dialup Video Server User’s Guide |
