XDVDN8190 INSTALLATION
Preparation
Please read entire manual before installation.
Before You Start
•Disconnect negative battery terminal. Consult a qualified technician for instructions.
•Avoid installing the unit where it would be subject to high temperatures, such as from direct sunlight, or where it would be subject to dust, dirt or excessive vibration.
Getting Started
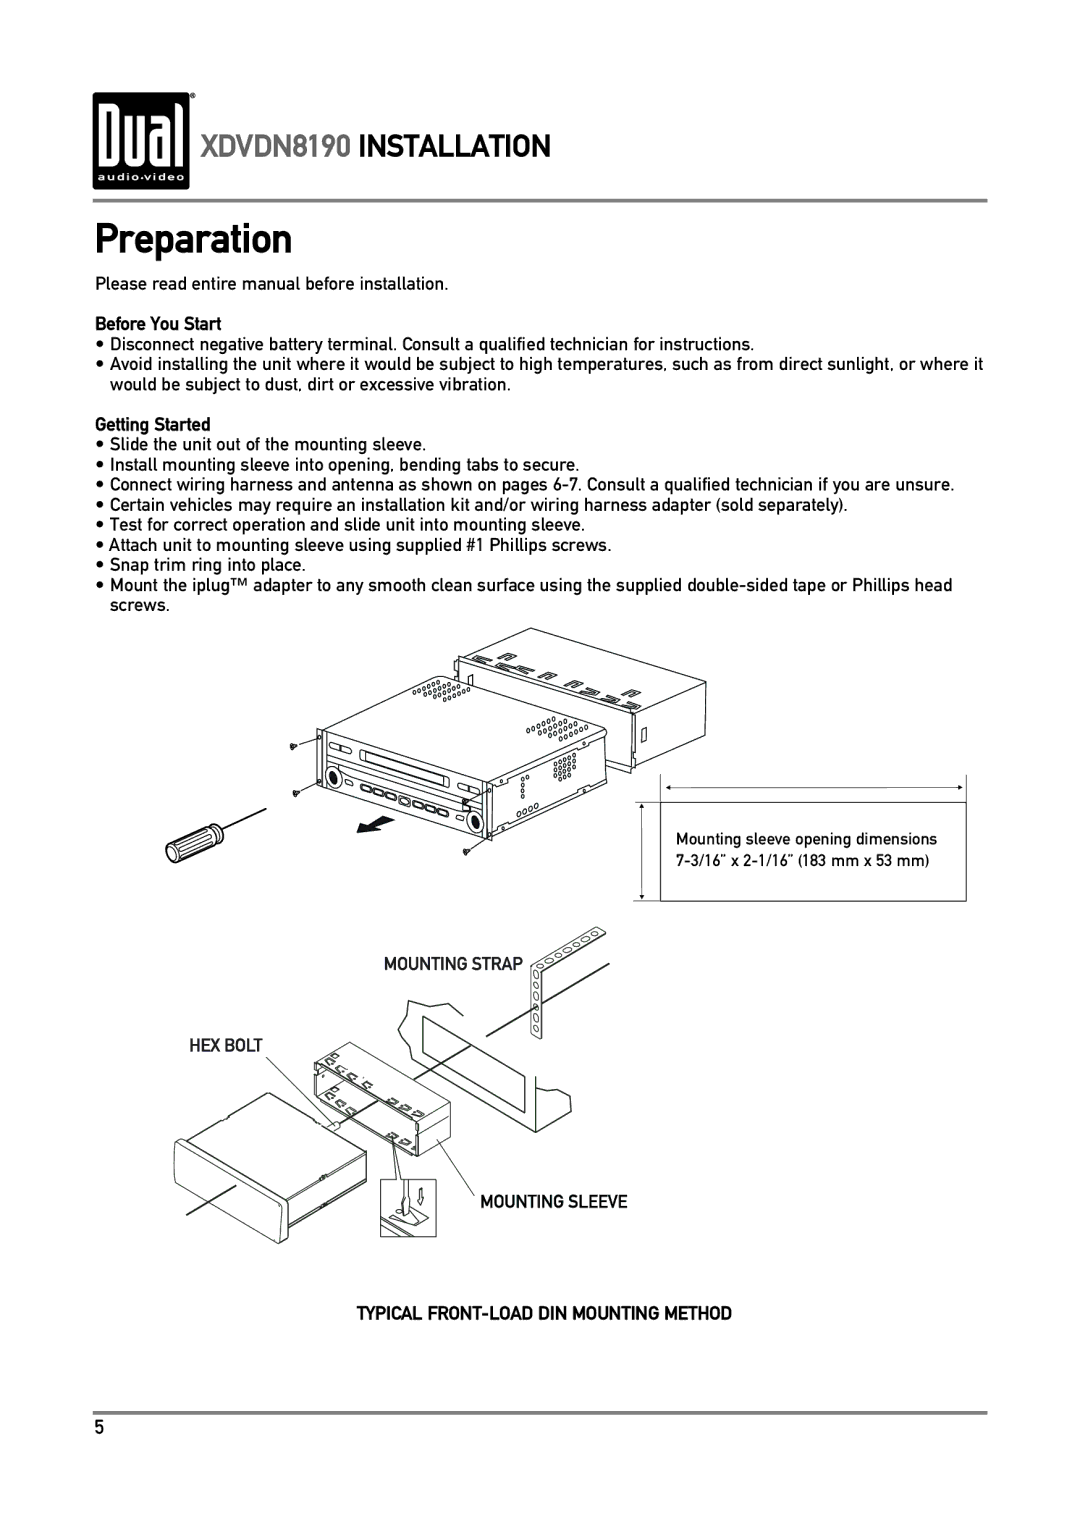
•Slide the unit out of the mounting sleeve.
•Install mounting sleeve into opening, bending tabs to secure.
•Connect wiring harness and antenna as shown on pages
•Certain vehicles may require an installation kit and/or wiring harness adapter (sold separately).
•Test for correct operation and slide unit into mounting sleeve.
•Attach unit to mounting sleeve using supplied #1 Phillips screws.
•Snap trim ring into place.
•Mount the iplug™ adapter to any smooth clean surface using the supplied
Mounting sleeve opening dimensions
TYPICAL
5