Computer Input
Manual PC Adjustment
Some computers employ special signal formats which may not be tuned by
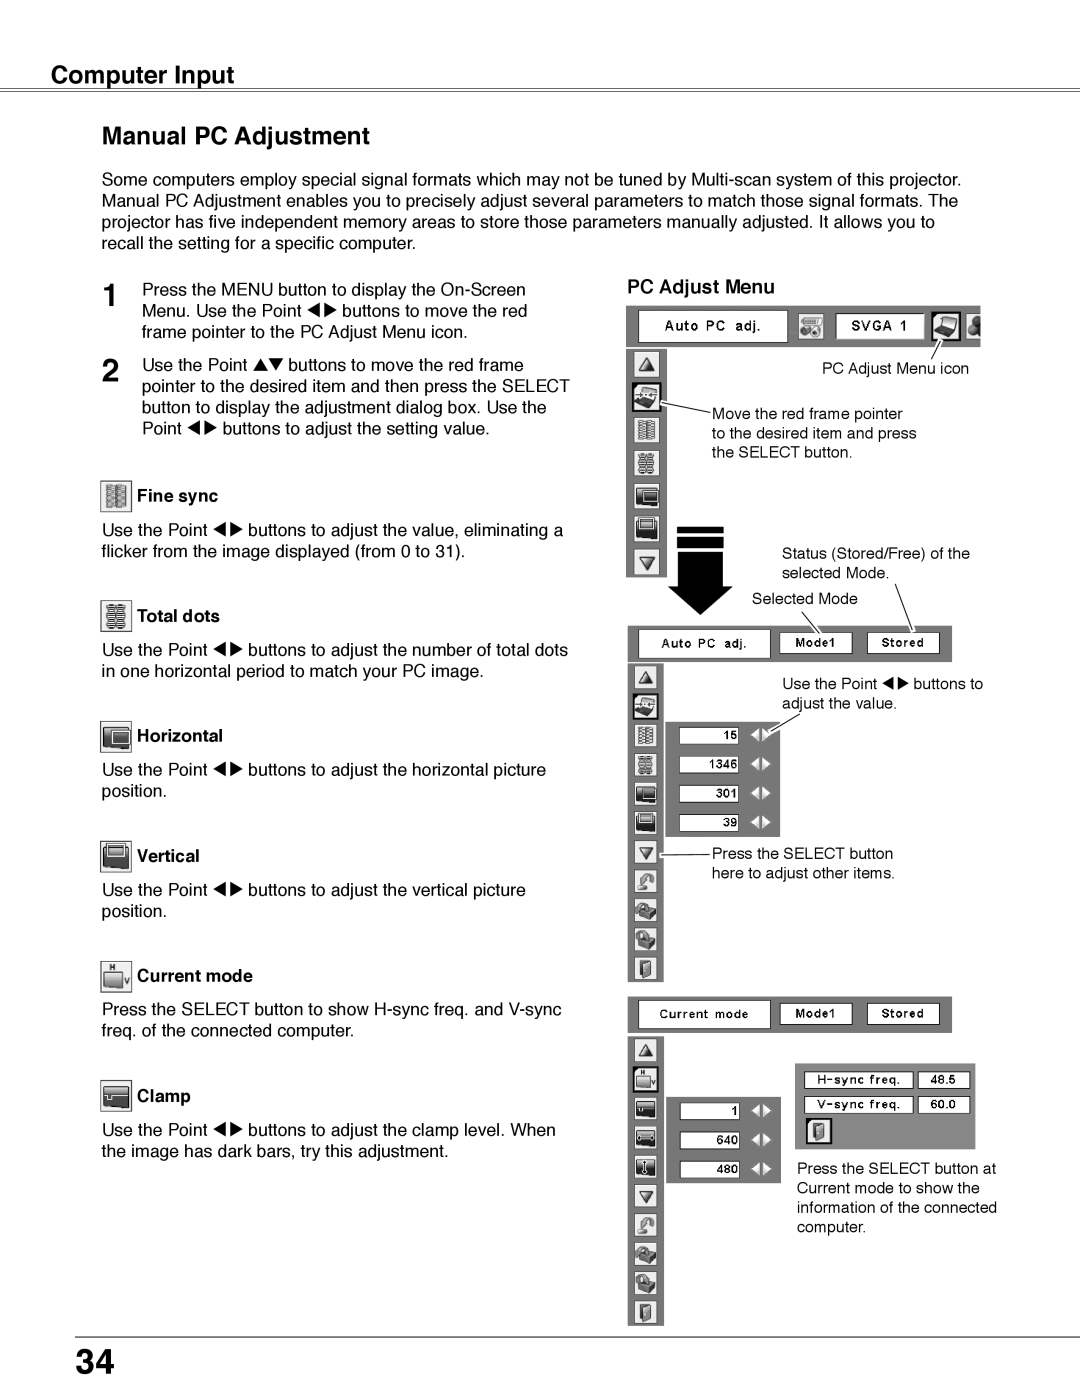
1 | Press the MENU button to display the | PC Adjust Menu |
Menu. Use the Point 7 8 buttons to move the red |
| |
2 | frame pointer to the PC Adjust Menu icon. |
|
Use the Point ed buttons to move the red frame | PC Adjust Menu icon | |
pointer to the desired item and then press the SELECT |
| |
| button to display the adjustment dialog box. Use the | Move the red frame pointer |
| Point 7 8 buttons to adjust the setting value. | to the desired item and press |
the SELECT button.
Fine sync
Use the Point 7 8 buttons to adjust the value, eliminating a flicker from the image displayed (from 0 to 31).
 Total dots
Use the Point 7 8 buttons to adjust the number of total dots in one horizontal period to match your PC image.
![]() Horizontal
Horizontal
Use the Point 7 8 buttons to adjust the horizontal picture position.
![]() Vertical
Vertical
Use the Point 7 8 buttons to adjust the vertical picture position.
![]() Current mode
Current mode
Press the SELECT button to show
 Clamp
Clamp
Use the Point 7 8 buttons to adjust the clamp level. When the image has dark bars, try this adjustment.
Use the Point 7 8 buttons to adjust the value.
![]() Press the SELECT button here to adjust other items.
Press the SELECT button here to adjust other items.
Press the SELECT button at Current mode to show the information of the connected computer.
34
