Part Names and Functions
Remote Control Battery Installation
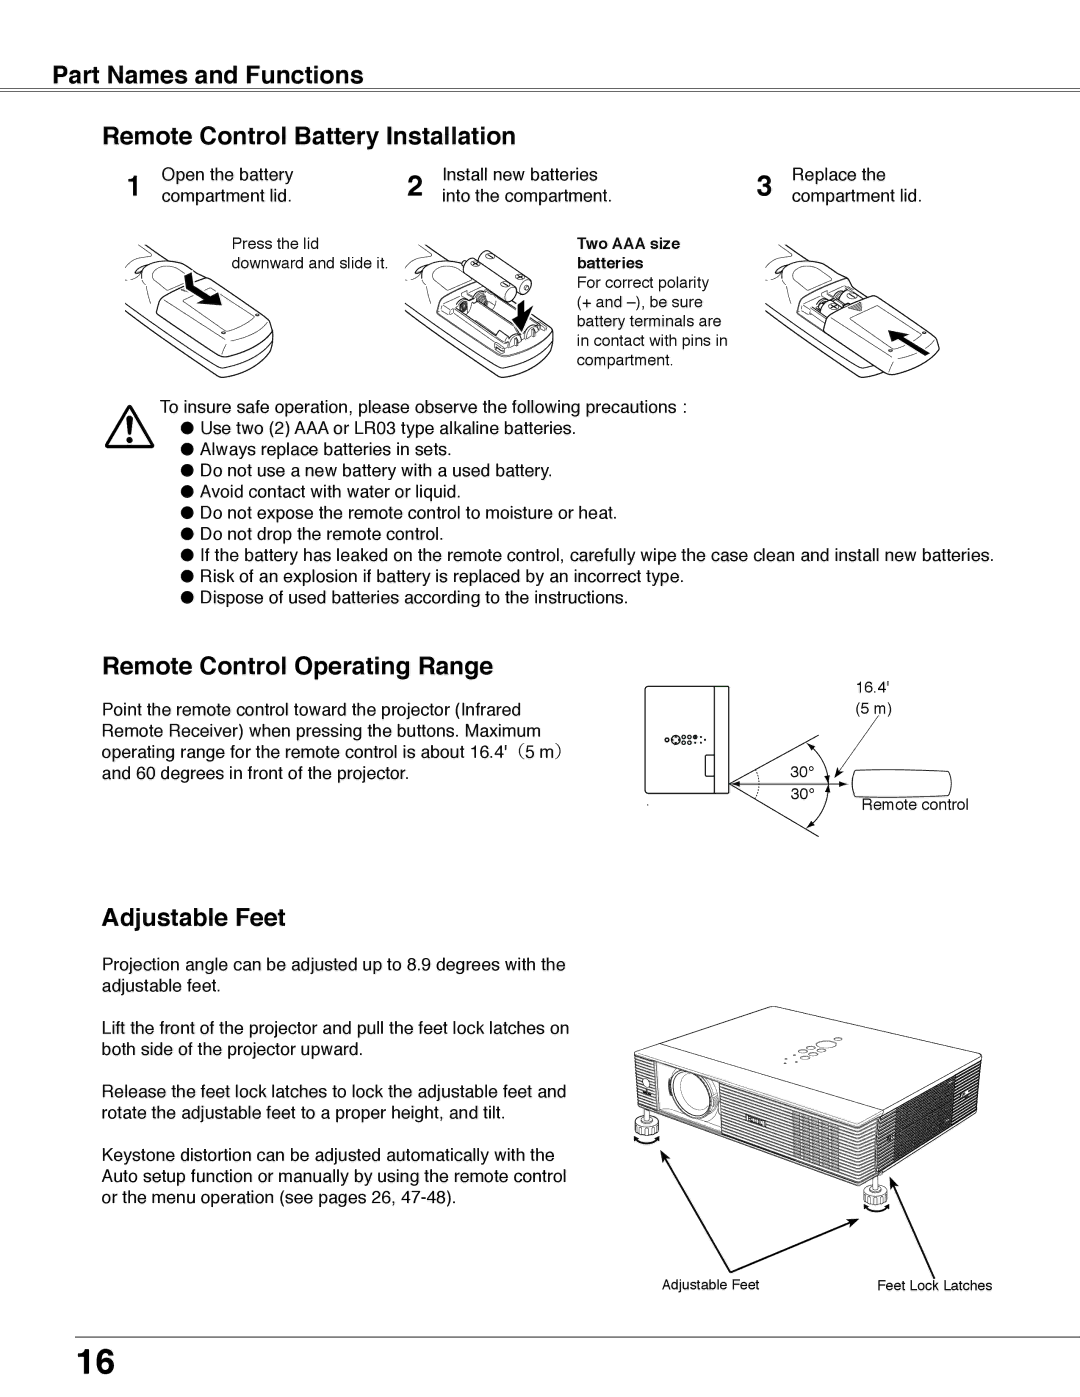
1 | Open the battery | 2 | Install new batteries | 3 | Replace the |
compartment lid. | into the compartment. | compartment lid. | |||
| Press the lid |
| Two AAA size |
|
|
| downward and slide it. |
| batteries |
|
|
|
|
| For correct polarity |
|
|
|
|
| (+ and |
|
|
|
|
| battery terminals are |
|
|
|
|
| in contact with pins in |
|
|
|
|
| compartment. |
|
|
To insure safe operation, please observe the following precautions : ● Use two (2) AAA or LR03 type alkaline batteries.
●Always replace batteries in sets.
●Do not use a new battery with a used battery.
●Avoid contact with water or liquid.
●Do not expose the remote control to moisture or heat.
●Do not drop the remote control.
●If the battery has leaked on the remote control, carefully wipe the case clean and install new batteries.
●Risk of an explosion if battery is replaced by an incorrect type.
●Dispose of used batteries according to the instructions.
Remote Control Operating Range |
|
|
| 16.4' |
Point the remote control toward the projector (Infrared |
|
|
| |
|
|
| (5 m) | |
Remote Receiver) when pressing the buttons. Maximum |
|
|
|
|
operating range for the remote control is about 16.4'(5 m) |
|
|
|
|
and 60 degrees in front of the projector. |
| 30° |
|
|
|
|
|
|
|
|
| 30° |
| Remote control |
|
|
|
|
Adjustable Feet
Projection angle can be adjusted up to 8.9 degrees with the adjustable feet.
Lift the front of the projector and pull the feet lock latches on both side of the projector upward.
Release the feet lock latches to lock the adjustable feet and rotate the adjustable feet to a proper height, and tilt.
Keystone distortion can be adjusted automatically with the Auto setup function or manually by using the remote control or the menu operation (see pages 26,
Adjustable Feet | Feet Lock Latches |
16
