pixels are fixed. The <Position> adjustment moves the image to the correct position.
Select <Position> and adjust the position by using the Up, Down, Right and Left switches.
If vertical bars of distortion appear after finishing the <Position> adjustment, return to <Clock> adjustment and repeat the previously explained adjustment procedure.("Clock" → "Phase" → "Position")
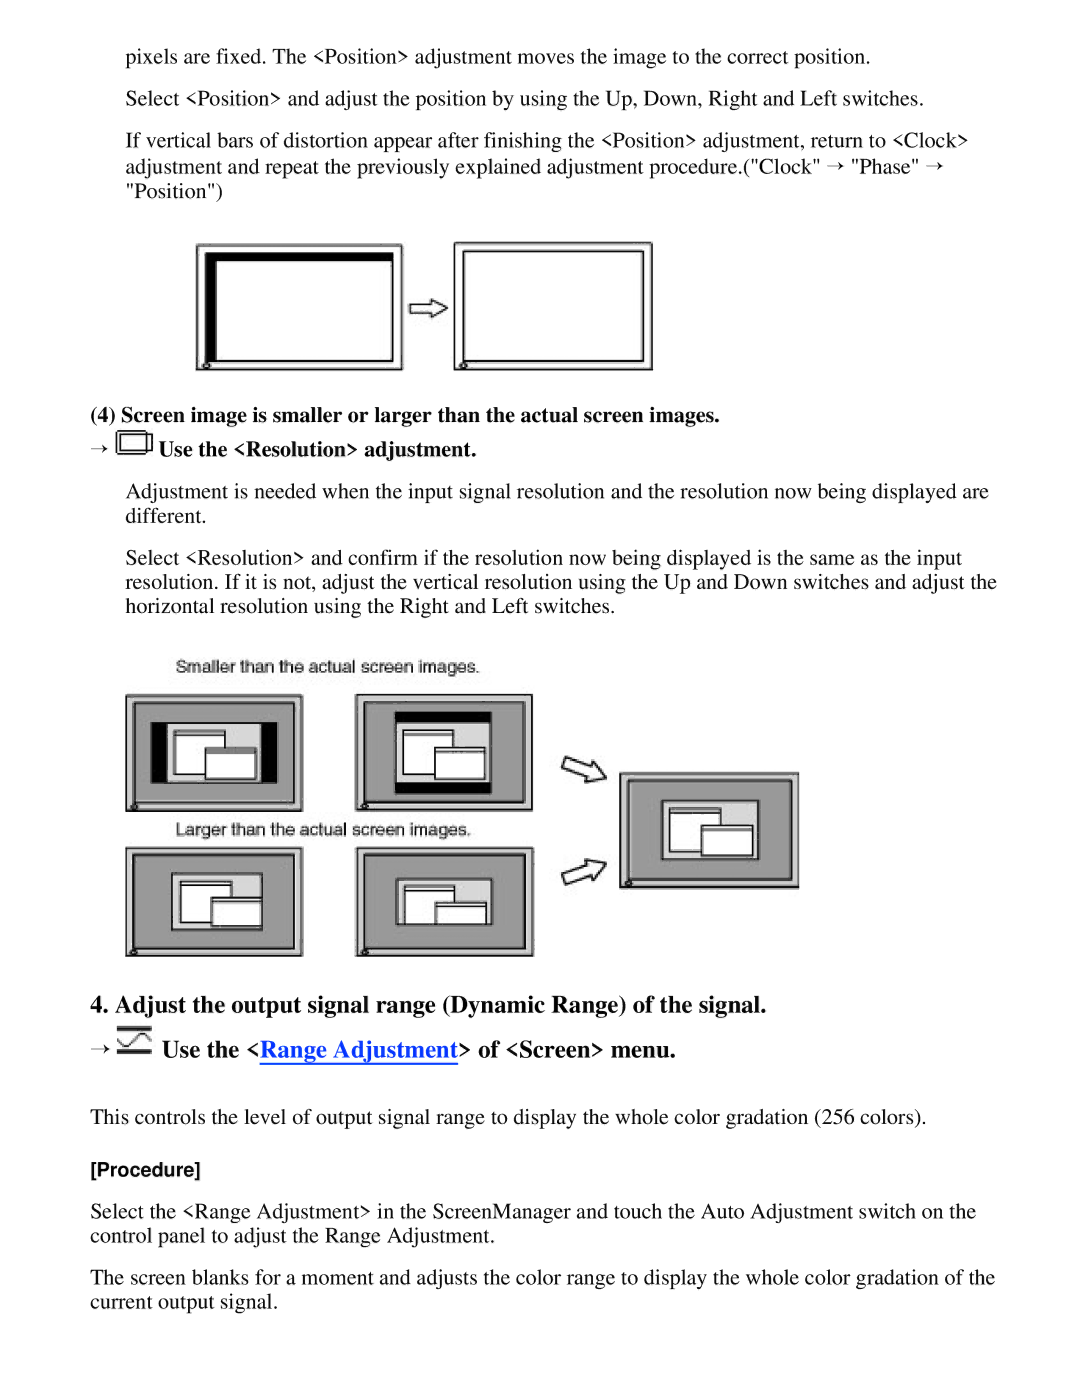
(4) Screen image is smaller or larger than the actual screen images.
→![]() Use the <Resolution> adjustment.
Use the <Resolution> adjustment.
Adjustment is needed when the input signal resolution and the resolution now being displayed are different.
Select <Resolution> and confirm if the resolution now being displayed is the same as the input resolution. If it is not, adjust the vertical resolution using the Up and Down switches and adjust the horizontal resolution using the Right and Left switches.
4. Adjust the output signal range (Dynamic Range) of the signal.
→![]() Use the <Range Adjustment> of <Screen> menu.
Use the <Range Adjustment> of <Screen> menu.
This controls the level of output signal range to display the whole color gradation (256 colors).
[Procedure]
Select the <Range Adjustment> in the ScreenManager and touch the Auto Adjustment switch on the control panel to adjust the Range Adjustment.
The screen blanks for a moment and adjusts the color range to display the whole color gradation of the current output signal.