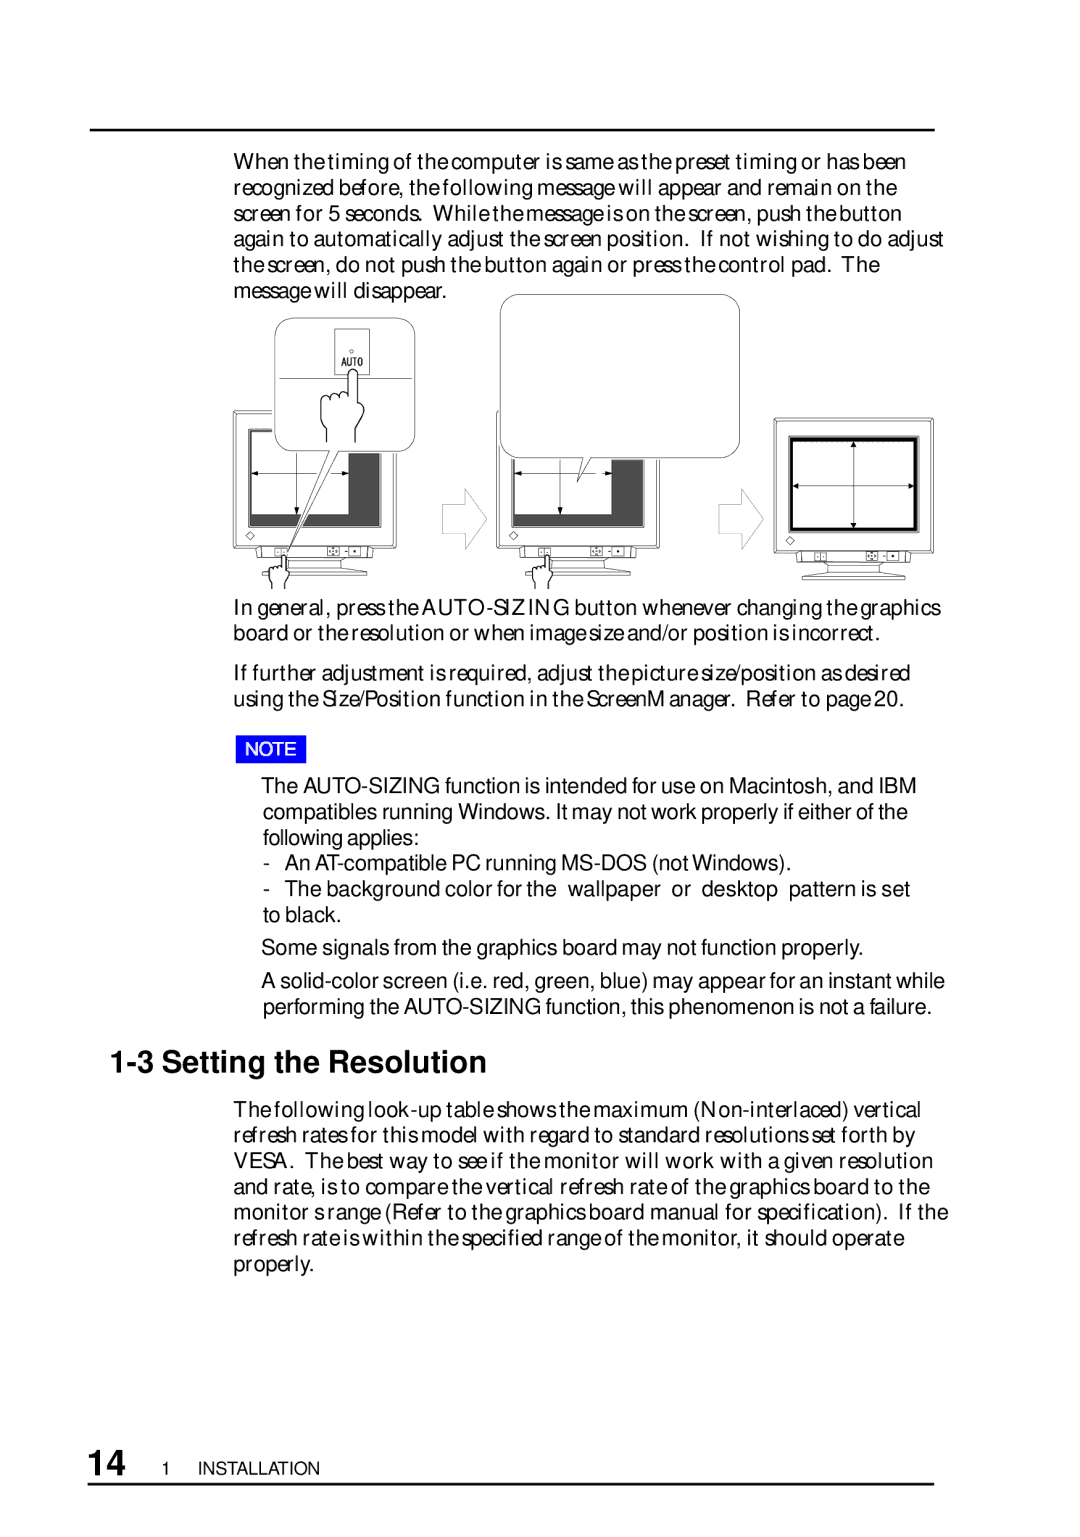
When the timing of the computer is same as the preset timing or has been recognized before, the following message will appear and remain on the screen for 5 seconds. While the message is on the screen, push the button again to automatically adjust the screen position. If not wishing to do adjust the screen, do not push the button again or press the control pad. The message will disappear.
In general, press the AUTO-SIZING button whenever changing the graphics board or the resolution or when image size and/or position is incorrect.
If further adjustment is required, adjust the picture size/position as desired using the Size/Position function in the ScreenManager. Refer to page 20.
•The AUTO-SIZING function is intended for use on Macintosh, and IBM compatibles running Windows. It may not work properly if either of the following applies:
-An AT-compatible PC running MS-DOS (not Windows).
-The background color for the “wallpaper” or “desktop” pattern is set to black.
•Some signals from the graphics board may not function properly.
•A solid-color screen (i.e. red, green, blue) may appear for an instant while performing the AUTO-SIZING function, this phenomenon is not a failure.
1-3 Setting the Resolution
The following look-up table shows the maximum (Non-interlaced) vertical refresh rates for this model with regard to standard resolutions set forth by VESA. The best way to see if the monitor will work with a given resolution and rate, is to compare the vertical refresh rate of the graphics board to the monitor’s range (Refer to the graphics board manual for specification). If the refresh rate is within the specified range of the monitor, it should operate properly.

