Design Spot 575B™
5. LAMP INSTALLATION INSTRUCTIONS
For a proper and safe lamp change, please read this chapter carefully and follow all instructions.
Safety Regulations
•Disconnect the unit’s main power supply.
•Allow the unit to cool for at least 30 minutes before attempting any type of service.
•Before you put the Design Spot 575B™ into operation be sure all covers have been replaced, otherwise you risk damage to the retina and expose to UV radiation!
•Replace the lamp with an approved replacement type. Be sure to follow all the lamp handling procedures included with your new lamp. Never handle the new lamp with your bare hands as the oils from your skin may damage the lamp. Always replace with a lamp that meets the original lamp specification, failure to do so may damage the unit and will void your manufactures warranty.
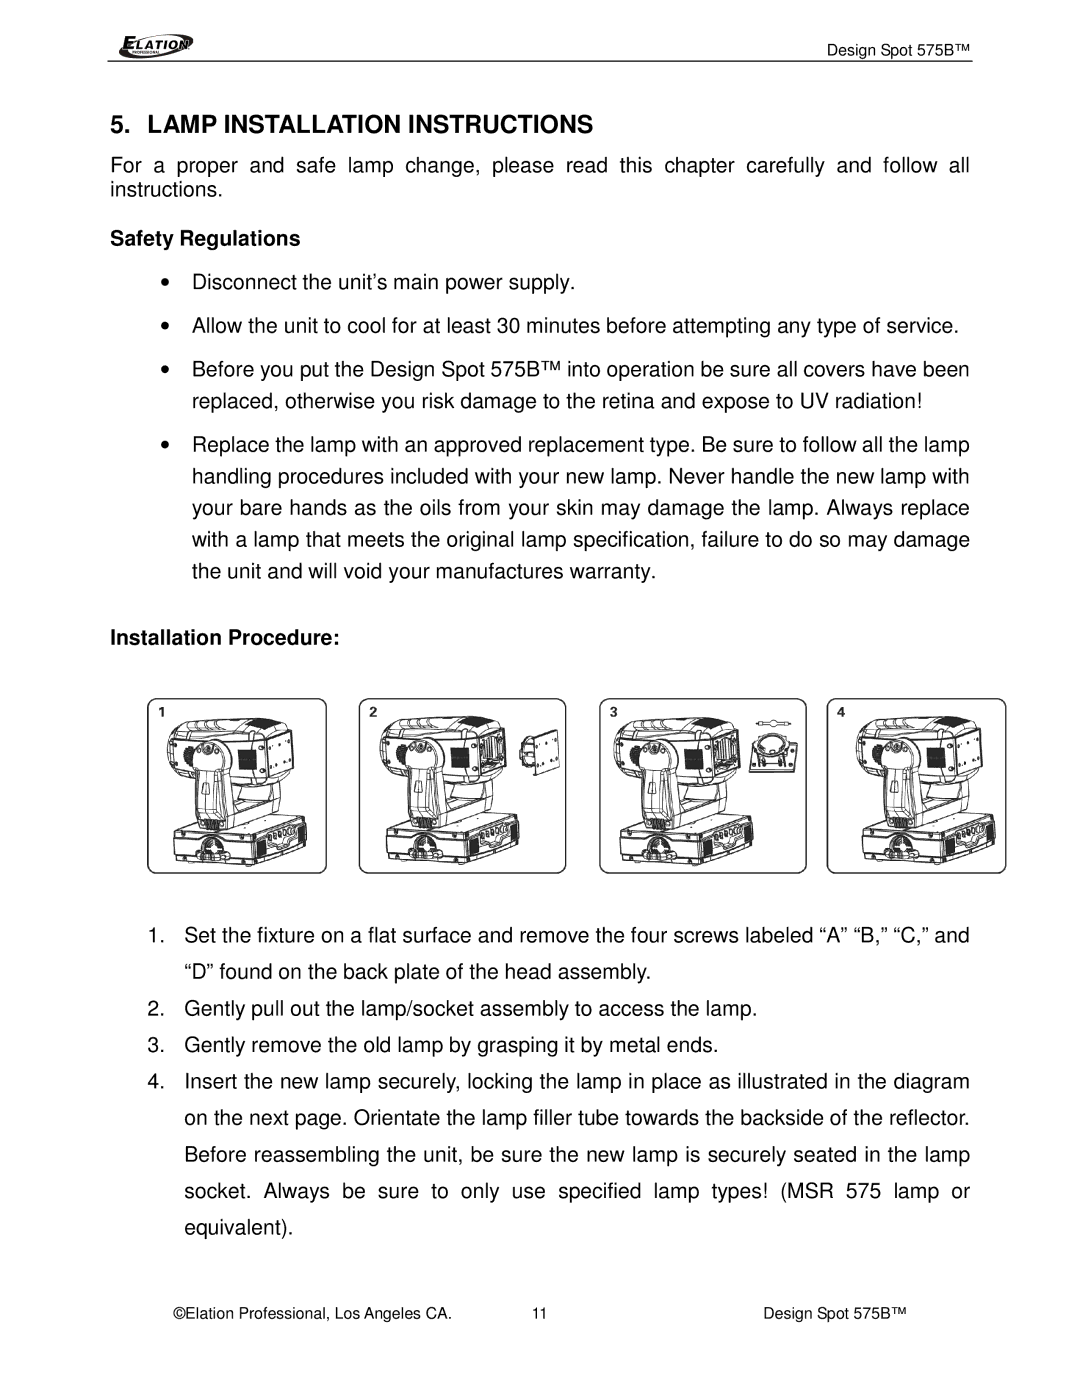
Installation Procedure:
1.Set the fixture on a flat surface and remove the four screws labeled “A” “B,” “C,” and “D” found on the back plate of the head assembly.
2.Gently pull out the lamp/socket assembly to access the lamp.
3.Gently remove the old lamp by grasping it by metal ends.
4.Insert the new lamp securely, locking the lamp in place as illustrated in the diagram on the next page. Orientate the lamp filler tube towards the backside of the reflector. Before reassembling the unit, be sure the new lamp is securely seated in the lamp socket. Always be sure to only use specified lamp types! (MSR 575 lamp or equivalent).
©Elation Professional, Los Angeles CA. | 11 | Design Spot 575B™ |