10. CHECKING THE MAIN OVEN CONTROLS

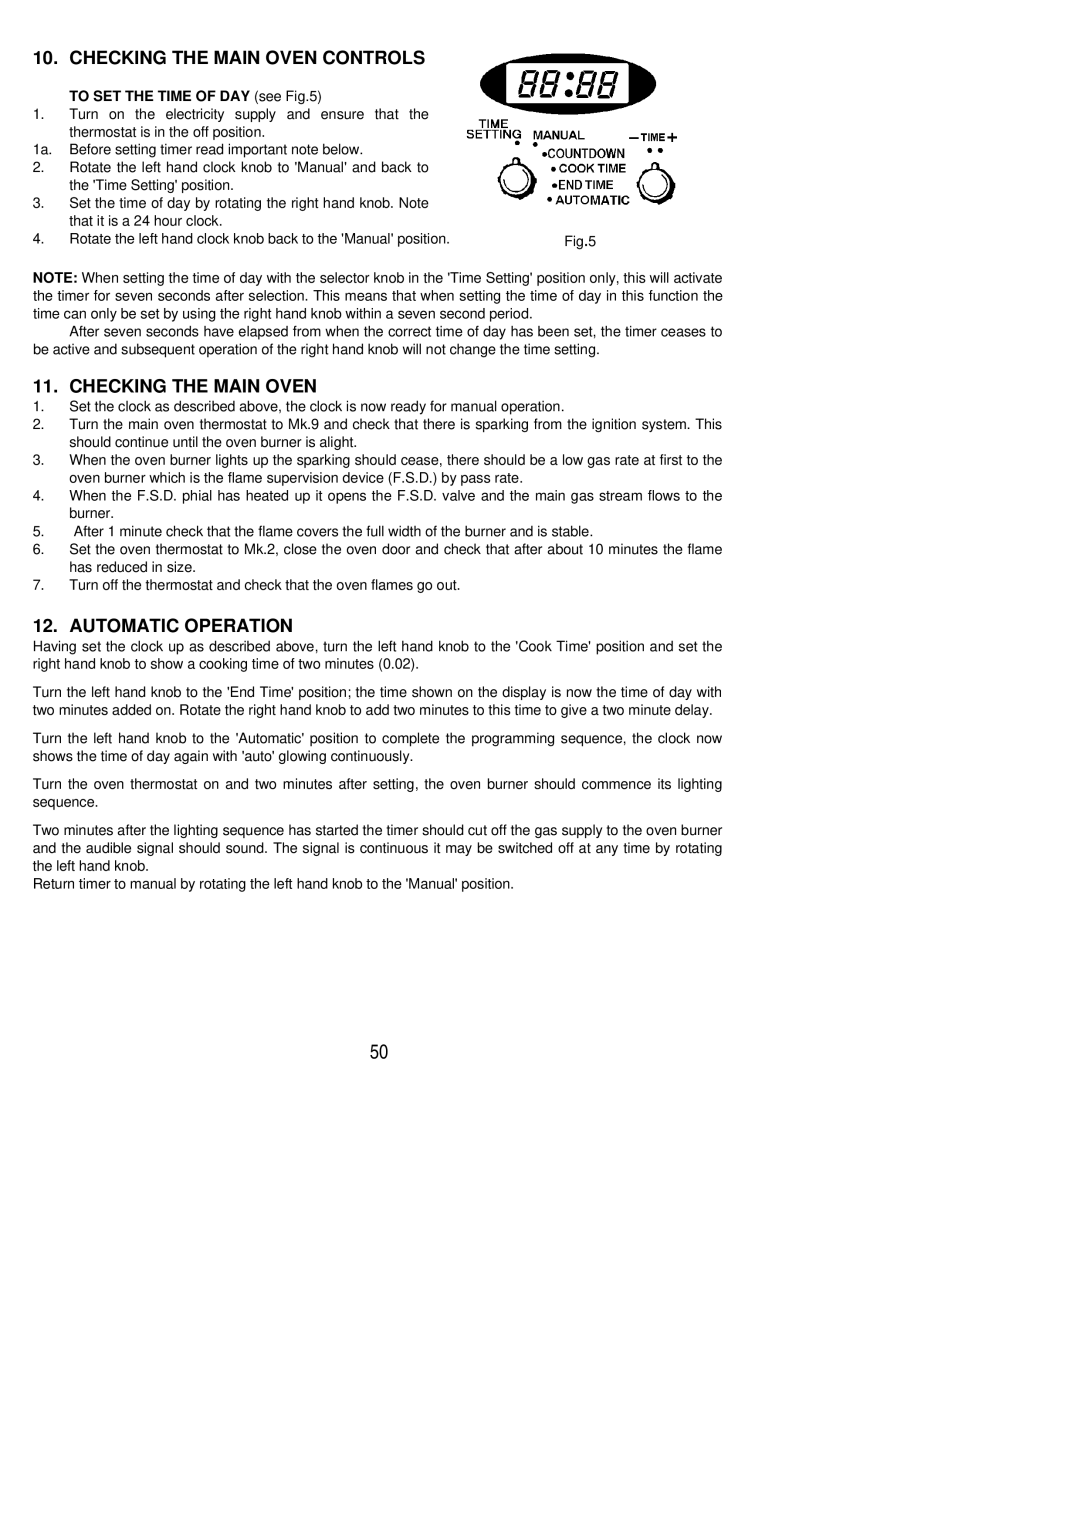
TO SET THE TIME OF DAY (see Fig.5)

1.Turn on the electricity supply and ensure that the

thermostat is in the off position.

1a. Before setting timer read important note below.

2.Rotate the left hand clock knob to 'Manual' and back to the 'Time Setting' position.

3.Set the time of day by rotating the right hand knob. Note that it is a 24 hour clock.

4.

Rotate the left hand clock knob back to the 'Manual' position.

Fig.5

NOTE: When setting the time of day with the selector knob in the 'Time Setting' position only, this will activate the timer for seven seconds after selection. This means that when setting the time of day in this function the time can only be set by using the right hand knob within a seven second period.

After seven seconds have elapsed from when the correct time of day has been set, the timer ceases to be active and subsequent operation of the right hand knob will not change the time setting.

11. CHECKING THE MAIN OVEN

1.Set the clock as described above, the clock is now ready for manual operation.

2.Turn the main oven thermostat to Mk.9 and check that there is sparking from the ignition system. This should continue until the oven burner is alight.

3.When the oven burner lights up the sparking should cease, there should be a low gas rate at first to the oven burner which is the flame supervision device (F.S.D.) by pass rate.

4.When the F.S.D. phial has heated up it opens the F.S.D. valve and the main gas stream flows to the burner.

5.After 1 minute check that the flame covers the full width of the burner and is stable.

6.Set the oven thermostat to Mk.2, close the oven door and check that after about 10 minutes the flame has reduced in size.

7.Turn off the thermostat and check that the oven flames go out.

12. AUTOMATIC OPERATION

Having set the clock up as described above, turn the left hand knob to the 'Cook Time' position and set the right hand knob to show a cooking time of two minutes (0.02).

Turn the left hand knob to the 'End Time' position; the time shown on the display is now the time of day with two minutes added on. Rotate the right hand knob to add two minutes to this time to give a two minute delay.

Turn the left hand knob to the 'Automatic' position to complete the programming sequence, the clock now shows the time of day again with 'auto' glowing continuously.

Turn the oven thermostat on and two minutes after setting, the oven burner should commence its lighting sequence.

Two minutes after the lighting sequence has started the timer should cut off the gas supply to the oven burner and the audible signal should sound. The signal is continuous it may be switched off at any time by rotating the left hand knob.

Return timer to manual by rotating the left hand knob to the 'Manual' position.

50

Page 50
Image 50
Electrolux RG60SS, RG60DL installation instructions Checking the Main Oven Controls, Automatic Operation

RG60SS, RG60DL specifications

The Electrolux RG60DL and RG60SS are two standout models in the company’s extensive lineup of built-in gas cooktops. Designed with both performance and aesthetics in mind, these cooktops cater to the needs of diverse home cooks, from novice to professional.

One of the main features of the RG60DL and RG60SS is their robust Construction. Both models feature a sleek, stainless-steel finish that not only enhances the kitchen's aesthetic but also provides durability and easy maintenance. The surface is resistant to scratches and stains, ensuring a clean look over time.

Both cooktops are equipped with high-efficiency burners, which are a significant advantage for cooking enthusiasts. The RG60DL model features four burners, including a powerful wok burner that delivers high heat for stir-frying and boiling, while the RG60SS has an additional burner, making it a five-burner option. This variety allows users to prepare multiple dishes simultaneously, greatly improving cooking efficiency.

In terms of technology, the flame control system is a highlight of these models. They are equipped with high-capacity burners that provide precise flame control, allowing for a wide range of cooking techniques, from simmering to searing. This technology ensures that every meal is cooked to perfection, giving users the flexibility they need in the kitchen.

Safety is a priority with Electrolux cooktops, and both the RG60DL and RG60SS come with integrated flame failure safety devices. This feature automatically shuts off the gas supply if the flame goes out, protecting against potential hazards and giving users peace of mind.

Another notable characteristic is the ergonomic design of the control knobs, which are strategically placed for easy accessibility. These knobs allow for precise temperature adjustments, making cooking a smoother and more enjoyable experience.

Cleaning is made easy with removable enamel trivets that support the cookware during use. These trivets can be lifted and cleaned effortlessly, ensuring that the cooktop remains in pristine condition.

In conclusion, the Electrolux RG60DL and RG60SS cooktops are engineered for both functionality and style. With their durable construction, high-efficiency burners, advanced safety features, and user-friendly design, they stand out as excellent choices for those looking to enhance their culinary experience. Whether you're simmering sauces or preparing a family feast, these cooktops are up to the challenge.