INSTALLATION INSTRUCTION

PRESSURE TESTING

1 The rapid injector is used as a pressure test point.

2.Connect the pressure gauge to the Rapid injector.

3.Check the supply pressure by turning the Rapid burner on and one other hotplate burner full on and light the appropriate burner. The pressure should be either:-

(i)For Natural Gas 20mbar

(ii)For LP.Gas. The pressure must be set to 28 mbar for use on butane or 37 mbar for use on propane.

4.Turn off the taps, disconnect the pressure gauge.

5.Check operation of each hotplate burner.

CHECKING THE GRILL

Place the grill pan containing the grid into the grill compartment. Open the grill door and turn the grill control to full on. Visually check that both elements are heating up.

CHECKING THE HOTPLATE

Fit the burner crowns and caps ensuring that they are correctly seated. Fit the pan supports. Check each of the hotplate burners in turn by turning the hotplate tap to its full on position and pushing the ignition button. As soon as the burners are lit the button can be released.

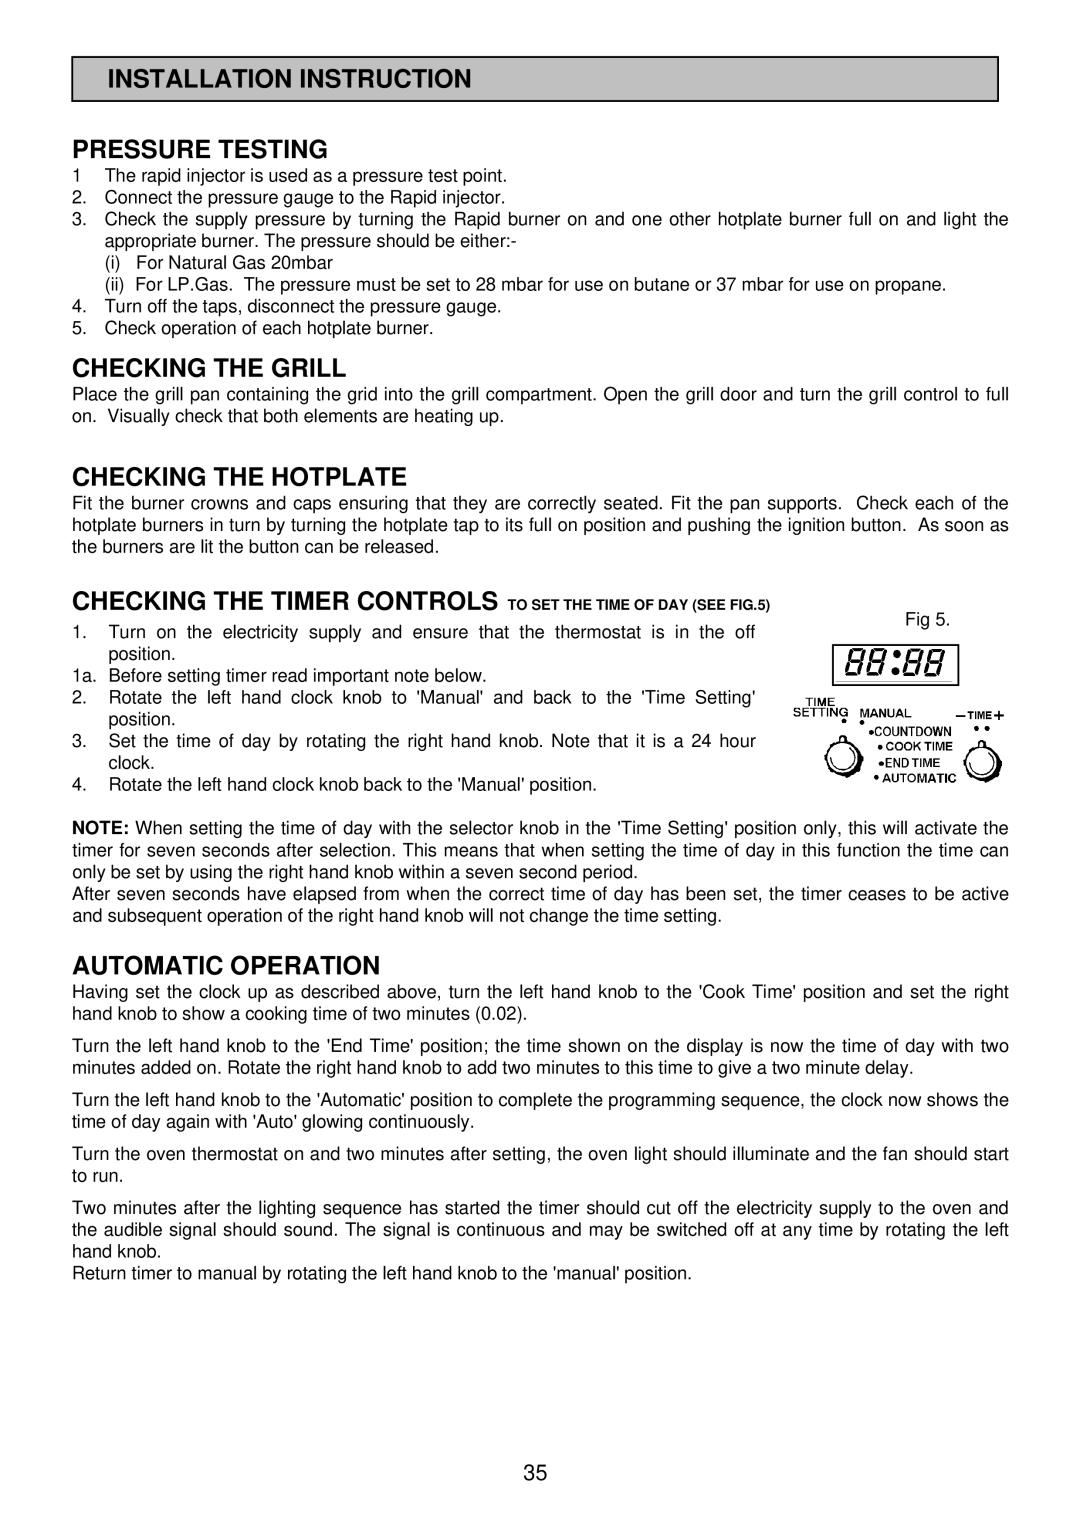
CHECKING THE TIMER CONTROLS TO SET THE TIME OF DAY (SEE FIG.5)

1. Turn on the electricity supply and ensure that the thermostat is in the off position.

1a. Before setting timer read important note below.

2. Rotate the left hand clock knob to 'Manual' and back to the 'Time Setting' position.

Fig 5.

3.Set the time of day by rotating the right hand knob. Note that it is a 24 hour clock.

4.Rotate the left hand clock knob back to the 'Manual' position.

NOTE: When setting the time of day with the selector knob in the 'Time Setting' position only, this will activate the timer for seven seconds after selection. This means that when setting the time of day in this function the time can only be set by using the right hand knob within a seven second period.

After seven seconds have elapsed from when the correct time of day has been set, the timer ceases to be active and subsequent operation of the right hand knob will not change the time setting.

AUTOMATIC OPERATION

Having set the clock up as described above, turn the left hand knob to the 'Cook Time' position and set the right hand knob to show a cooking time of two minutes (0.02).

Turn the left hand knob to the 'End Time' position; the time shown on the display is now the time of day with two minutes added on. Rotate the right hand knob to add two minutes to this time to give a two minute delay.

Turn the left hand knob to the 'Automatic' position to complete the programming sequence, the clock now shows the time of day again with 'Auto' glowing continuously.

Turn the oven thermostat on and two minutes after setting, the oven light should illuminate and the fan should start to run.

Two minutes after the lighting sequence has started the timer should cut off the electricity supply to the oven and the audible signal should sound. The signal is continuous and may be switched off at any time by rotating the left hand knob.

Return timer to manual by rotating the left hand knob to the 'manual' position.

35

Page 35
Image 35
Electrolux SIM 533 Installation Instruction Pressure Testing, Checking the Grill, Checking the Hotplate

SIM 533 specifications

The Electrolux SIM 533 is an innovative induction cooktop that revolutionizes the cooking experience with its blend of advanced technology and user-friendly design. This state-of-the-art appliance is engineered to meet the needs of modern kitchens, making it an ideal choice for both amateur cooks and culinary experts alike.

One of the standout features of the Electrolux SIM 533 is its induction cooking technology. Unlike traditional gas or electric stoves, induction cooking offers rapid heating and precise temperature control. The electromagnetic coils beneath the ceramic glass surface generate heat directly in the cookware, resulting in faster cooking times while using less energy. This efficiency not only saves on utility bills but also minimizes heat loss and provides a safer cooking environment.

The SIM 533 comes equipped with multiple cooking zones, allowing users to prepare multiple dishes simultaneously. Each zone is equipped with sensors that detect the size of the cookware, activating only the necessary elements to optimize energy use. Additionally, the cooktop features a smart bridging function that enables two zones to combine into one, accommodating larger pots and pans for versatile cooking options.

Another notable characteristic of this model is its intuitive touch control panel. The user interface is designed for ease of use, featuring clear displays and responsive touchkeys that make adjusting settings a breeze. Users can quickly adjust the temperature, set timers, and switch between cooking modes with just a few taps.

Safety is also a top priority in the design of the Electrolux SIM 533. The appliance includes a child lock feature to prevent accidental activation, as well as an automatic shut-off function that kicks in when the cooktop detects an empty or incorrectly placed pot. This thoughtful approach reduces the risk of fire hazards and enhances peace of mind during the cooking process.

Moreover, cleaning up after cooking is effortless due to the smooth ceramic glass surface, which resists stains and can be wiped down easily. The sleek design complements any kitchen aesthetic, adding a touch of elegance to cooking spaces.

In conclusion, the Electrolux SIM 533 induction cooktop stands out for its blend of modern technology, safety features, and user-friendly design. Whether you’re simmering sauces or searing meats, this appliance provides the precision and efficiency that today’s cooks demand. It's not just a cooktop; it's an essential kitchen companion that elevates the culinary experience.