GB
5 | 6 |
4
Before fitting the unit make sure that the stand is perfectly positioned on the floor, completely opened, and that the support plate is horizontal.
TAKE CARE, AS THE UNIT IS VERY HEAVY AND
COULD CAUSE THE STAND TO CLOSE.
7
MOUNTING THE BIKE ON THE STAND
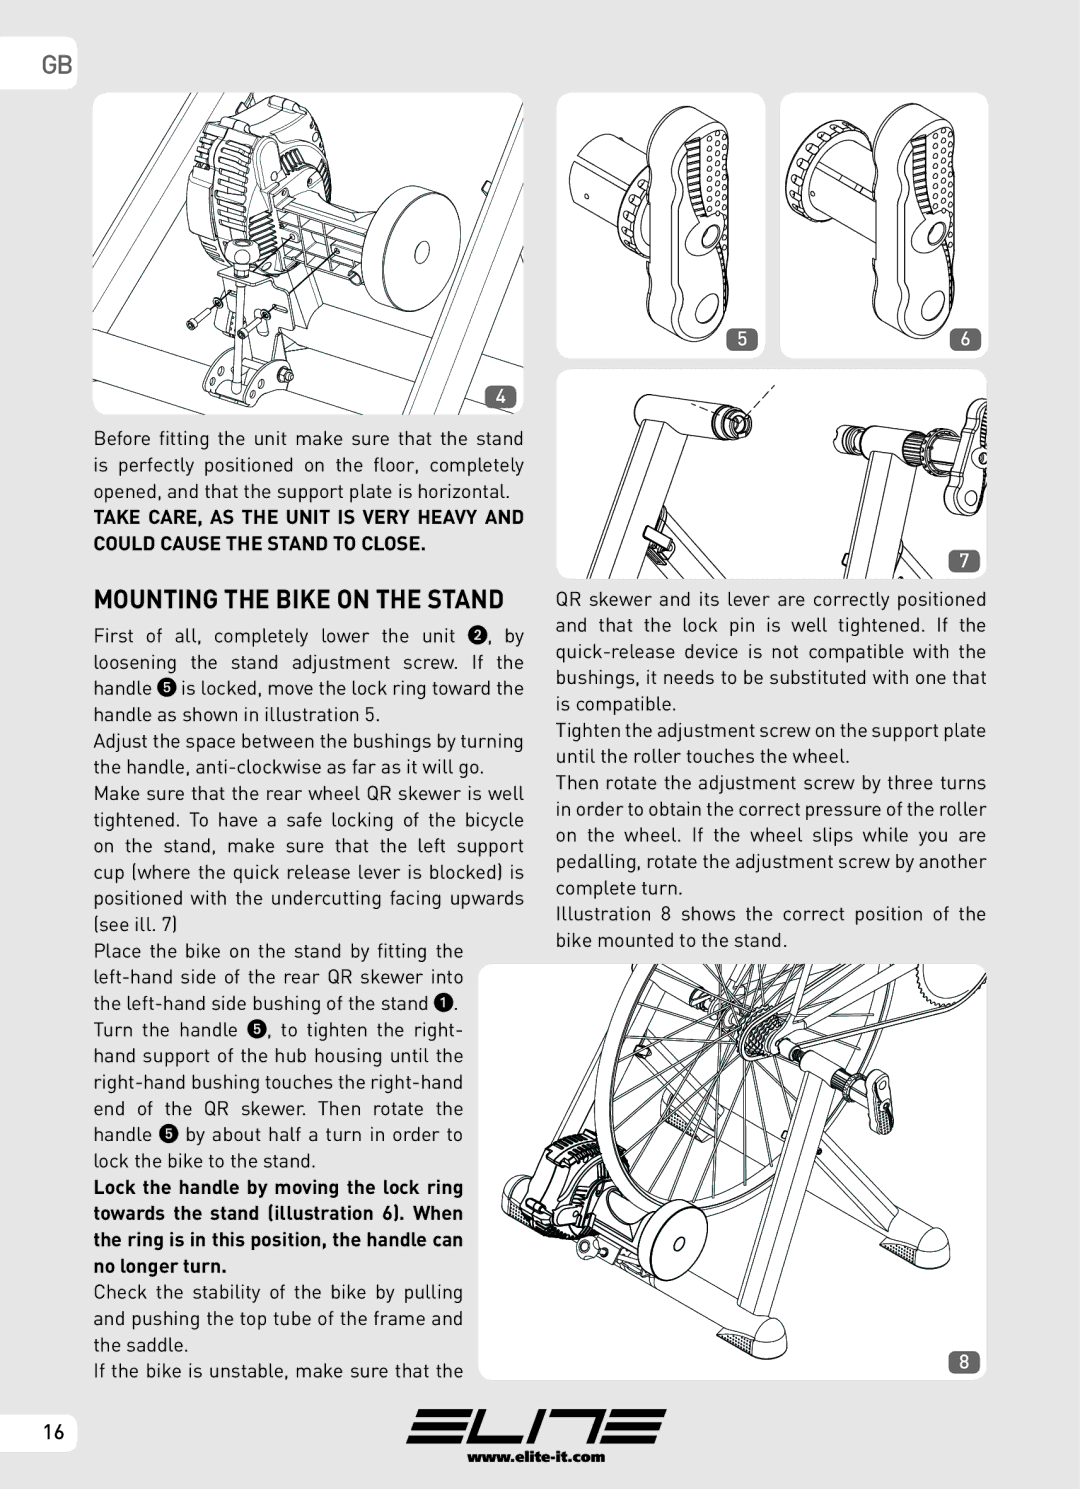
First of all, completely lower the unit 2, by loosening the stand adjustment screw. If the handle 5 is locked, move the lock ring toward the handle as shown in illustration 5.
Adjust the space between the bushings by turning the handle,
Place the bike on the stand by fitting the
Lock the handle by moving the lock ring towards the stand (illustration 6). When the ring is in this position, the handle can no longer turn.
Check the stability of the bike by pulling and pushing the top tube of the frame and the saddle.
If the bike is unstable, make sure that the
QR skewer and its lever are correctly positioned and that the lock pin is well tightened. If the
Tighten the adjustment screw on the support plate until the roller touches the wheel.
Then rotate the adjustment screw by three turns in order to obtain the correct pressure of the roller on the wheel. If the wheel slips while you are pedalling, rotate the adjustment screw by another complete turn.
Illustration 8 shows the correct position of the bike mounted to the stand.
8
16