
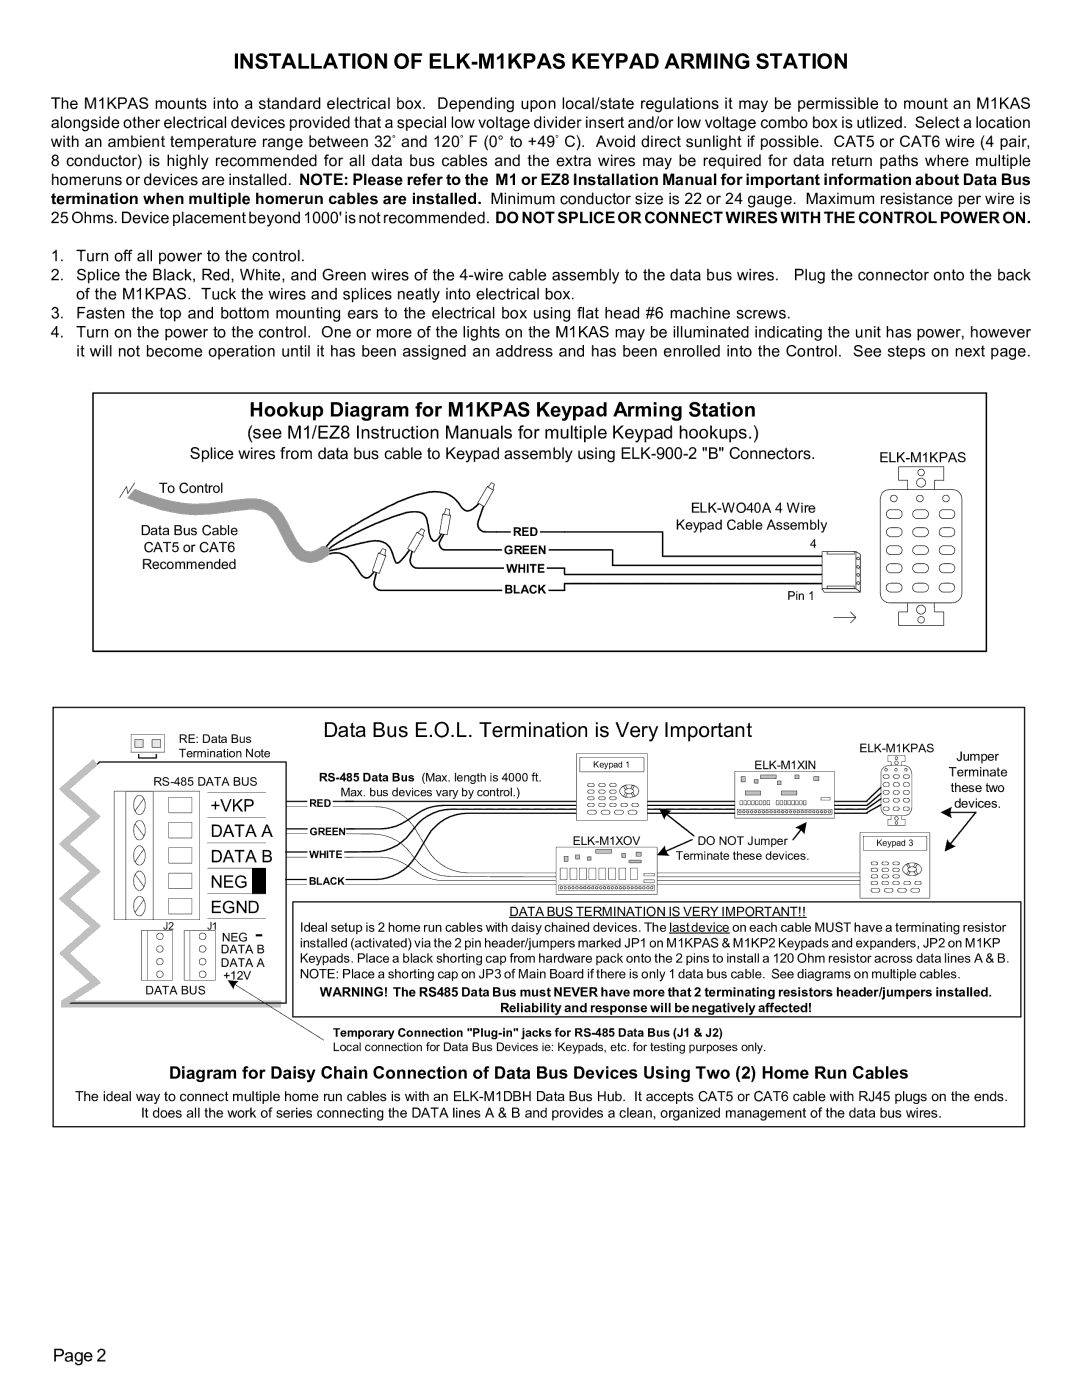
M1KPAS specifications
The Elk M1KPAS is a highly regarded security system designed for residential and commercial applications. It stands out for its advanced features, user-friendly interface, and robust technology. This comprehensive system provides extensive security solutions, making it an ideal choice for those seeking reliable protection.One of the key features of the Elk M1KPAS is its versatility. The system supports a wide range of configurations, accommodating various sensor types and alarm devices. It works seamlessly with both wired and wireless sensors, allowing users to customize their security setup according to their specific needs. This flexibility makes the M1KPAS suitable for buildings of all sizes, from small homes to large office complexes.
The M1KPAS is equipped with advanced communication technologies, enabling users to monitor and control their security system from anywhere. With built-in Ethernet connectivity and optional cellular modules, the system allows for remote access through smartphone apps and web interfaces. This means users can receive alerts, check system status, and control features even when they are away from their property.
Another significant characteristic of the Elk M1KPAS is its integration capabilities. The system can be easily integrated with various home automation devices, such as lighting, climate control, and surveillance cameras. This synergy provides users with a comprehensive smart home experience, allowing them to manage their security along with other home systems through a single interface.
The Elk M1KPAS also emphasizes user accessibility. The system comes with a user-friendly keypad that provides straightforward navigation for arming, disarming, and configuring user settings. Additionally, it includes voice prompts to guide users through programming, ensuring that even those with limited technical knowledge can operate the system effectively.
Moreover, the M1KPAS is designed with scalability in mind. As security needs evolve, users can expand their system easily by adding more devices or sensors. This capability ensures that the system can grow alongside the user’s requirements without necessitating a complete overhaul.
In summary, the Elk M1KPAS is a versatile and technologically advanced security system that offers a wealth of features and integration capabilities. With its user-friendly interface, remote access options, and scalability, it provides a comprehensive solution for maintaining safety and security. Whether for home or business use, the M1KPAS stands out as an excellent choice for those serious about protecting their property.