Considerations Prior to Installation
Considerations Prior to Installation
When installing the switch, note the following:
•Before starting the installation procedure, notify the network administrator of the installation.
•Follow the installation procedures in the order as presented in this guide.
•Do not connect the switch to the network until you have established the correct IP address.
Required Tools
A Phillips screwdriver is required to install the switch into a rack.
Unpacking the Switch
Unpack the switch as follows:
1.Open the box and remove the packing material protecting the switch.
2.Verify that the contents of the carton contains the items listed in Table 3‐1.
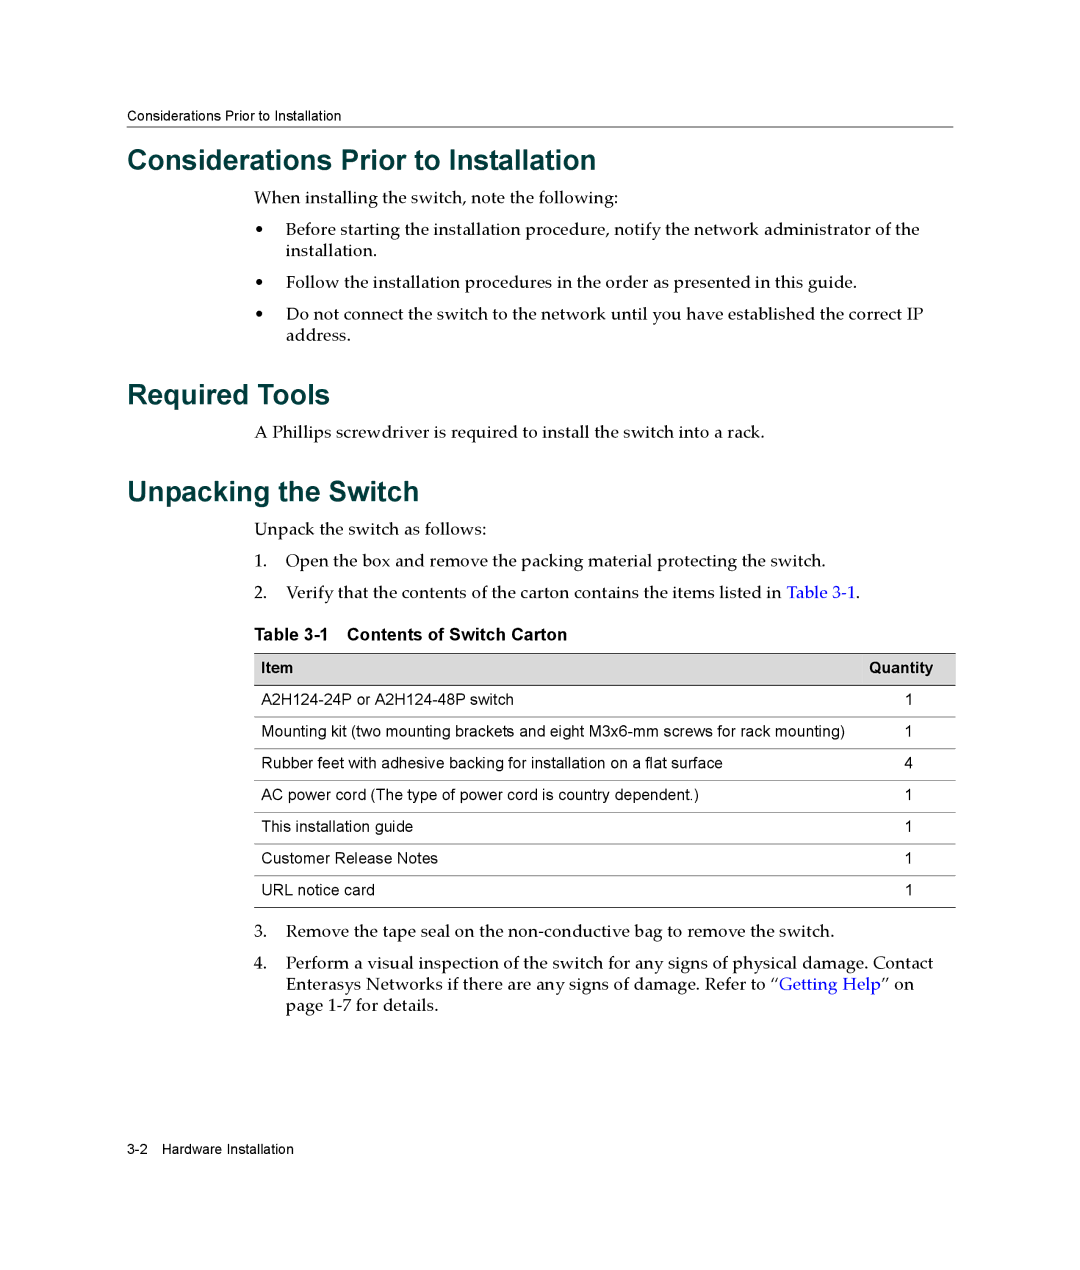
Table 3-1 Contents of Switch Carton
Item | Quantity |
|
|
1 | |
|
|
Mounting kit (two mounting brackets and eight | 1 |
|
|
Rubber feet with adhesive backing for installation on a flat surface | 4 |
|
|
AC power cord (The type of power cord is country dependent.) | 1 |
|
|
This installation guide | 1 |
|
|
Customer Release Notes | 1 |
|
|
URL notice card | 1 |
|
|
3.Remove the tape seal on the non‐conductive bag to remove the switch.
4.Perform a visual inspection of the switch for any signs of physical damage. Contact Enterasys Networks if there are any signs of damage. Refer to “Getting Help” on page 1‐7 for details.