Rack Mounting the Switch
Rack Mounting the Switch
To install the switch in a 19‐inch rack, you need:
•Two rackmount brackets and mounting screws (rackmount kit) shipped with the switch.
•Four user‐supplied screws to attach the switch to a standard 19‐inch rack.
Guidelines for Rackmount Installation
The installation site must be within reach of the network cabling and meet the requirements listed below:
•Appropriate grounded power receptacles must be located within 152 cm (5 ft) of the location.
•A temperature of between 0°C (32°F) and 40°C (104°F) must be maintained at the installation site with fluctuations of less than 10°C (18°F) per hour.
Note: To ensure proper ventilation and prevent overheating, leave a minimum clearance space of 5.1 cm (2.0 in.) at the left, right, and rear of the switch.
Warning: Before
Advertencia: Antes de montar el equipo en el rack, asegurarse que el rack puede soportar su peso sin comprometer su propia estabilidad, de otra forma, daño personal o del equipo puede ocurrir.
Warnhinweis: Überzeugen Sie sich vor dem Einbau des Gerätes in das Rack von dessen Stabilität, ansonsten könnten Personenschäden oder Schäden am Gerät die Folge sein.
Attaching Brackets and Installing in Rack
Proceed as follows to install the switch into a 19‐inch rack:
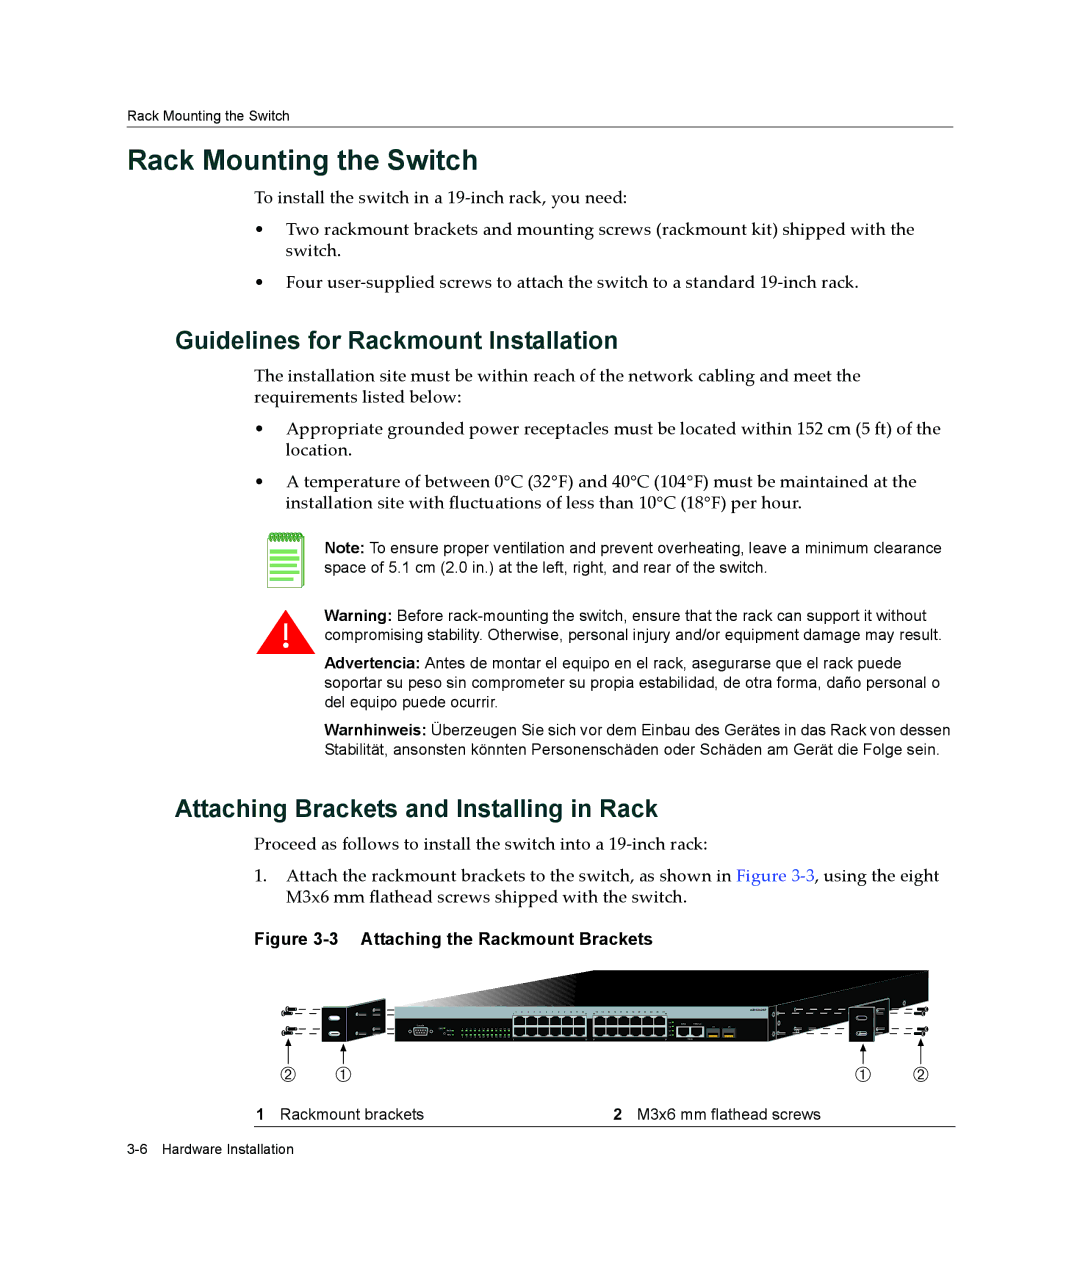
1.Attach the rackmount brackets to the switch, as shown in Figure 3‐3, using the eight M3x6 mm flathead screws shipped with the switch.
Figure 3-3 Attaching the Rackmount Brackets
|
|
|
|
|
|
|
|
|
|
|
| 1 | 1 | 2 | 3 | 4 | 5 | 6 | 7 | 8 | 9 | 10 | 11 | 12 | 11 | 13 13 | 14 | 15 | 16 | 17 | 18 | 19 | 20 | 21 | 22 | 23 | 24 23 |
|
|
|
Console |
|
|
|
|
|
|
|
|
|
|
|
|
|
|
|
|
|
|
|
|
|
|
|
|
|
|
|
|
|
|
|
|
|
|
|
| 25 | 25/Up | 26/Down |
|
|
|
|
|
|
|
|
|
|
|
|
|
|
|
|
|
|
|
|
|
|
|
|
|
|
|
|
|
|
|
|
|
|
|
|
| 26 |
| 27 | 28 | |
CPU | 1 | 3 | 5 | 7 | 9 | 11 | 13 | 15 | 17 | 19 | 21 | 23 |
|
|
|
|
|
|
|
|
|
|
|
|
|
|
|
|
|
|
|
|
|
|
|
|
|
|
|
|
MGR |
|
|
|
|
|
|
|
|
|
|
|
|
|
|
|
|
|
|
|
|
|
|
|
|
|
|
|
|
|
|
|
|
|
|
|
| 27 |
|
|
|
RPS | 2 | 4 | 6 | 8 | 10 | 12 | 14 | 16 | 18 | 20 | 22 | 24 |
|
|
|
|
|
|
|
|
|
|
|
|
|
|
|
|
|
|
|
|
|
|
|
| 28 |
|
|
|
|
|
|
|
|
|
|
|
|
|
|
| 2 |
|
|
|
|
|
|
|
|
|
|
|
| 12 | 14 |
|
|
|
|
|
|
|
|
|
| 24 |
| Stack |
|
|
|
|
|
|
|
|
|
|
|
|
|
|
|
Á À | À | Á | ||||
1 Rackmount brackets | 2 M3x6 mm flathead screws |
|
| |||