Model 8/10 PLUS Operation and Configuration
Model 8/10 PLUS Switcher Installation Guide
The recommended installation procedure for the Model 8 PLUS and Model 10 PLUS Switchers is:
1.Prior to installing the switcher (because it requires opening the case) do the procedure "Changing the Baud Rate" on page
2.If the switcher is to be rack mounted, install it in the rack using the procedure "Rack Mounting the Switcher" on page
3.Connect switcher input and output cables using the diagram on the facing page as a general guide (also see "Connecting the Inputs" below).
4.Set the Output Select DIP Switches using the procedure "Output Select DIP Switch Setting" on page
5.If the switcher
6.If the Extron
7.If the Extron
8.If a third party remote control device is to be used, connect it to the switcher using the information on page
9.Upon completion of switcher installation, use "Model 8/10 Switcher Operation" on page
10.If
_ If a projector is connected to the RGB output and picture sizing, rolling, or other forms of distortion occur for an instant after the input is switched, the Triple Action SwitchingTM adjustment on page
Connecting the Inputs
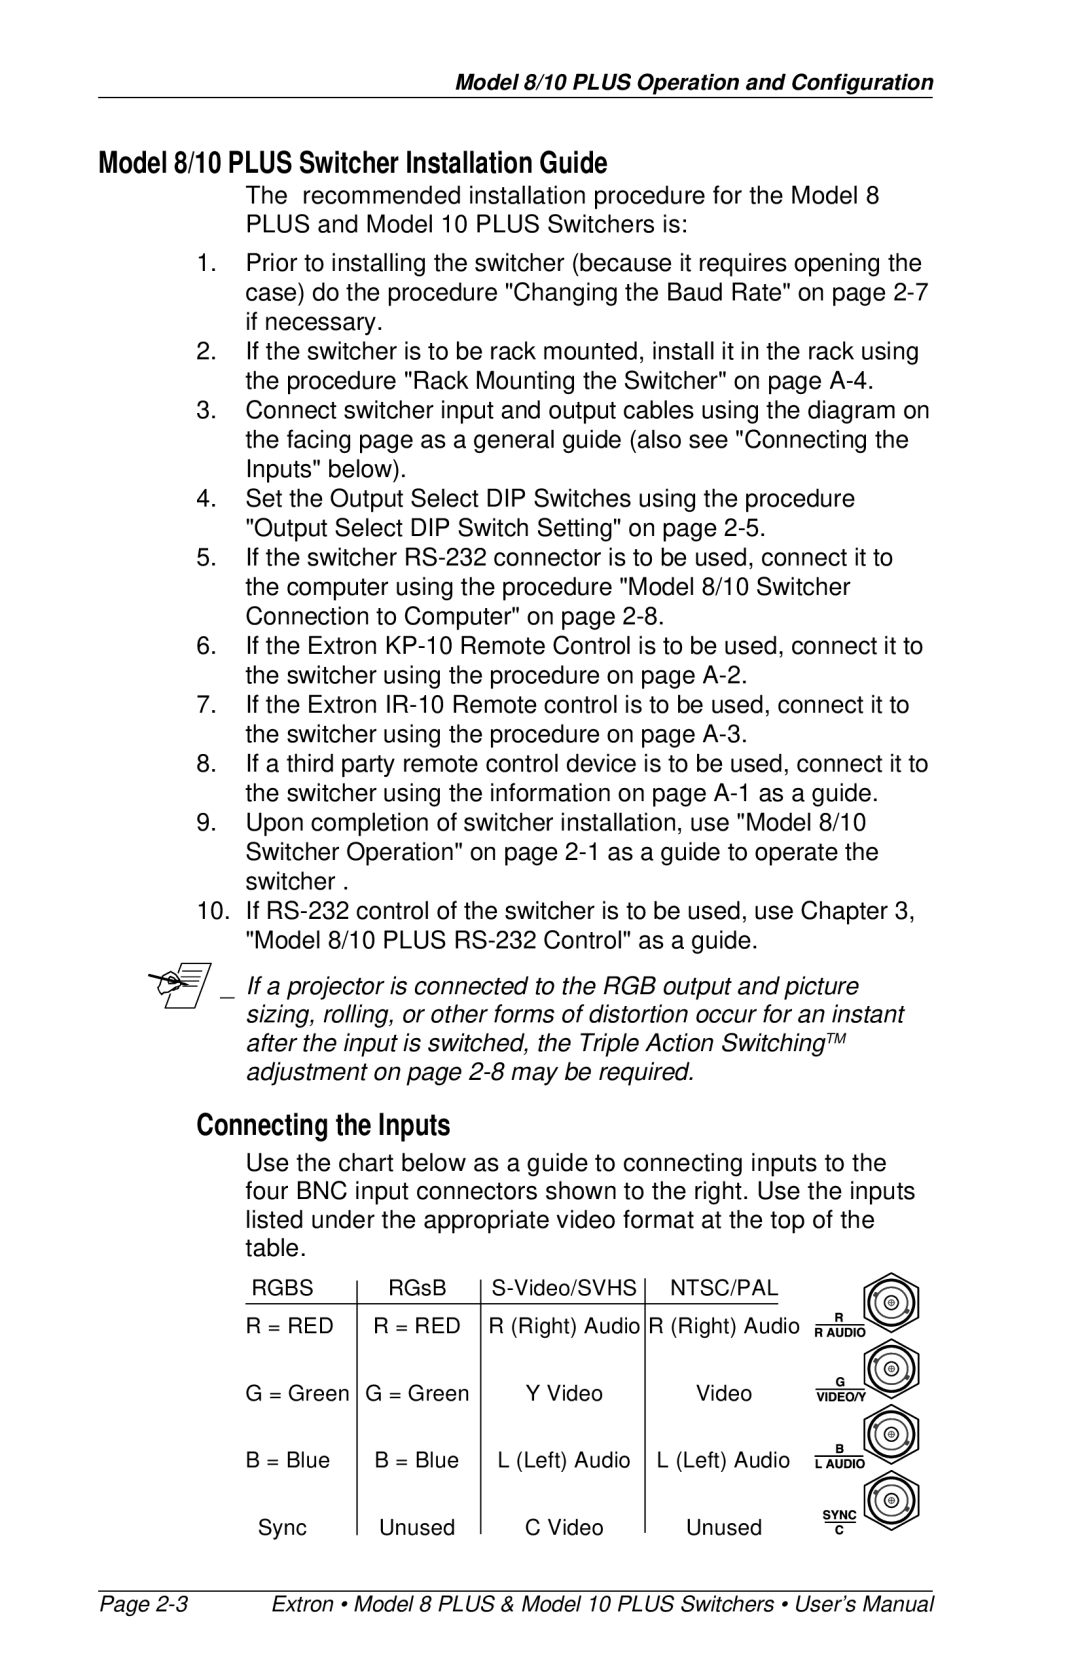
Use the chart below as a guide to connecting inputs to the four BNC input connectors shown to the right. Use the inputs listed under the appropriate video format at the top of the table.
RGBS | RGsB |
| |
R = RED | R = RED | R (Right) Audio R (Right) Audio | |
G = Green G = Green
Y Video
Video
B = Blue
B = Blue | L (Left) Audio L (Left) Audio |
Sync
Unused
C Video
Unused
Page | Extron • Model 8 PLUS & Model 10 PLUS Switchers • User’s Manual |