Installation, cont’d
Routing the AAP Cables
The AAP cables must have freedom of movement to permit opening and closing the surface mount enclosure. At the same time, they need to be restrained to prevent their rubbing against the edges of the enclosure cable access hole in the underside of the surface mount enclosure. Rubbing against the cable access hole edges can damage the cables. Route and secure the AAP cables as follows:
1. Open the top panel to extend the AAP cables to their |
maximum pull. |
Bezels
The HSA 822 ships with
Bezel
To change to a different color
2. Experiment with AAP cable positioning to ensure that the |
cables do not rub against the edges of the AAP cable hole |
and to ensure that the cable pull does not restrict the |
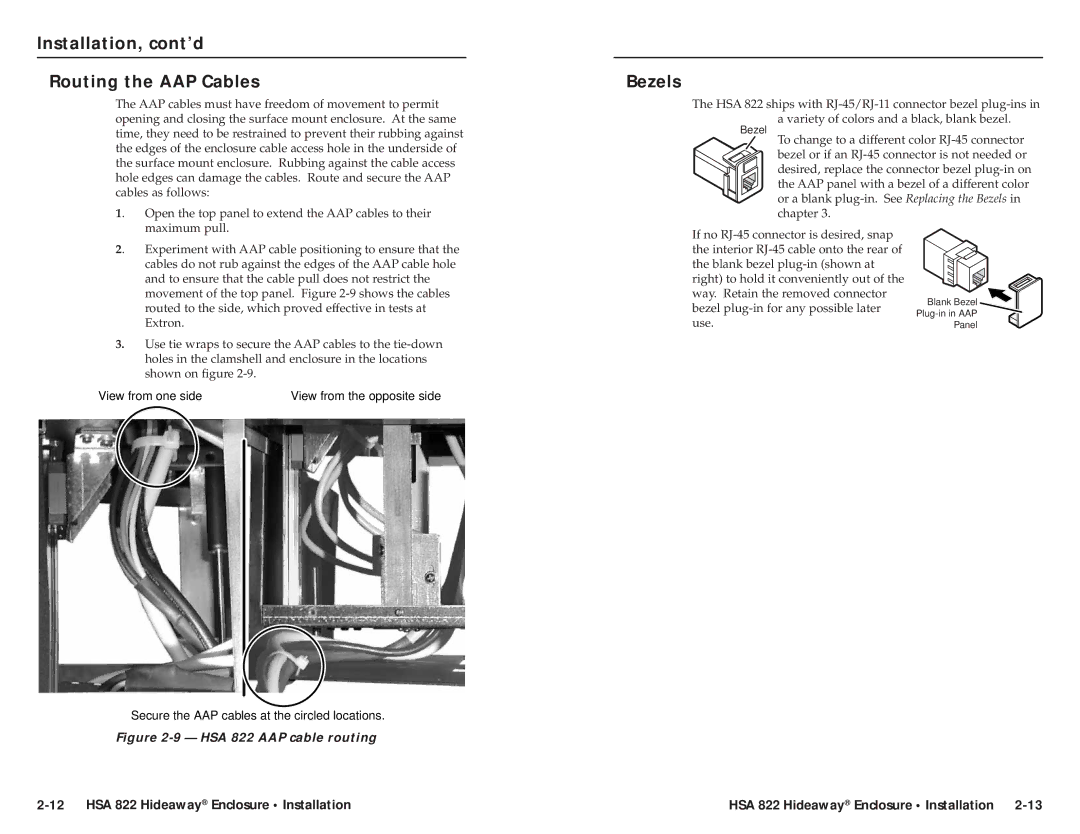
movement of the top panel. Figure |
routed to the side, which proved effective in tests at |
Extron. |
3.Use tie wraps to secure the AAP cables to the
View from one side | View from the opposite side |
Secure the AAP cables at the circled locations.
Figure 2-9 — HSA 822 AAP cable routing
If no
Blank Bezel
Panel
HSA 822 Hideaway® Enclosure • Installation |