Installation, cont’d
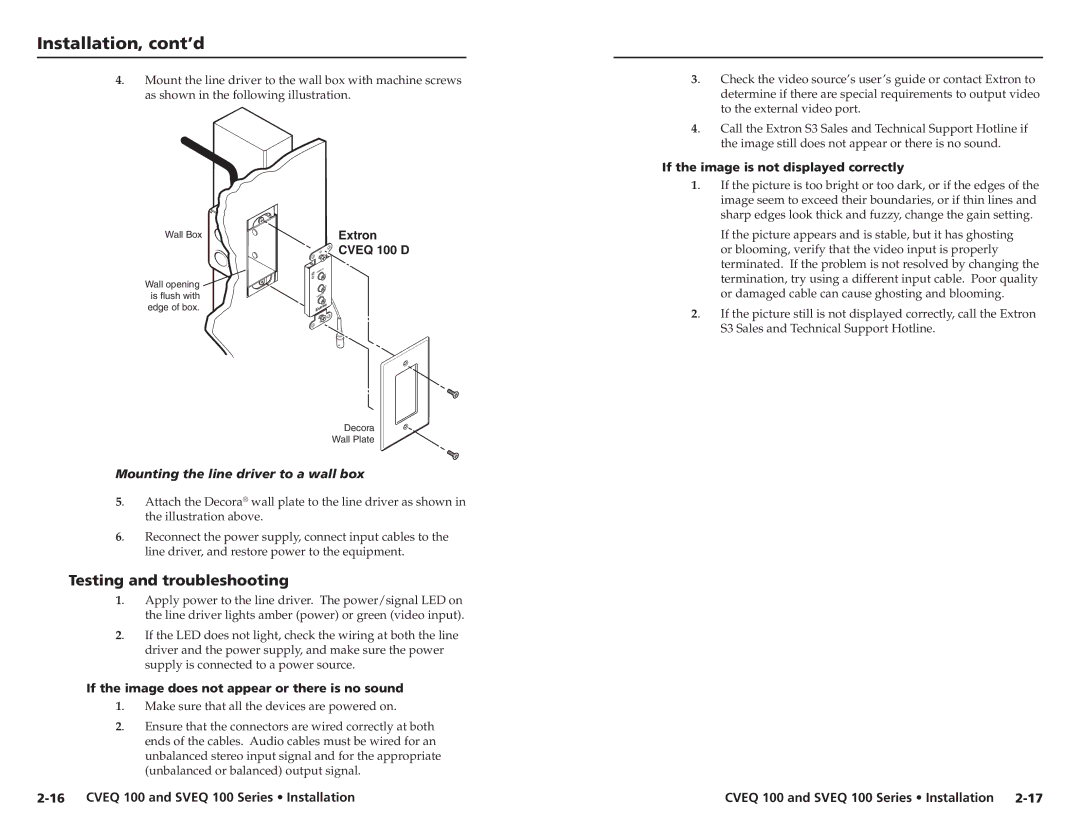
4. Mount the line driver to the wall box with machine screws as shown in the following illustration.
3. Check the video source’s user’s guide or contact Extron to determine if there are special requirements to output video to the external video port.
4. Call the Extron S3 Sales and Technical Support Hotline if the image still does not appear or there is no sound.
If the image is not displayed correctly
1. If the picture is too bright or too dark, or if the edges of the image seem to exceed their boundaries, or if thin lines and sharp edges look thick and fuzzy, change the gain setting.
Wall Box
Wall opening ![]() is flush with
is flush with
edge of box.
Extron
CVEQ 100 D
|
| IN |
AUDIO | L | |
|
| |
|
| R |
| EO | IN |
VID |
| |
If the picture appears and is stable, but it has ghosting or blooming, verify that the video input is properly terminated. If the problem is not resolved by changing the termination, try using a different input cable. Poor quality or damaged cable can cause ghosting and blooming.
2. If the picture still is not displayed correctly, call the Extron S3 Sales and Technical Support Hotline.
Decora
Wall Plate
Mounting the line driver to a wall box
5. Attach the Decora® wall plate to the line driver as shown in the illustration above.
6. Reconnect the power supply, connect input cables to the line driver, and restore power to the equipment.
Testing and troubleshooting
1. Apply power to the line driver. The power/signal LED on the line driver lights amber (power) or green (video input).
2. If the LED does not light, check the wiring at both the line driver and the power supply, and make sure the power supply is connected to a power source.
If the image does not appear or there is no sound
1. Make sure that all the devices are powered on.
2. Ensure that the connectors are wired correctly at both ends of the cables. Audio cables must be wired for an unbalanced stereo input signal and for the appropriate (unbalanced or balanced) output signal.
| CVEQ 100 and SVEQ 100 Series • Installation |