Installation and Operation, cont’d
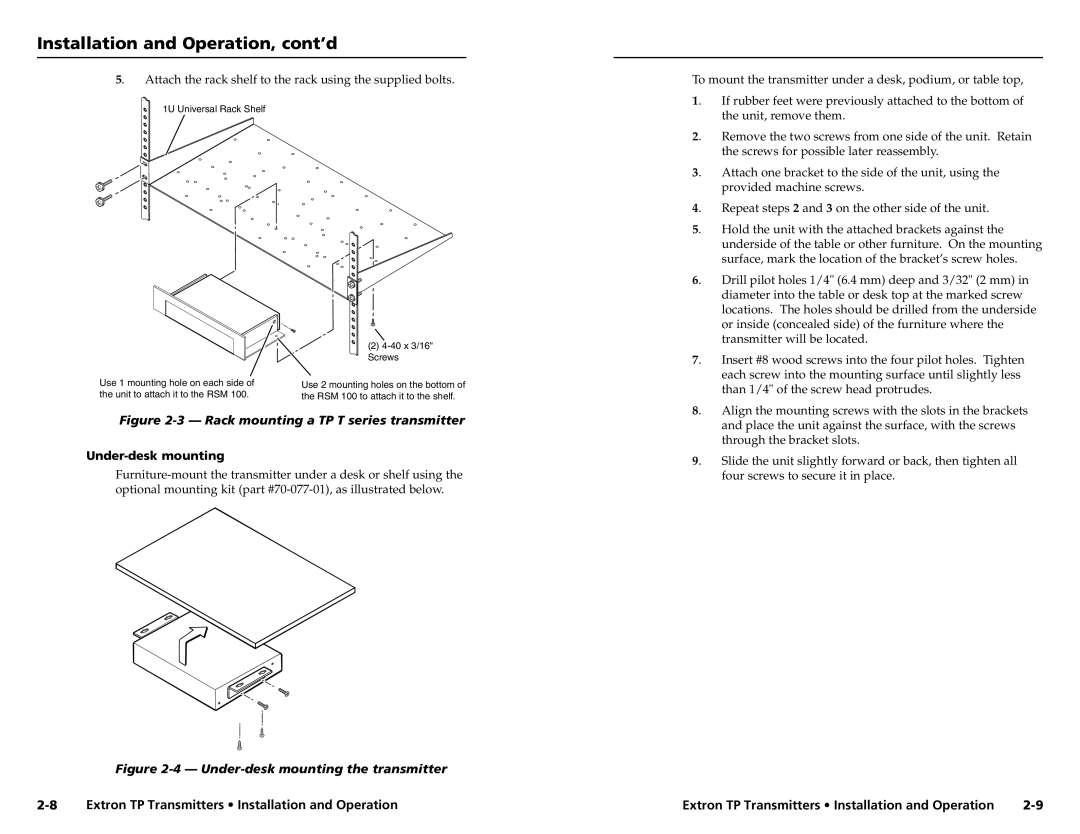
5. | Attach the rack shelf to the rack using the supplied bolts. |
1U Universal Rack Shelf
| (2) |
| Screws |
Use 1 mounting hole on each side of | Use 2 mounting holes on the bottom of |
the unit to attach it to the RSM 100. | the RSM 100 to attach it to the shelf. |
Figure
Under-desk mounting
Figure 2-4 — Under-desk mounting the transmitter
To mount the transmitter under a desk, podium, or table top,
1. | If rubber feet were previously attached to the bottom of |
| the unit, remove them. |
2. | Remove the two screws from one side of the unit. Retain |
| the screws for possible later reassembly. |
3. | Attach one bracket to the side of the unit, using the |
| provided machine screws. |
4. | Repeat steps 2 and 3 on the other side of the unit. |
5. | Hold the unit with the attached brackets against the |
| underside of the table or other furniture. On the mounting |
| surface, mark the location of the bracket’s screw holes. |
6. | Drill pilot holes 1/4" (6.4 mm) deep and 3/32" (2 mm) in |
| diameter into the table or desk top at the marked screw |
| locations. The holes should be drilled from the underside |
| or inside (concealed side) of the furniture where the |
| transmitter will be located. |
7. | Insert #8 wood screws into the four pilot holes. Tighten |
| each screw into the mounting surface until slightly less |
| than 1/4" of the screw head protrudes. |
8. | Align the mounting screws with the slots in the brackets |
| and place the unit against the surface, with the screws |
| through the bracket slots. |
9. | Slide the unit slightly forward or back, then tighten all |
| four screws to secure it in place. |
Extron TP Transmitters • Installation and Operation | Extron TP Transmitters • Installation and Operation |