REMOTE VIEWING
SMARTPHONE APPS
Remote Viewing (continued)
LAN viewing on a shared network (From iPhone/iPad/Android)
(iPhone/iPad/Android must be connected to the same local network as the Camera)
1.Follow steps
2.Make sure your mobile device is connected to your Local Area Network (WIFI).
3.Download the First Alert HD IP Camera Viewer from the appropriate App Store.
4.Open First Alert HD IP Camera Viewer App on mobile device.
5.Select the Local tab from the bottom of the App.
6.Select the camera in the camera list to view.
7.Select back.
Wireless Connectivity (From iPhone/iPad/Android)
1.Next to Exxxx ID number in App, select the (iPhone) or (Android) button.
2.Select wireless Setting (iPhone) or use WIFI (Android).
3.Toggle WIFI to ON.
4.Select SSID (iPhone) or click search (Android).
5.Select Password and enter your Wireless Network Password
a.Toggle show password to confirm the password was entered correctly.
b.DHCP should be enabled.
6.Select Done (iPhone) or OK (Android).
7.Unplug the Camera Ethernet Cable from the router and the camera.
8.Please allow 2 minutes for the camera to reboot.
9.Select Back.
10.Click the refresh button at the top right. The camera will show up in the task pane when it is finished rebooting.
11.Select camera to view.
Remote viewing of DWIP-720 (From iPhone/iPad/Android)
1.Repeat steps
2.Select Remote tab.
3.Create an account by selecting "Create Account" or if you already created an account move onto the next step.
4.Enter your username and password and select login.
5.Select "Options" from the top right of the App.
6.Select "Add Camera".
7.Select "Scan QR code" (QR code is on the bottom of the camera)
or Enter the device information for the camera. (Device information is
on a label on the bottom of the camera. DO NOT LOSE THIS INFORMATION.)
8.Click done on the top righ corner.
Tip:
1.Pinch the image screen to zoom.
2. Manually focus the camera by rotating the lens on the front of the camera.
9.Click "OK" on the add camera success.
10.Select the camera in the camera list to view.
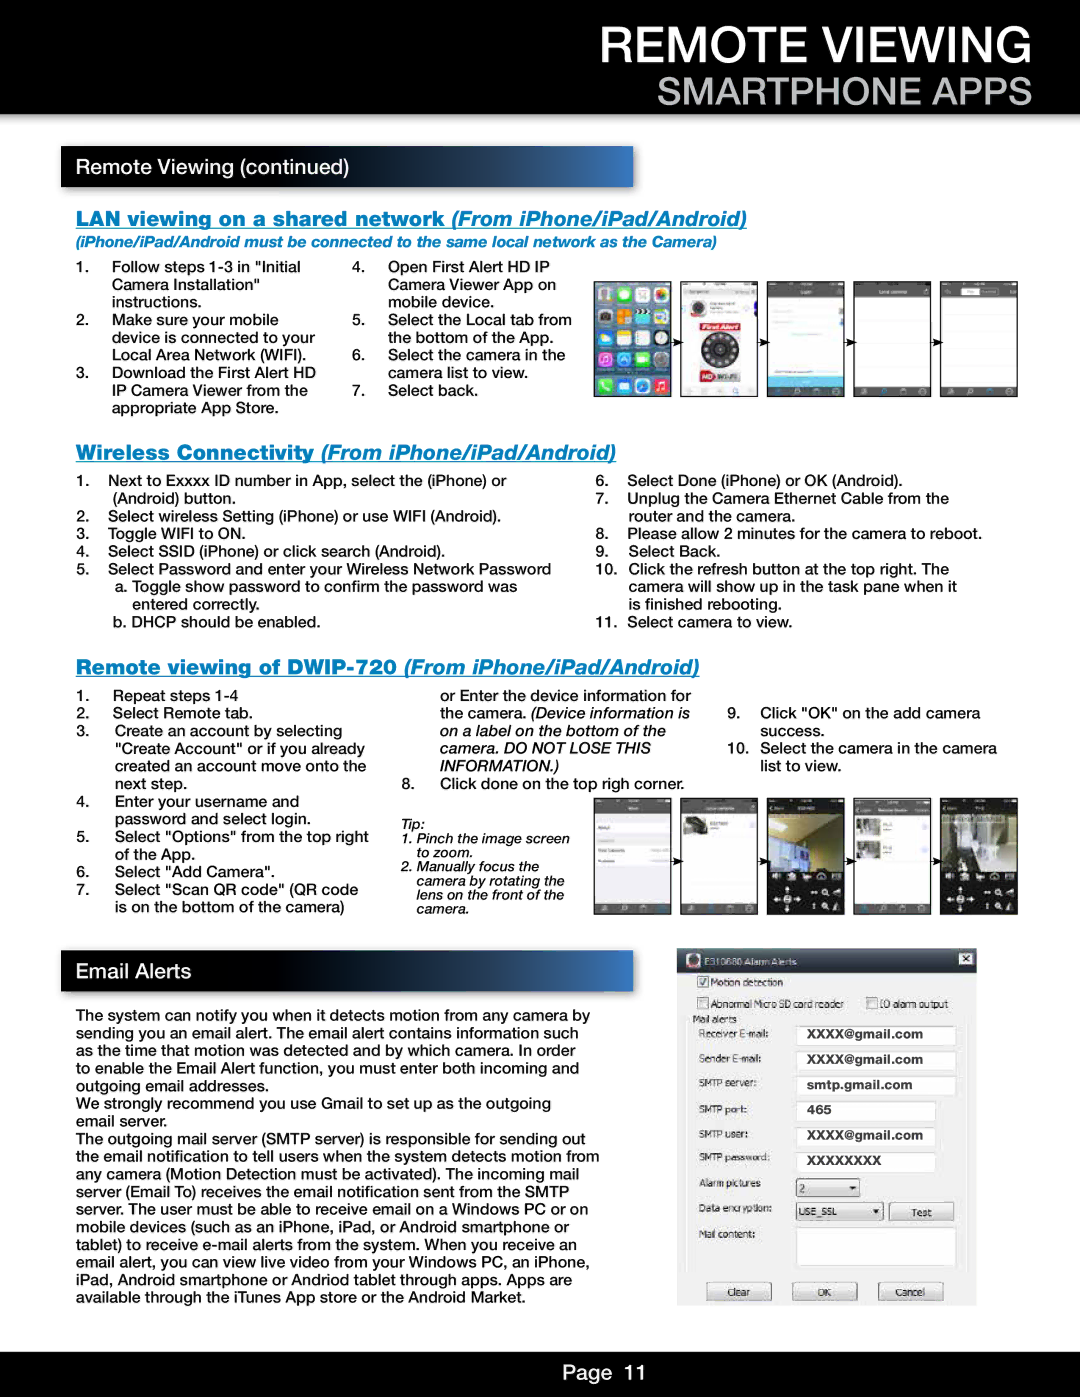
Email Alerts
The system can notify you when it detects motion from any camera by sending you an email alert. The email alert contains information such as the time that motion was detected and by which camera. In order to enable the Email Alert function, you must enter both incoming and outgoing email addresses.
We strongly recommend you use Gmail to set up as the outgoing email server.
The outgoing mail server (SMTP server) is responsible for sending out the email notification to tell users when the system detects motion from any camera (Motion Detection must be activated). The incoming mail server (Email To) receives the email notification sent from the SMTP server. The user must be able to receive email on a Windows PC or on mobile devices (such as an iPhone, iPad, or Android smartphone or tablet) to receive
XXXX@gmail.com
XXXX@gmail.com
smtp.gmail.com
465
XXXX@gmail.com
XXXXXXXX
Page 11