Noncontact Food Safety Thermometer
Proper Application and Operation
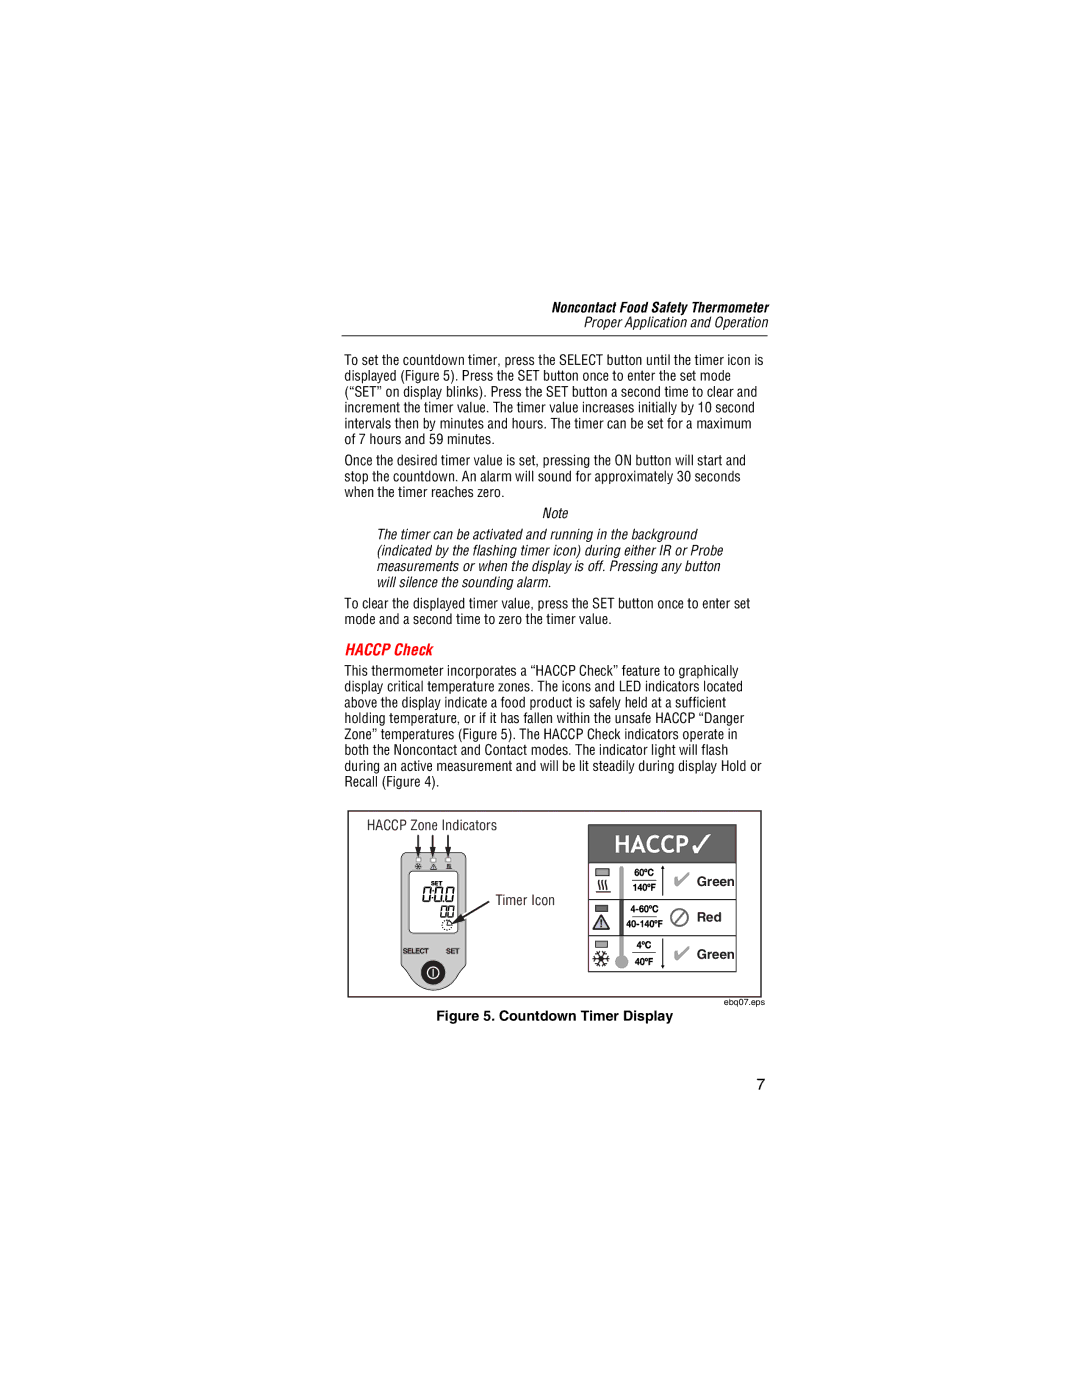
To set the countdown timer, press the SELECT button until the timer icon is displayed (Figure 5). Press the SET button once to enter the set mode (“SET” on display blinks). Press the SET button a second time to clear and increment the timer value. The timer value increases initially by 10 second intervals then by minutes and hours. The timer can be set for a maximum of 7 hours and 59 minutes.
Once the desired timer value is set, pressing the ON button will start and stop the countdown. An alarm will sound for approximately 30 seconds when the timer reaches zero.
Note
The timer can be activated and running in the background (indicated by the flashing timer icon) during either IR or Probe measurements or when the display is off. Pressing any button will silence the sounding alarm.
To clear the displayed timer value, press the SET button once to enter set mode and a second time to zero the timer value.
HACCP Check
This thermometer incorporates a “HACCP Check” feature to graphically display critical temperature zones. The icons and LED indicators located above the display indicate a food product is safely held at a sufficient holding temperature, or if it has fallen within the unsafe HACCP “Danger Zone” temperatures (Figure 5). The HACCP Check indicators operate in both the Noncontact and Contact modes. The indicator light will flash during an active measurement and will be lit steadily during display Hold or Recall (Figure 4).
HACCP Zone Indicators
![]()
![]()
![]()
![]()
![]() Timer Icon
Timer Icon
Green
Red
Green
ebq07.eps
Figure 5. Countdown Timer Display
7
