Cabinet Service Procedures
2 Service Procedures
DANGER: Failure to disconnect power from the unit before servicing could result in serious injury or death. The cabinet power switch DOES NOT disconnect all incoming power to the cabinet.
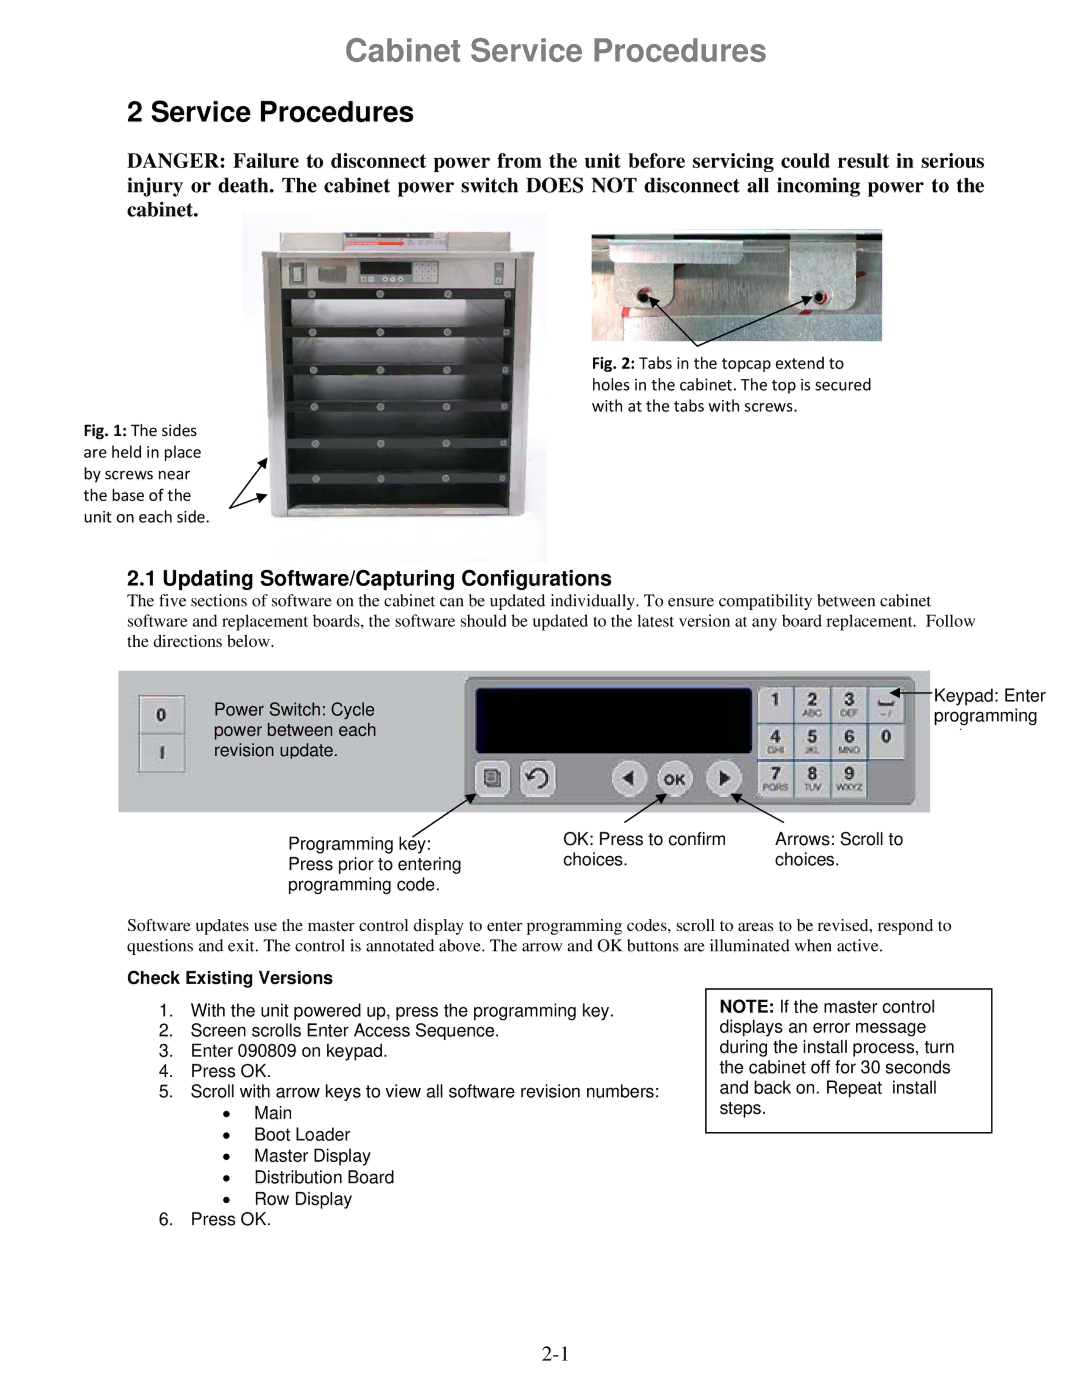
Fig. 1: The sides are held in place by screws near the base of the unit on each side.
Fig. 2: Tabs in the topcap extend to holes in the cabinet. The top is secured with at the tabs with screws.
2.1 Updating Software/Capturing Configurations
The five sections of software on the cabinet can be updated individually. To ensure compatibility between cabinet software and replacement boards, the software should be updated to the latest version at any board replacement. Follow the directions below.
Power Switch: Cycle | Keypad: Enter |
programming | |
power between each | d |
revision update. |
|
Programming key: | OK: Press to confirm | Arrows: Scroll to |
Press prior to entering | choices. | choices. |
programming code. |
|
|
Software updates use the master control display to enter programming codes, scroll to areas to be revised, respond to questions and exit. The control is annotated above. The arrow and OK buttons are illuminated when active.
Check Existing Versions
1.With the unit powered up, press the programming key.
2.Screen scrolls Enter Access Sequence.
3.Enter 090809 on keypad.
4.Press OK.
5.Scroll with arrow keys to view all software revision numbers:
•Main
•Boot Loader
•Master Display
•Distribution Board
•Row Display
6.Press OK.
NOTE: If the master control displays an error message during the install process, turn the cabinet off for 30 seconds and back on. Repeat install steps.
