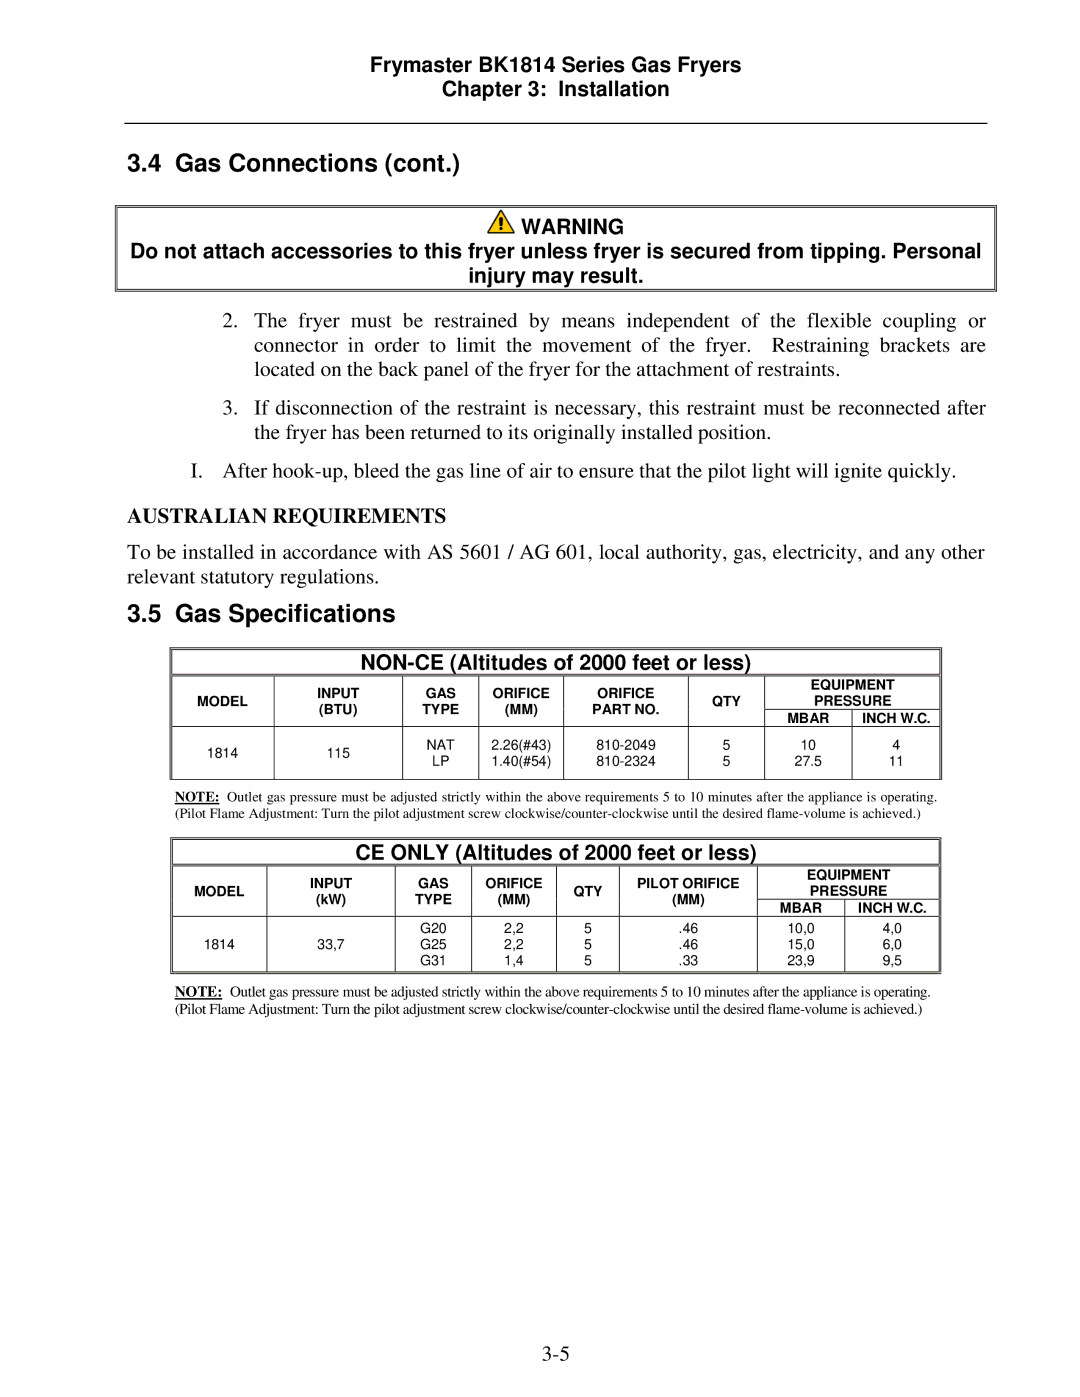
BK1814 specifications
The Frymaster BK1814 stands as a significant model in the world of commercial frying, known for its efficiency, reliability, and innovative features. This deep fryer is designed for high-capacity cooking environments, making it ideal for restaurants, cafeterias, and fast-food operations that require intense frying capabilities.One of the standout features of the Frymaster BK1814 is its impressive cooking capacity. With the ability to hold a substantial volume of oil, this fryer can accommodate large batches of food, reducing cooking time and ensuring that high volumes of product can be prepared simultaneously. This is particularly beneficial in busy kitchens where speed and efficiency are paramount.
Equipped with advanced technology, the BK1814 incorporates a digital control system that allows for precise temperature management. This temperature control is crucial as it directly affects the quality of the fried food, ensuring that it is cooked to perfection every time. The fryer also features a built-in filtration system that not only maintains oil quality but also extends its life, allowing for cost savings on oil replacement.
The BK1814 model is designed with safety in mind. It includes multiple safety mechanisms, such as an automatic shut-off feature and a secure lid to prevent splattering during frying. These features enhance the overall safety of kitchen operations, minimizing risks for staff.
Another notable characteristic of the Frymaster BK1814 is its energy efficiency. The fryer is built to reduce energy consumption, which is especially important in commercial kitchens where operating costs can add up quickly. This efficiency is achieved through a combination of insulation, advanced heating elements, and effective heat transfer methods.
Cleaning and maintenance of the Frymaster BK1814 are also simplified. The fryer is designed with removable components and features that facilitate easy access for cleaning, ensuring that hygiene standards can be consistently met without excessive downtime.
In conclusion, the Frymaster BK1814 is a versatile and robust deep fryer that combines high capacity, advanced technology, safety features, and energy efficiency. It is an excellent choice for any commercial kitchen looking to enhance its frying operations while maintaining quality and performance. With its array of features tailored to meet the demands of busy food service environments, the BK1814 continues to be a popular choice among chefs and restaurant owners alike.

