SETTING THE DATE AND TIME
1 | 0103 | 02 |
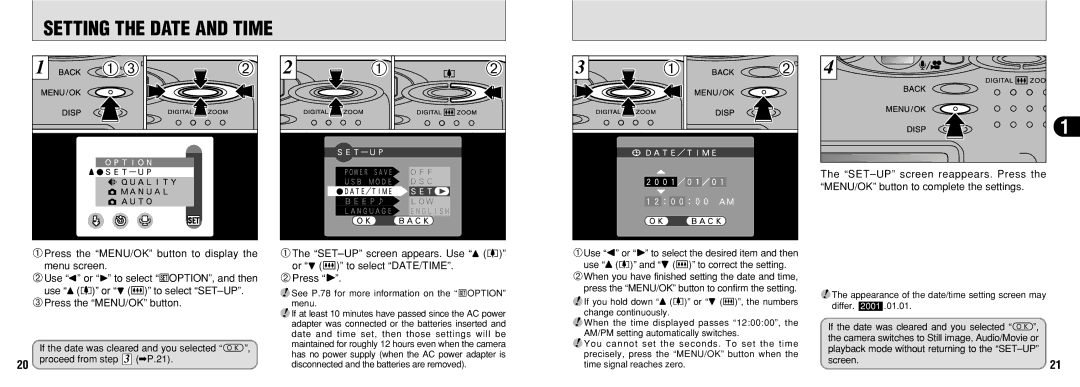
1Press the “MENU/OK” button to display the menu screen.
2Use “d” or “c” to select “dOPTION”, and then use “a ([)” or “b (])” to select
3Press the “MENU/OK” button.
2 | 01 | 02 |
1The | ||
or “b (])” to select “DATE/TIME”. |
| |
2Press “c”. |
|
|
●! See P.78 for more information on the “dOPTION” menu.
3 | 01 | 02 |
1Use “d” or “c” to select the desired item and then
use “a ([)” and “b (])” to correct the setting.
2When you have finished setting the date and time, press the “MENU/OK” button to confirm the setting.
●! If you hold down “a ([)” or “b (])”, the numbers
4 |
1 |
The
●! The appearance of the date/time setting screen may differ. 2001 .01.01.
20
If the date was cleared and you selected “H”,
proceed from step 3 (➡P.21).
●! If at least 10 minutes have passed since the AC power adapter was connected or the batteries inserted and date and time set, then those settings will be maintained for roughly 12 hours even when the camera has no power supply (when the AC power adapter is disconnected and the batteries are removed).
change continuously.
●! When the time displayed passes “12:00:00”, the AM/PM setting automatically switches.
●! You cannot set the seconds. To set the time precisely, press the “MENU/OK” button when the time signal reaches zero.
If the date was cleared and you selected “H”, the camera switches to Still image, Audio/Movie or playback mode without returning to the
screen.21