7 Settings | SETTINGS/USING THE OPTION MENU |
djSETTING THE FILE SIZE AND QUALITY (COMPRESSION RATIO)
The “Settings” chapter looks at functions available from “dOPTION” in the “q” Still Image, “r” Audio/Movie and “3” Playback.
■List of settings
qStill Image | rAudio/Movie | 3Playback |
mode | mode | mode |
1AUTO | — | — |
2MANUAL | — | — |
jQUALITY | — | — |
(➡P.79) |
|
|
— | — | VOLUME |
|
| (➡P.80) |
LCD BRIGHTNESS | LCD BRIGHTNESS | LCD BRIGHTNESS |
(➡P.80) | (➡P.80) | (➡P.80) |
|
|
|
0103
 02
02
Photography | Playback |
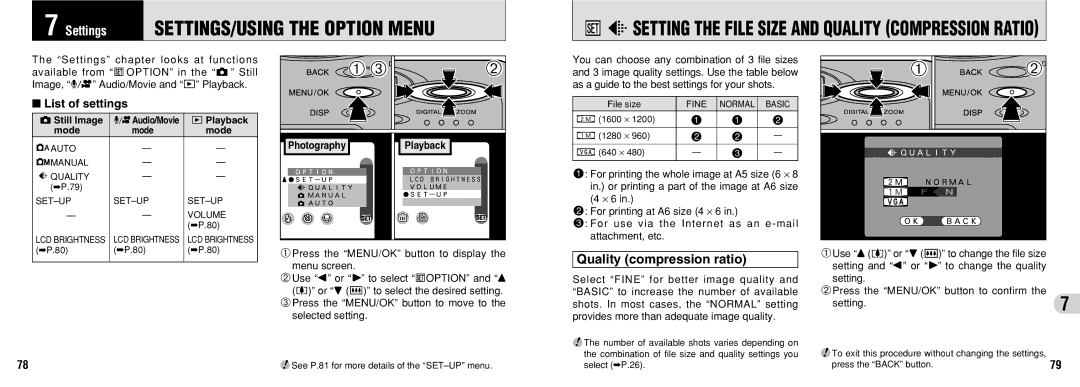
1Press the “MENU/OK” button to display the menu screen.
You can choose any combination of 3 file sizes and 3 image quality settings. Use the table below as a guide to the best settings for your shots.
| File size | FINE | NORMAL | BASIC | |
8 | (1600 | ⋅ 1200) | ! | ! | @ |
9 | (1280 | ⋅ 960) | @ | @ | — |
0 | (640 ⋅ 480) | — | # | — | |
!: For printing the whole image at A5 size (6 ⋅ 8 in.) or printing a part of the image at A6 size (4 ⋅ 6 in.)
@: For printing at A6 size (4 ⋅ 6 in.)
#: For use via the Internet as an
Quality (compression ratio)
01 | 02 |
1Use “a ([)” or “b (])” to change the file size setting and “d” or “c” to change the quality
| 2Use “d” or “c” to select “dOPTION” and “a |
| ([)” or “b (])” to select the desired setting. |
| 3Press the “MENU/OK” button to move to the |
| selected setting. |
78 | ●! See P.81 for more details of the |
Select “FINE” for better image quality and “BASIC” to increase the number of available shots. In most cases, the “NORMAL” setting provides more than adequate image quality.
●! The number of available shots varies depending on the combination of file size and quality settings you select (➡P.26).
setting.
2Press the “MENU/OK” button to confirm the
setting.7
●! To exit this procedure without changing the settings, | 79 |
press the “BACK” button. |
