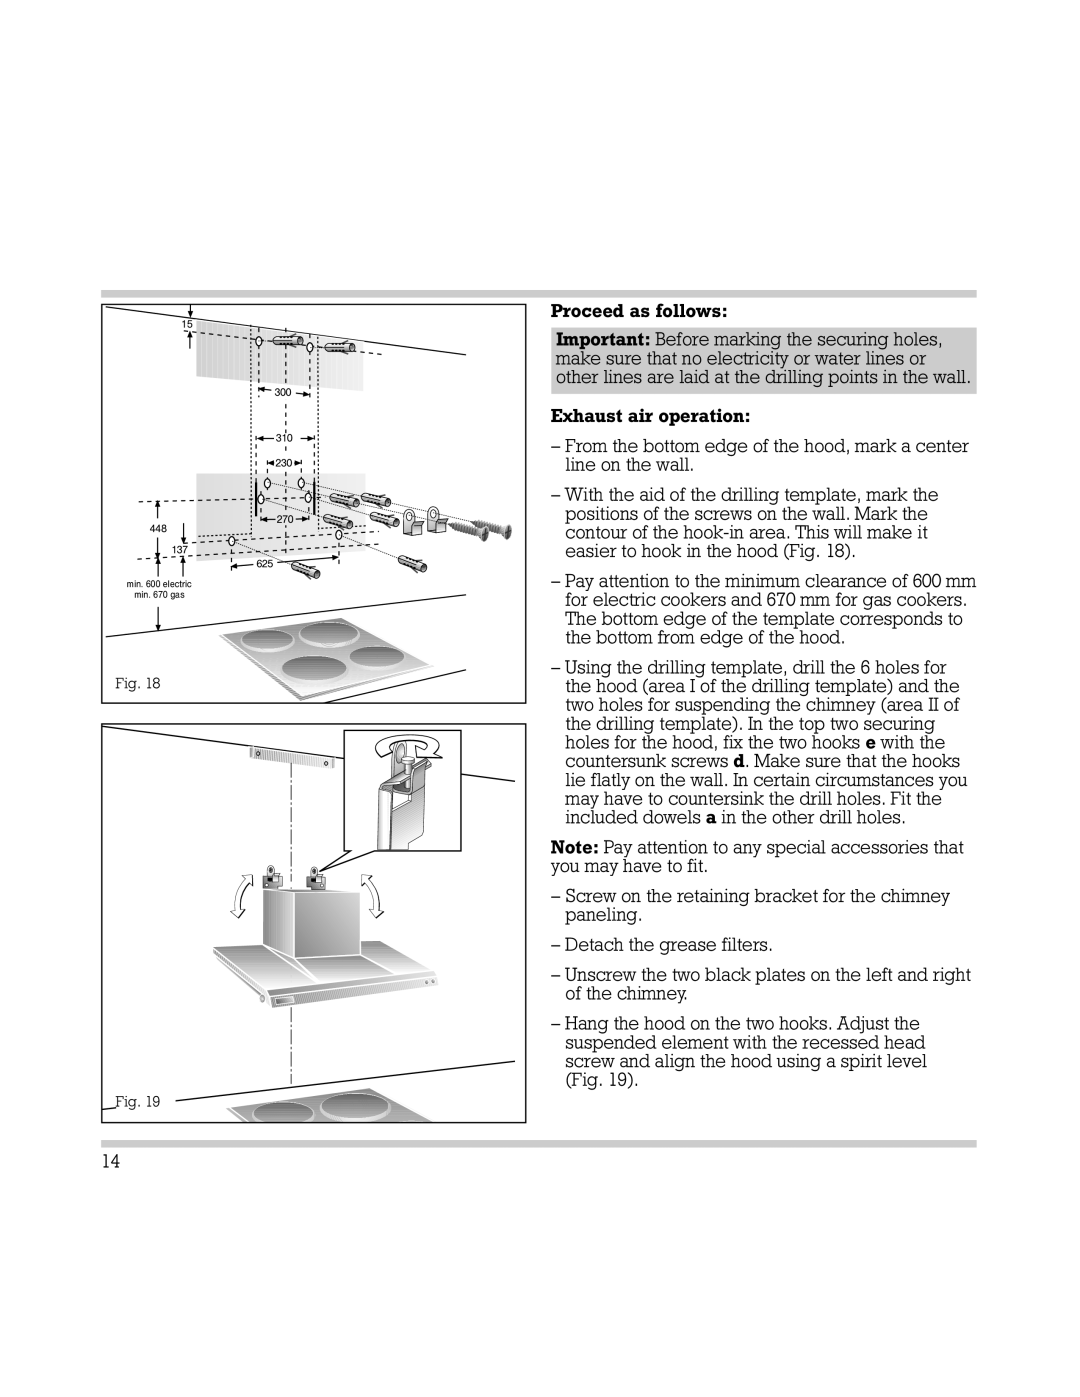
15 | Proceed as follows: | |
Important: Before marking the securing holes, | ||
| ||
| make sure that no electricity or water lines or | |
300 | other lines are laid at the drilling points in the wall. | |
| ||
| Exhaust air operation: | |
310 | – From the bottom edge of the hood, mark a center | |
| ||
230 | line on the wall. | |
| – With the aid of the drilling template, mark the | |
270 | positions of the screws on the wall. Mark the | |
448 | contour of the | |
| ||
137 | easier to hook in the hood (Fig. 18). | |
| ||
625 |
| |
min. 600 electric | – Pay attention to the minimum clearance of 600 mm | |
min. 670 gas | for electric cookers and 670 mm for gas cookers. | |
| ||
| The bottom edge of the template corresponds to | |
| the bottom from edge of the hood. | |
Fig. 18 | – Using the drilling template, drill the 6 holes for | |
the hood (area I of the drilling template) and the | ||
| two holes for suspending the chimney (area II of | |
| the drilling template). In the top two securing | |
| holes for the hood, fix the two hooks e with the | |
| countersunk screws d. Make sure that the hooks | |
| lie flatly on the wall. In certain circumstances you | |
| may have to countersink the drill holes. Fit the | |
| included dowels a in the other drill holes. | |
| Note: Pay attention to any special accessories that | |
| you may have to fit. | |
| – Screw on the retaining bracket for the chimney | |
| paneling. | |
| – Detach the grease filters. | |
| – Unscrew the two black plates on the left and right | |
| of the chimney. | |
| – Hang the hood on the two hooks. Adjust the | |
| suspended element with the recessed head | |
| screw and align the hood using a spirit level | |
| (Fig. 19). | |
Fig. 19 |
| |
14 |
|