Installation Instructions
2 INSTALLATION (cont.)
10INSTALL THE OUTDOOR UNIT
•Install the connection tube
1.Align the center of the tubing flare with the relevant valve.
2.Screw in the flare nut by hand and then tighten the nut with spanner and torque wrench. See the table below for the correct torque.
3.Connecting tube specifications are shown below:
| 10,000/14,000 | 20,000 |
Specifications | BTU Units | BTU Units |
|
|
|
Design Length | 20 ft. | 26.2 ft. |
|
|
|
Extra Refrigerant Charge | 0.16 oz./ft. | 0.54 oz./ft. |
Per Ft. Above Design Length |
|
|
|
|
|
Outer Diameter Liquid Pipe | 1/4″ | 3/8″ |
|
|
|
Outer Diameter Gas Pipe | 1/2″ | 5/8″ |
|
|
|
Max. Distance Height | 33 ft. | 33 ft. |
|
|
|
Max. Distance Length | 68 ft. | 98 ft. |
|
|
|
NOTE: Exceeding tightening torque will damage the copper tubing.
Tightening torque table
Tubing OD | Tightening torque (in./lb.) |
1/4″ | |
3/8″ | |
1/2″ | |
5/8″ | |
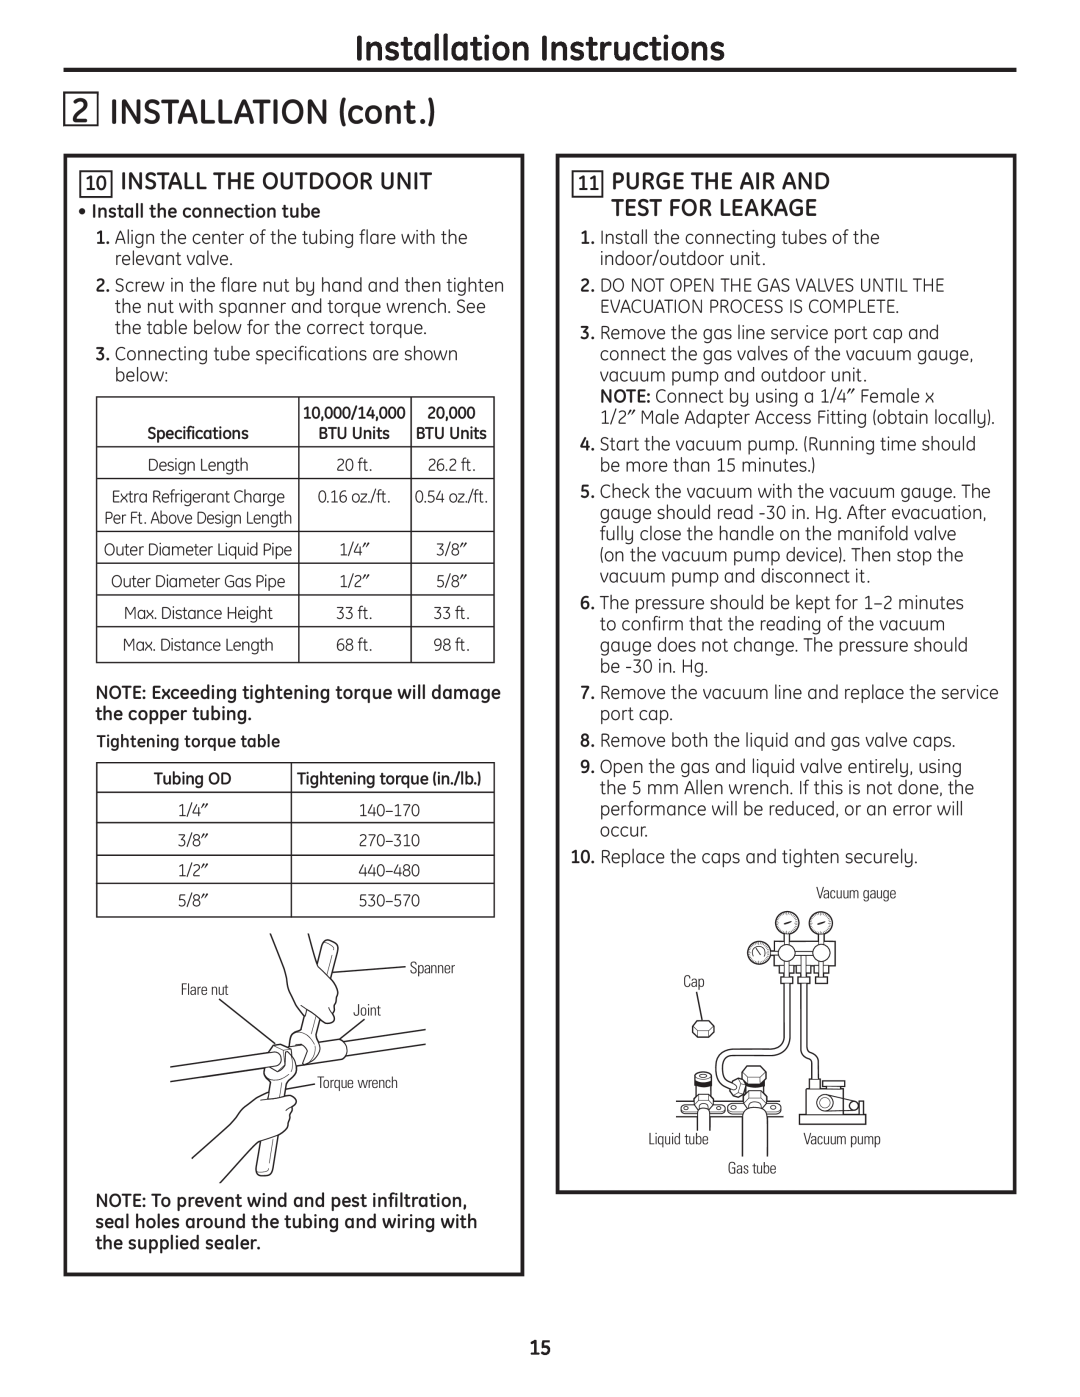
| Spanner |
Flare nut |
|
| Joint |
| Torque wrench |
NOTE: To prevent wind and pest infiltration, seal holes around the tubing and wiring with the supplied sealer.
11PURGE THE AIR AND TEST FOR LEAKAGE
1.Install the connecting tubes of the indoor/outdoor unit .
2.DO NOT OPEN THE GAS VALVES UNTIL THE EVACUATION PROCESS IS COMPLETE.
3.Remove the gas line service port cap and connect the gas valves of the vacuum gauge,
vacuum pump and outdoor unit .
NOTE: Connect by using a 1/4″ Female x
1/2″ Male Adapter Access Fitting (obtain locally).
4.Start the vacuum pump. (Running time should be more than 15 minutes.)
5.Check the vacuum with the vacuum gauge. The gauge should read
6.The pressure should be kept for
7.Remove the vacuum line and replace the service port cap.
8.Remove both the liquid and gas valve caps.
9.Open the gas and liquid valve entirely, using the 5 mm Allen wrench. If this is not done, the performance will be reduced, or an error will occur.
10.Replace the caps and tighten securely.
Vacuum gauge
Cap
Liquid tube | Vacuum pump |
Gas tube
15