Proper care and cleaning are important so your range will give you efficient and satisfactory service. Follow these directions carefully in caring for your range to assure safe and proper maintenance.
BE SURE ELECTRICAL POWER IS OFF BEFORE CLEANING ANY PART OF THE RANGE.
Burner Assembly
The burner assemblies should be washed regularly and, of course, after spillovers.
Turn all the controls to OFF before removing the burner parts.
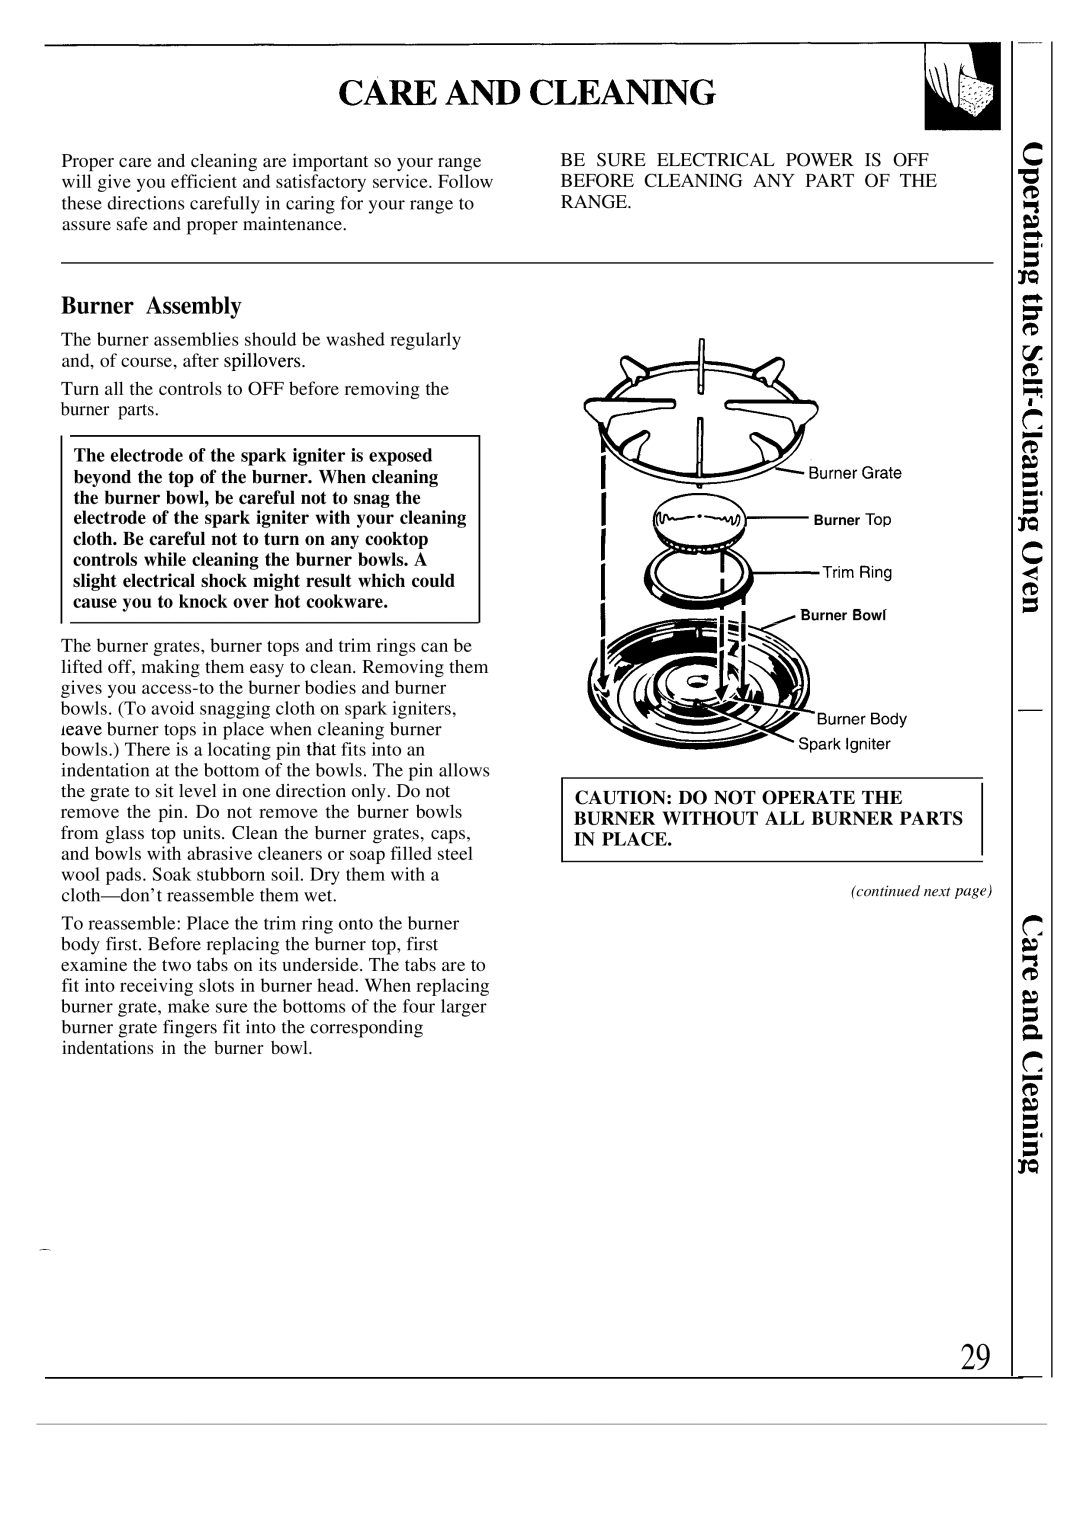
The electrode of the spark igniter is exposed beyond the top of the burner. When cleaning the burner bowl, be careful not to snag the electrode of the spark igniter with your cleaning cloth. Be careful not to turn on any cooktop controls while cleaning the burner bowls. A slight electrical shock might result which could cause you to knock over hot cookware.
The burner grates, burner tops and trim rings can be lifted off, making them easy to clean. Removing them gives you
To reassemble: Place the trim ring onto the burner body first. Before replacing the burner top, first examine the two tabs on its underside. The tabs are to fit into receiving slots in burner head. When replacing burner grate, make sure the bottoms of the four larger burner grate fingers fit into the corresponding indentations in the burner bowl.
I | Burner ToP |
#—T’mRing
CAUTION: DO NOT OPERATE THE BURNER WITHOUT ALL BURNER PARTS IN PLACE.
(continued next page)
.
29
