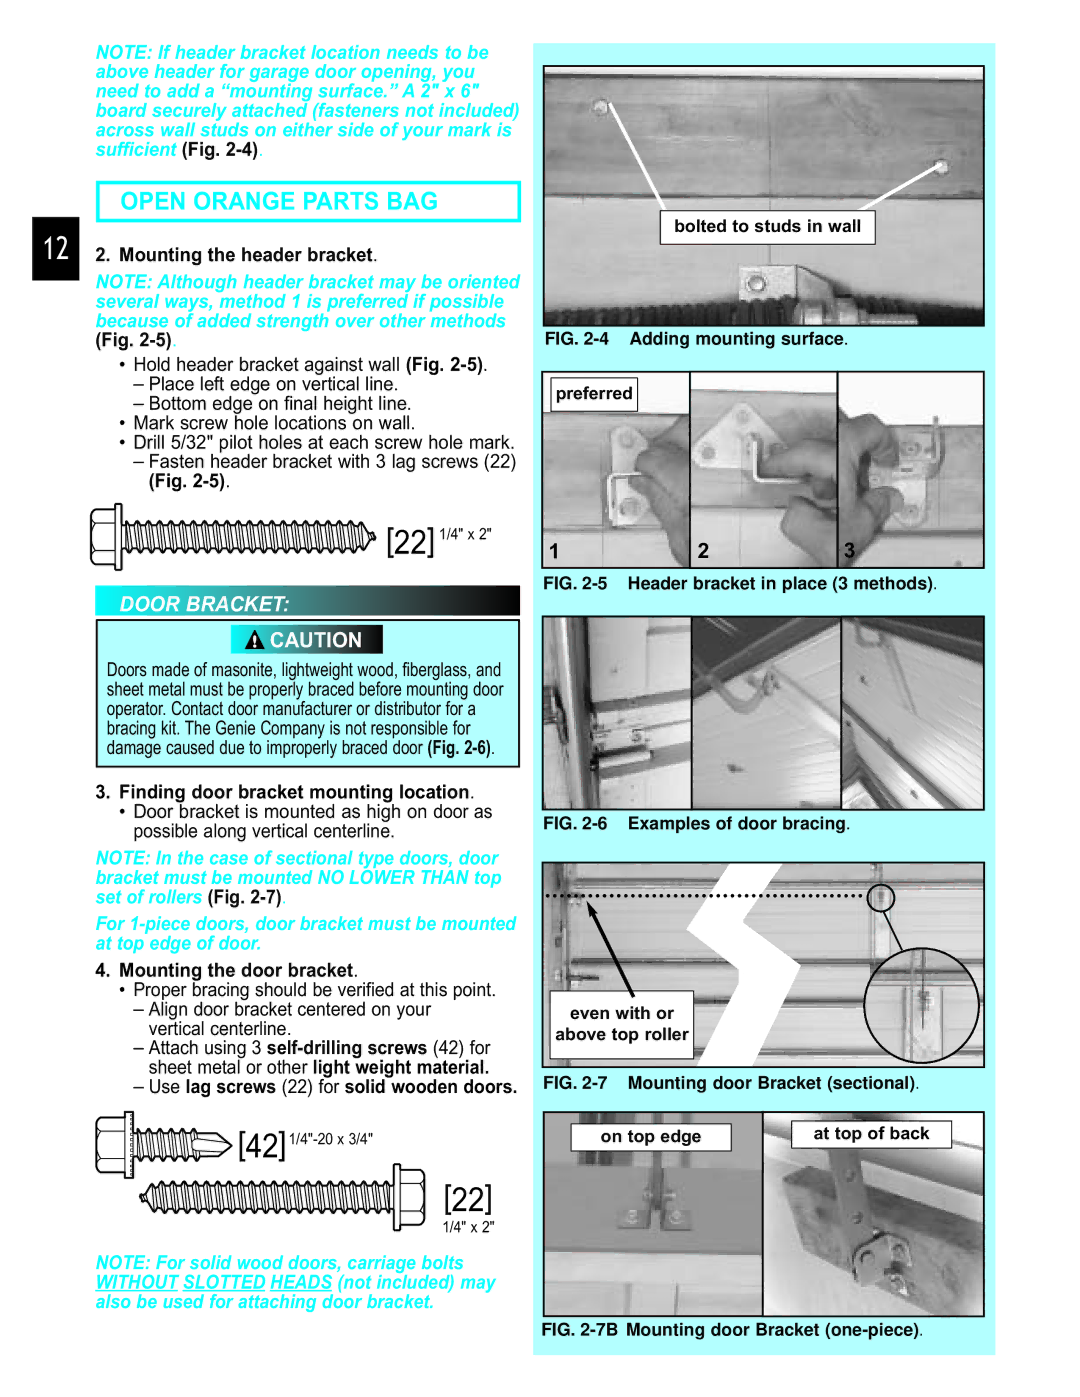
NOTE: If header bracket location needs to be above header for garage door opening, you need to add a “mounting surface.” A 2" x 6" board securely attached (fasteners not included) across wall studs on either side of your mark is sufficient (Fig.
OPEN ORANGE PARTS BAG
12 2. Mounting the header bracket.
NOTE: Although header bracket may be oriented several ways, method 1 is preferred if possible because of added strength over other methods (Fig.
•Hold header bracket against wall (Fig.
–Place left edge on vertical line.
–Bottom edge on final height line.
•Mark screw hole locations on wall.
•Drill 5/32" pilot holes at each screw hole mark.
–Fasten header bracket with 3 lag screws (22) (Fig.
[22]1/4" x 2"
DOOR BRACKET:
![]() CAUTION
CAUTION
Doors made of masonite, lightweight wood, fiberglass, and sheet metal must be properly braced before mounting door operator. Contact door manufacturer or distributor for a bracing kit. The Genie Company is not responsible for damage caused due to improperly braced door (Fig.
3.Finding door bracket mounting location.
•Door bracket is mounted as high on door as possible along vertical centerline.
NOTE: In the case of sectional type doors, door bracket must be mounted NO LOWER THAN top set of rollers (Fig.
For
4.Mounting the door bracket.
•Proper bracing should be verified at this point.
–Align door bracket centered on your vertical centerline.
–Attach using 3
–Use lag screws (22) for solid wooden doors.
bolted to studs in wall |
FIG. 2-4 Adding mounting surface.
preferred
1 | 2 | 3 |
FIG. 2-5 Header bracket in place (3 methods).
FIG. 2-6 Examples of door bracing.
even with or
above top roller
FIG. 2-7 Mounting door Bracket (sectional).
![]()
![]() [42]1/4"-20
[42]1/4"-20
[22]
1/4" x 2"
NOTE: For solid wood doors, carriage bolts WITHOUT SLOTTED HEADS (not included) may also be used for attaching door bracket.
|
|
|
|
|
|
| on top edge |
|
| at top of back |
|
|
|
|
|
|
|
|
|
|
|
|
|
|
|
|
|
|
|