Attaching the Hub to a Wall
Attaching the Hub to a Wall
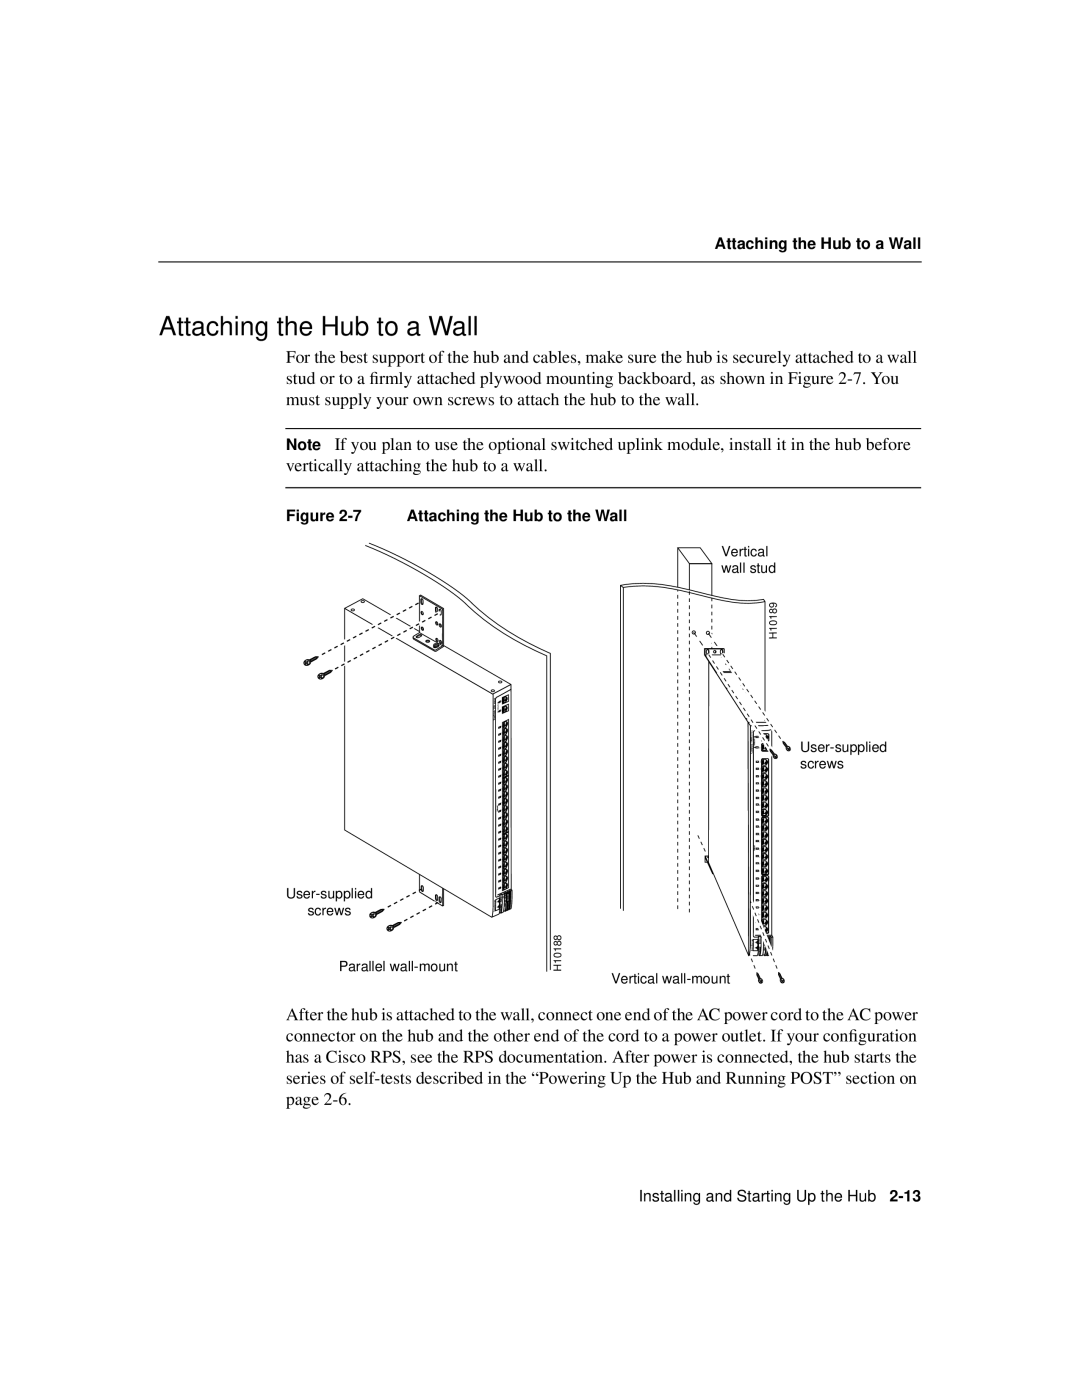
For the best support of the hub and cables, make sure the hub is securely attached to a wall stud or to a firmly attached plywood mounting backboard, as shown in Figure
Note If you plan to use the optional switched uplink module, install it in the hub before vertically attaching the hub to a wall.
Figure 2-7 Attaching the Hub to the Wall
Vertical wall stud
![]()
![]()
Parallel
H10189
RPS | MODE |
H10188
Vertical
After the hub is attached to the wall, connect one end of the AC power cord to the AC power connector on the hub and the other end of the cord to a power outlet. If your configuration has a Cisco RPS, see the RPS documentation. After power is connected, the hub starts the series of
Installing and Starting Up the Hub