GS-R12T4H2-RH Rack Mount Server
Replacing the Motherboard
Step 1 Remove the chassis cover. See Removing the Chassis Cover on page 12.
Step 2 Remove the fanduct from the chassis by pulling the rear edge in the direction of the arrow. Step 3 Remove the processor, heat sink, memory module, and PCI assembly. See previous
sections for detail instruction.
Step 4 Disconnect the power, SATA, front panel, and mainboard cable connectors. See Motherboard Placement and Jumper Setting section on page 38.
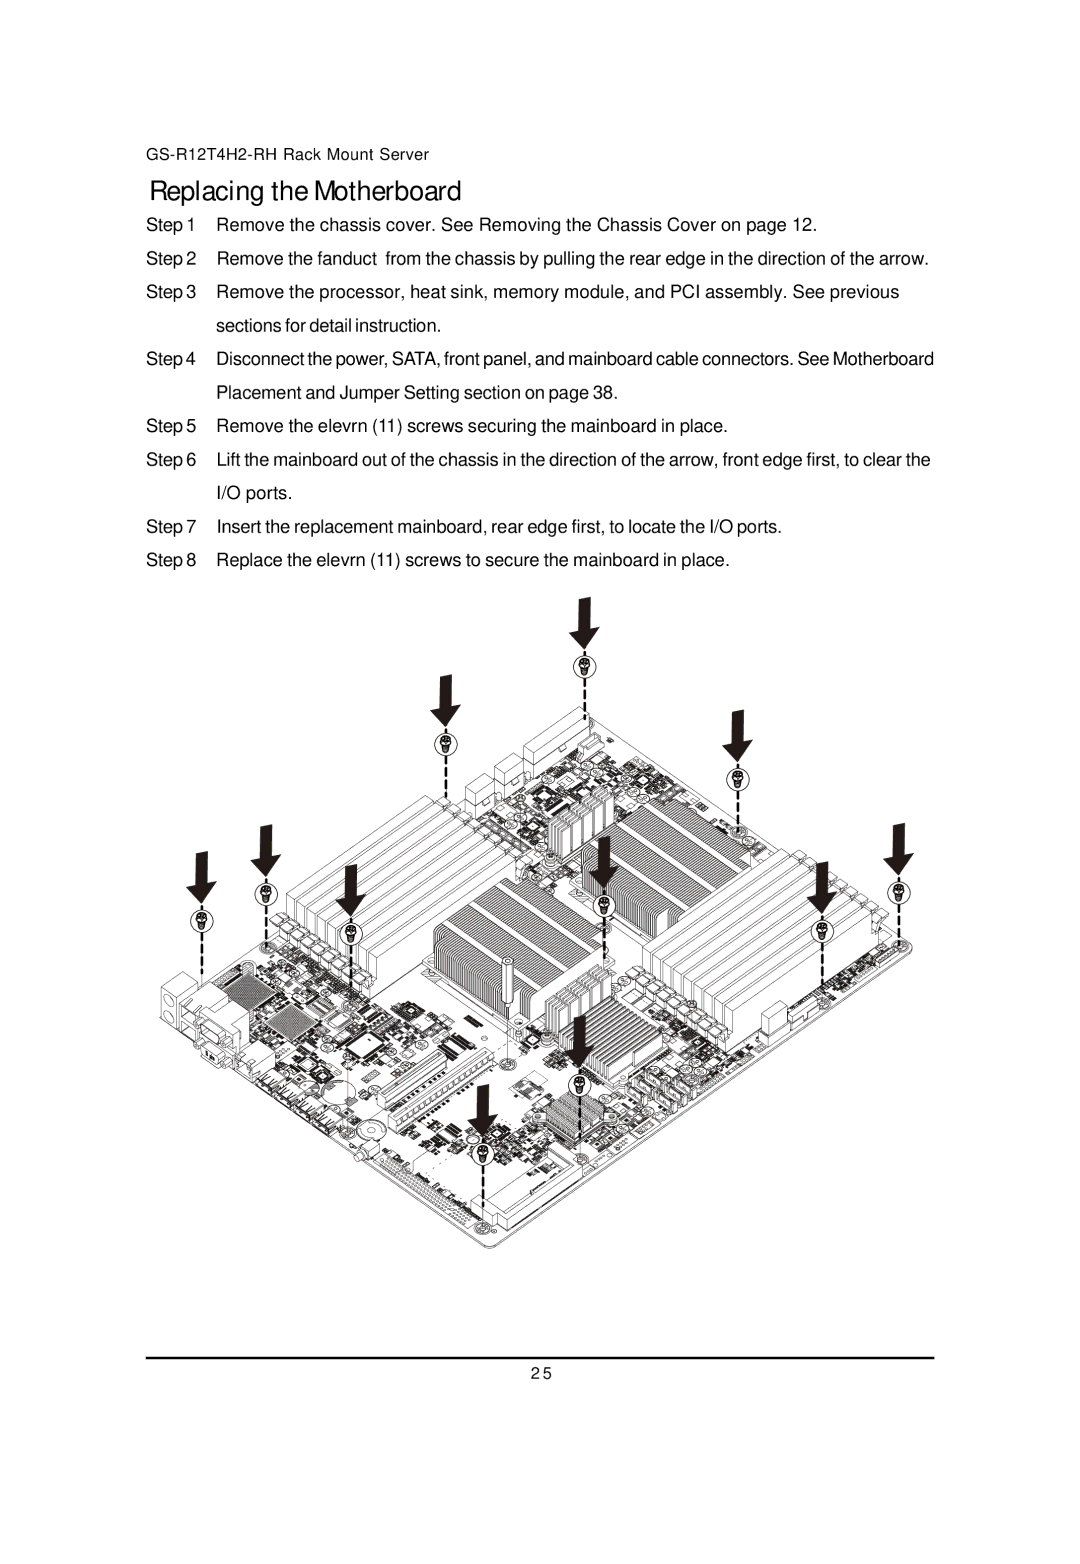
Step 5 Remove the elevrn (11) screws securing the mainboard in place.
Step 6 Lift the mainboard out of the chassis in the direction of the arrow, front edge first, to clear the I/O ports.
Step 7 Insert the replacement mainboard, rear edge first, to locate the I/O ports. Step 8 Replace the elevrn (11) screws to secure the mainboard in place.
2 5