PR70 and PR70v Feed Systems
Contents
Related Manuals
Product Configurator
PR7F
Low Volume Side Piston
High Pressure, 3/8 in .5 mm 2.5 ft
Code K Part Dispense Valve
Code M Part Applicator Mounting
Code Q Part High Volume Side Tank Cover
Code Part Off-Board Tank Stands
Electric Shock Hazard
Fire and Explosion Hazard
Grounding
Installation
Polyethylene Tank Lid with Agitator
Pneumatic Agitator Motor
Level Sensors
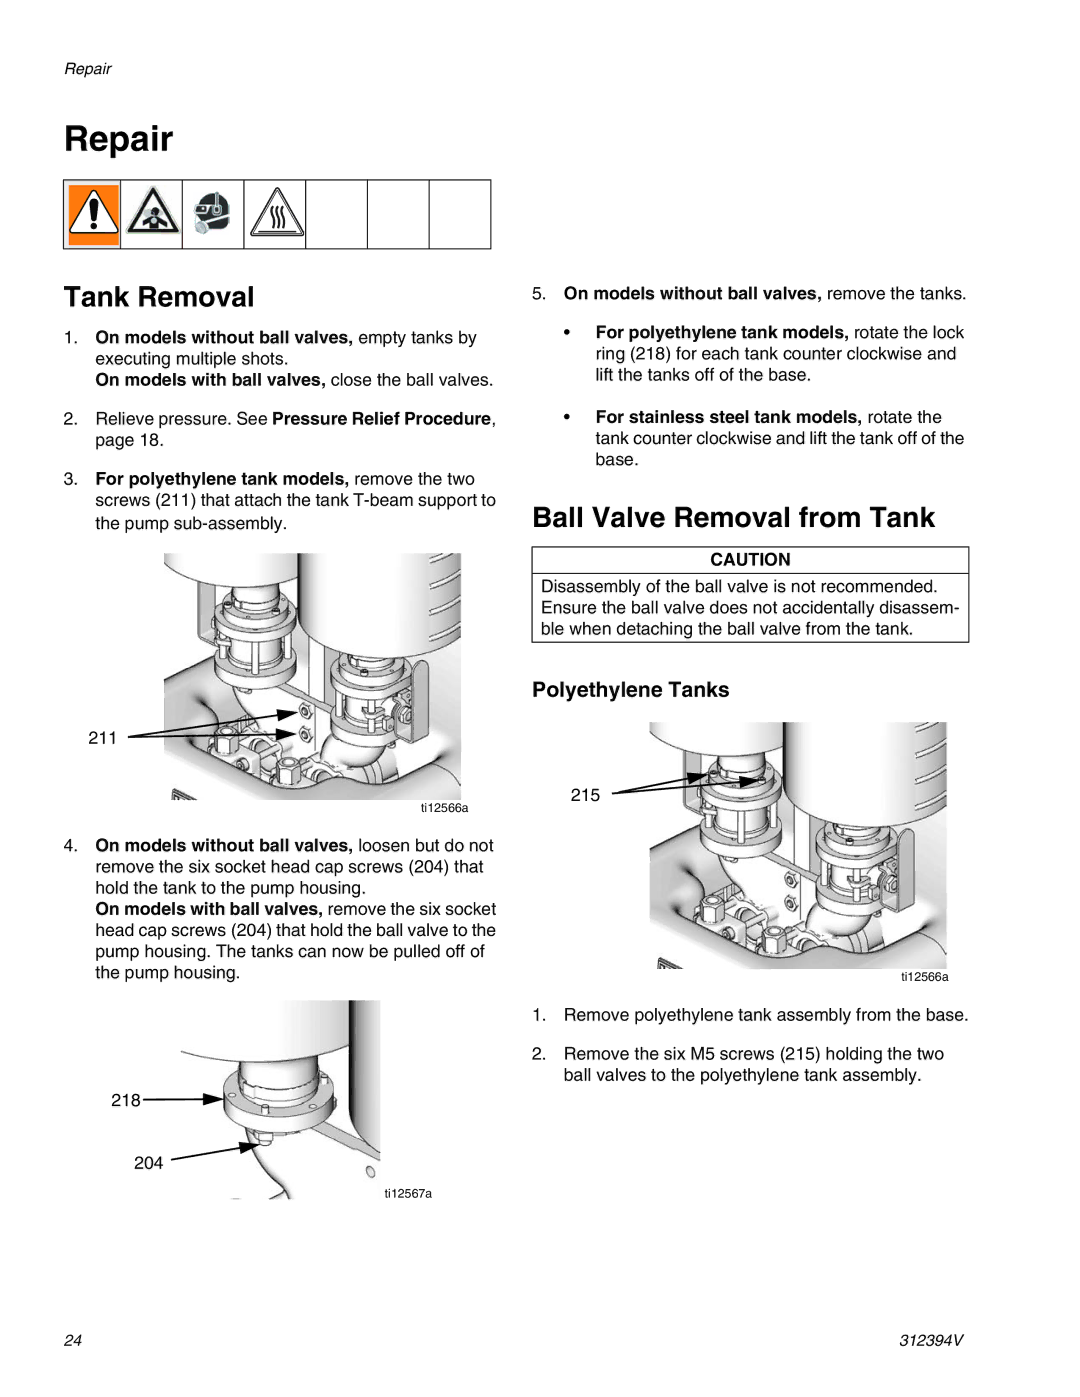
Polyethylene Tanks
Stainless Steel Tanks
Accumulators
Auto-Refill Installation
Pressure Transducer and Flow Meter Installation
Advanced Display Module Disabled Mode
Startup
Pressure Relief Procedure
Setup
Relieve pressure. See Pressure Relief Procedure,
Level Sensor Calibration
Stainless Steel Tanks Polyethylene Tanks
Vacuum De-gas
Vacuum De-gas and Vacuum Auto-Fill
Accumulator Filling
Relieve pressure. See Pressure Relief Procedure on
Shutdown
Repair
Tank Removal
Ball Valve Removal from Tank
Assembly 255284 Shown
Ball Valve Repair
Agitator Fuse Replacement
Parts
Accumulators, Assemblies LC0160 and LC0297
Accumulators
Part Description Qty
Ring
Assembly 255282 Shown 224 211
Liter Polyethylene Tanks
† ‹
Polyethylene Tank Agitators
Electric Agitator Assemblies 255246
† Part not shown
Pneumatic Agitator Assembly
801 802 808 813 823 805 824 804 807 806 814 822
Part Description
Agitator Shaft
On-Board Stainless Steel Tanks
Tank Assemblies LC0237, LC0238 LC0254, and LC0255
Part Description Qty
Part Description Qty
DescriptionQty
Ball Valve, Assembly
Flange Assembly
On-Board Stainless Steel Tank Lids
Lid Assemblies LC0019 to LC0026 and LC0130 to LC0132
LC0023, Lid assembly Agitator, De-gas
Tanks for Use with Dust Covers
Tanks for Use with Clampdown Covers
LC0012 LC0235 LC0013
24U714 24U713 24U715
Lid Assembly LC0018
Off-Board Stainless Steel Tanks
Tank Assemblies LC0054 and LC0055
Assembly LC0259 Shown
Tank Assemblies LC0259 and LC0260
Pipe and Tube System
Lid Assembly LC0101
Off-Board Stainless Steel Tank Lids
Lid Assembly LC0102
Parts 312394V
Assembly LC0147 Shown
Lid Assemblies LC0050, LC0144, LC0145, LC0146, LC0147
Quantity LC0050 LC0145 LC0146 LC0147 60 L LC0144 Pneumatic
Agitator
Agitator Vacuum De-gas
Part Description De-gas 60 L Port, 30 L Port, 60 L
Lid Assemblies LC0042, LC0043, LC0142, and LC0143
Quantity LC0142 LC0143 Lid LC0043 Assembly LC0042
With
Assembly LC0051 Shown
Lid Assemblies LC0047, LC0048, LC0051, LC0052
Fill
Vacuum Tree Manifold
NPT
Parts 312394V
Electric Agitator Motor Assembly
Stainless Steel Tank Agitators
Washer
Electric Agitator Motor, Assemblies 255337
Pneumatic Agitator Motor Assembly, 02/1116/50
Pneumatic Agitator Motor
Pneumatic Agitator Motor, 24J183
Agitator Blade Assemblies 257607
Polyethylene Tanks Level Sensors Assembly LC0278
Stainless Steel Tanks Level Sensors
2103 2102 2101 2104
Tank Accessories
Kits
Mixer and Shroud Options
MD2 Valve Kits
Vacuum Kits
Refill Kits
External Control Interface Connection Kit
Dimensions
Machine with On-Board Tanks
PR70
PR70v
† Assembly Dimensions, in. mm Tank
Machine with Off-Board Tanks
Page
Technical Data
Graco Standard Warranty
Graco Information